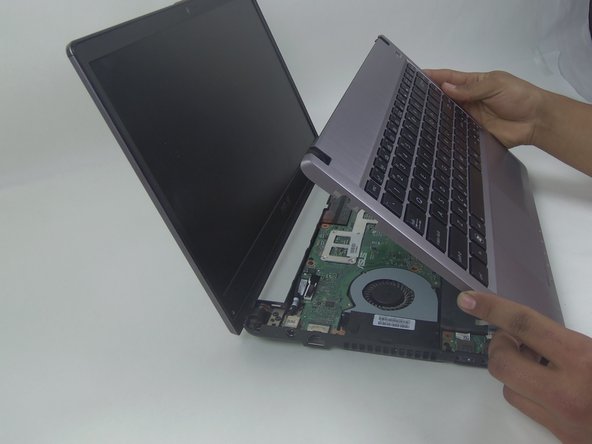
Aller au contenu principal

Asus U47VC-DS51 Cooling Fan Replacement

Ce dont vous avez besoin

  1. Asus U47VC-DS51 Cooling Fan Replacement, Hard Drive: étape 1, image 1 de 3 Asus U47VC-DS51 Cooling Fan Replacement, Hard Drive: étape 1, image 2 de 3 Asus U47VC-DS51 Cooling Fan Replacement, Hard Drive: étape 1, image 3 de 3
    • Remove the hard drive cover.

    • Unscrew one 8mm Phillips #00 screw.

    • Using the black spudger, insert its flat end under the hard drive's covering, working around to pry it off.

  2. Asus U47VC-DS51 Cooling Fan Replacement: étape 2, image 1 de 3 Asus U47VC-DS51 Cooling Fan Replacement: étape 2, image 2 de 3 Asus U47VC-DS51 Cooling Fan Replacement: étape 2, image 3 de 3
    • Remove the hard drive.

    • Unscrew the four 3mm Phillips #00 screws.

    • Pull the hard drive's black tab away from the laptop to free it.

  3. Asus U47VC-DS51 Cooling Fan Replacement, Keyboard: étape 3, image 1 de 2 Asus U47VC-DS51 Cooling Fan Replacement, Keyboard: étape 3, image 2 de 2
    • Remove 9 screws from bottom of notebook using PH00 bit + 1 under hard drive bay.

    • Remove 3 screws from bottom of notebook using PH00 bit. 1 is same screw spec as the other 9, and 2 are shorter.

  4. Asus U47VC-DS51 Cooling Fan Replacement: étape 4, image 1 de 2 Asus U47VC-DS51 Cooling Fan Replacement: étape 4, image 2 de 2
    • Using the black spudger, insert its flat end between the crevice where the color changes from grey to black.

    • The keyboard is very tightly secured.

    • Carefully ease the spudger's end along the crevice, going around the entire frame.

    • The back connectors are short, so be careful when lifting.

  5. Asus U47VC-DS51 Cooling Fan Replacement: étape 5, image 1 de 2 Asus U47VC-DS51 Cooling Fan Replacement: étape 5, image 2 de 2
    • Lift the keyboard from the front where it is closest to the screen.

    • Disconnect the large and small ZIF connectors attached to the motherboard by flipping the light-colored part of the switch.

  6. Asus U47VC-DS51 Cooling Fan Replacement: étape 6, image 1 de 2 Asus U47VC-DS51 Cooling Fan Replacement: étape 6, image 2 de 2
    • Remove the third and last ZIF connector on the motherboard by flipping up the dark-colored part of the switch.

    • Now, the component should come completely free.

  7. Asus U47VC-DS51 Cooling Fan Replacement, Motherboard: étape 7, image 1 de 3 Asus U47VC-DS51 Cooling Fan Replacement, Motherboard: étape 7, image 2 de 3 Asus U47VC-DS51 Cooling Fan Replacement, Motherboard: étape 7, image 3 de 3
    • Unscrew the one 8mm screw using a Phillips #00.

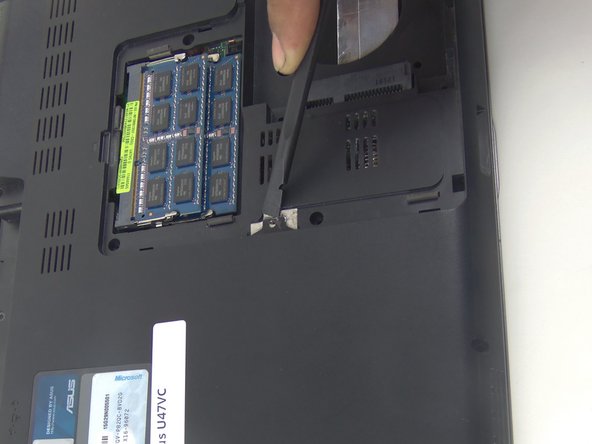
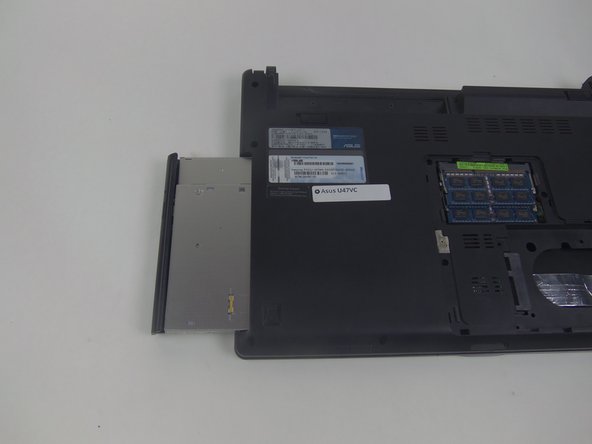
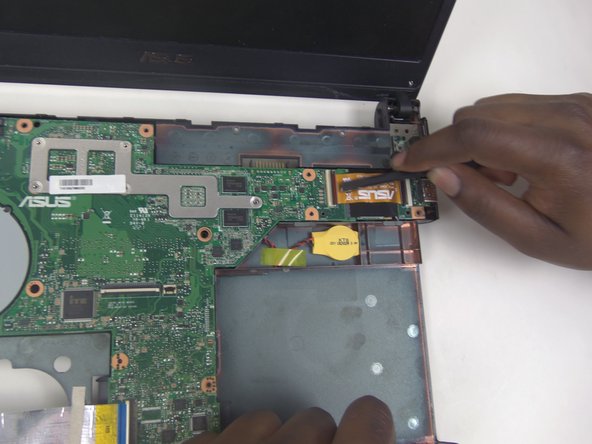
    • Using the black spudger, slightly pry up on the tab and gently pull the optical drive away from the laptop in order to remove it.

  8. Asus U47VC-DS51 Cooling Fan Replacement: étape 8, image 1 de 3 Asus U47VC-DS51 Cooling Fan Replacement: étape 8, image 2 de 3 Asus U47VC-DS51 Cooling Fan Replacement: étape 8, image 3 de 3
    • Using the black spudger, slowly lift up on the cable connectors and pull them away from the connectors.

    • Repeat steps on both cables.

    • Unscrew the 12 8mm screws using a Phillips #00 screwdriver.

  9. Asus U47VC-DS51 Cooling Fan Replacement: étape 9, image 1 de 3 Asus U47VC-DS51 Cooling Fan Replacement: étape 9, image 2 de 3 Asus U47VC-DS51 Cooling Fan Replacement: étape 9, image 3 de 3
    • Lift up on the motherboard and disengage the two connectors.

    • Disconnect the cooling fan connector.

    • Unscrew the 7 8mm screws holding in the cooling fan using a Phillips #00 screwdriver.

  10. Asus U47VC-DS51 Cooling Fan Replacement, Cooling fan: étape 10, image 1 de 3 Asus U47VC-DS51 Cooling Fan Replacement, Cooling fan: étape 10, image 2 de 3 Asus U47VC-DS51 Cooling Fan Replacement, Cooling fan: étape 10, image 3 de 3
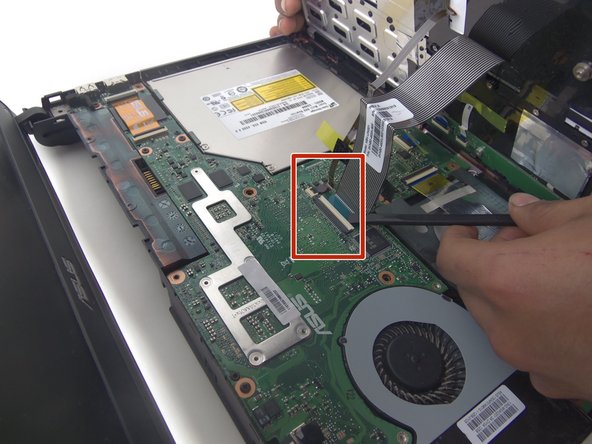
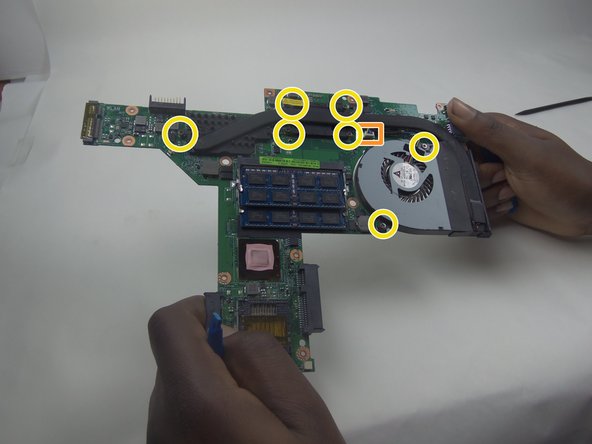
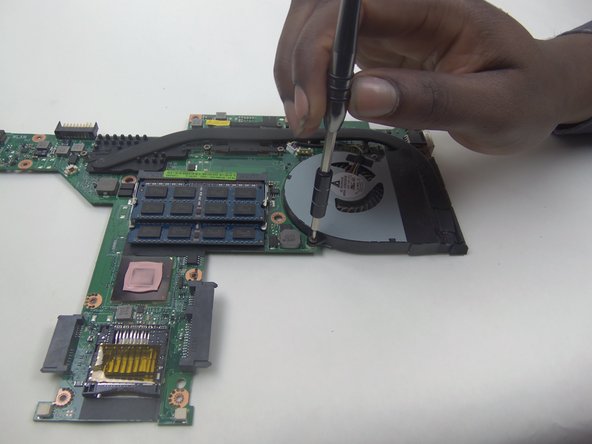
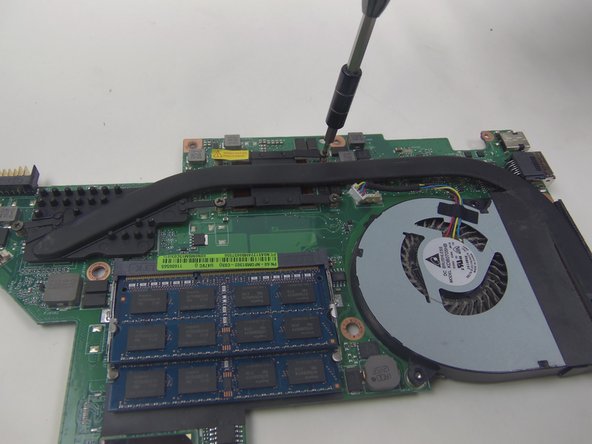
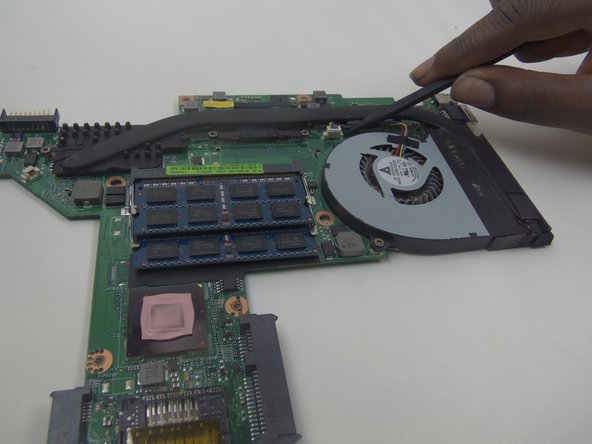
    • Use a Phillips screwdriver to loosen the four screws holding the component in place.

  11. Asus U47VC-DS51 Cooling Fan Replacement: étape 11, image 1 de 1
    • After loosening the screws, use the black spudger to help disconnect the fan wires from the connector.

  12. Asus U47VC-DS51 Cooling Fan Replacement: étape 12, image 1 de 1
    • The fan should then come free.

Conclusion

To reassemble your device, follow these instructions in reverse order.

Devontae Williams

Membre depuis le 01/22/17

101 Réputation

1 tutoriel rédigé

0 commentaires

Ajouter un commentaire

Nombre de vues :

Dernières 24 heures : 0

7 derniers jours : 0

30 derniers jours : 1

Total : 549