Introduction
The fan in your Asus laptop plays a critical role in maintaining optimal performance by preventing overheating. Over time, dust can accumulate within the fan and heat sink, reducing their efficiency and leading to excessive heat buildup. If left unchecked, this can cause your laptop to overheat, resulting in unexpected shutdowns or even permanent damage. Thankfully, you don't have to replace the entire fan; instead, you can simply clean the fan and heat sink to restore their performance. This guide will walk you through 8 simple steps to safely remove and clean the fan and heat sink of your Asus laptop, allowing you to get your device running at peak performance once again.
- Full Device Name: Asus Laptop (Model Specific)
- Parts Being Addressed: Fan and Heat Sink
- The fan and heat sink are responsible for cooling the internal components of your laptop, particularly the processor and graphics card. If these parts become clogged with dust or debris, it can lead to overheating, reduced performance, and even hardware damage.
- Overheating: Your laptop may become excessively hot during use.
- Frequent Shutdowns: The laptop may automatically shut down to prevent overheating.
- Loud Fan Noise: The fan may spin faster or make more noise than usual, signaling that it is struggling to cool the device.
- Performance Throttling: When the laptop gets too hot, the processor may slow down to prevent damage.
If you’re experiencing any of these issues, cleaning the fan and heat sink is a great first step toward solving them. This guide will ensure you safely clean your laptop's cooling system and restore its optimal performance.
- Power Off: Always power off your laptop and disconnect it from any power sources before performing any hardware maintenance.
- Static Electricity (ESD): Use an anti-static wrist strap or take other precautions to protect your device from static discharge, which can damage sensitive internal components.
- Proper Disposal: If you need to dispose of any old parts, such as a malfunctioning fan, make sure to recycle them responsibly as they contain materials that can harm the environment.
- Backup Your Data: While cleaning the fan is a relatively simple process, always back up your important files before making any changes to your device.
By following this guide, you’ll be able to safely clean the fan and heat sink in your Asus laptop and ensure that it continues to run smoothly and efficiently.
Ce dont vous avez besoin
-
-
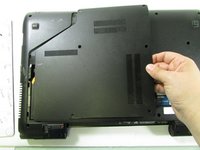
Turn the laptop over so the bottom is facing up.
-
Slide the two tabs on the bottom of the laptop toward the edges of laptop.
-
Slide the left tab to the left to lock it into the unlocked position. The red showing next to the tab signifies that it's unlocked.
-
-
-
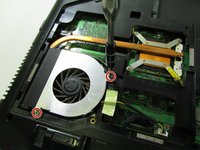
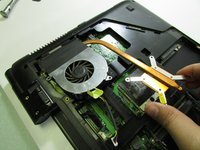
Use the Phillips #1 to remove two screws from the fan that attach it to the motherboard.
-
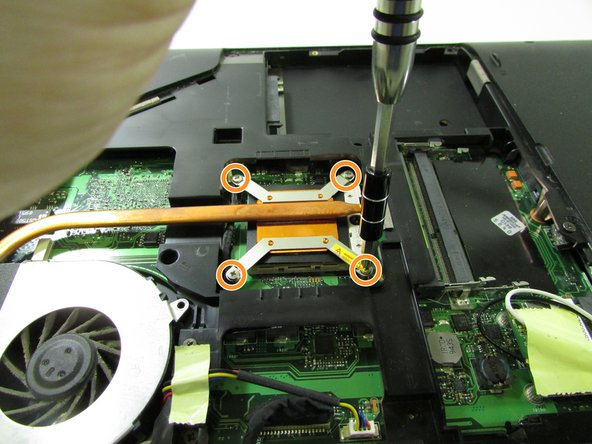
Remove the four screws on the heat sink.
-


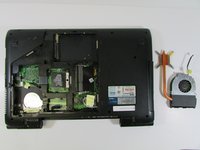
To reassemble your device, follow these instructions in reverse order.
To reassemble your device, follow these instructions in reverse order.
Équipe

University of Illinois Urbana-Champaign, Team 1-1, Scrogum Spring 2017 Membre de l'équipe University of Illinois Urbana-Champaign, Team 1-1, Scrogum Spring 2017
UICU-SCROGUM-S17S1G1
3 membres
19 tutoriels rédigés