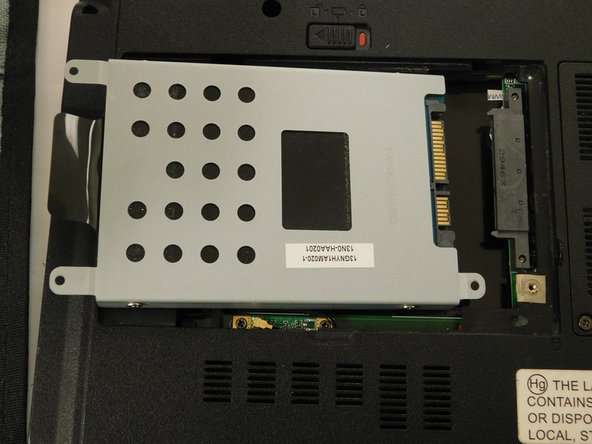
Aller au contenu principal

Asus UL30VT-A1 Hard Drive Replacement

Ce dont vous avez besoin

  1. Asus UL30VT-A1 Hard Drive Replacement, Hard Drive: étape 1, image 1 de 1
    • Flip your device so that the back of the device is facing you.

  2. Asus UL30VT-A1 Hard Drive Replacement: étape 2, image 1 de 2 Asus UL30VT-A1 Hard Drive Replacement: étape 2, image 2 de 2
    • Remove the four screws using your Phillips #0 screwdriver to attain access to your Hard Drive.

    • Remove the panel using a plastic opening tool.

  3. Asus UL30VT-A1 Hard Drive Replacement: étape 3, image 1 de 2 Asus UL30VT-A1 Hard Drive Replacement: étape 3, image 2 de 2
    • Gently pull the black strip and the Hard Drive should slide right off. Pull your hard drive to the side not up to avoid damage to the slot.

Conclusion

To reassemble your device, follow these instructions in reverse order.

Une autre personne a terminé cette réparation.

Miguel Gonzalez

Membre depuis le 02/04/19

97 Réputation

1 tutoriel rédigé

Équipe

Gateway, Team S1-G2, Saknee Spring 2019 Membre de l'équipe Gateway, Team S1-G2, Saknee Spring 2019

GCC-SAKNEE-S19S1G2

5 membres

3 tutoriels rédigés

0 commentaires

Ajouter un commentaire

Nombre de vues :

Dernières 24 heures : 0

7 derniers jours : 3

30 derniers jours : 9

Total : 216