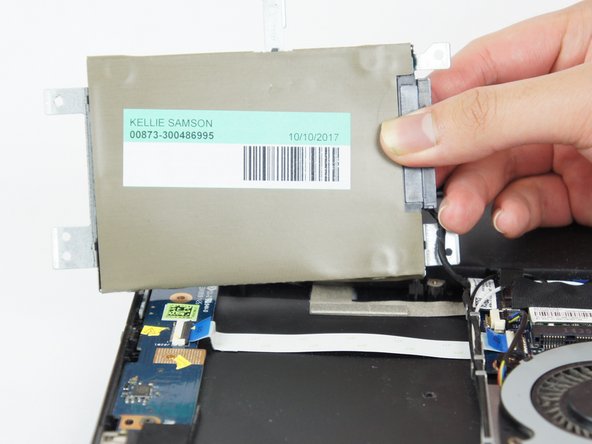
Aller au contenu principal

Asus VivoBook Q302LA-BHI3T09 Hard Drive Replacement

Ce dont vous avez besoin

  1. Asus VivoBook Q302LA-BHI3T09 Hard Drive Replacement, Hard Drive: étape 1, image 1 de 2 Asus VivoBook Q302LA-BHI3T09 Hard Drive Replacement, Hard Drive: étape 1, image 2 de 2
    • Before doing a repair or replacement make sure the laptop is fully shut off.

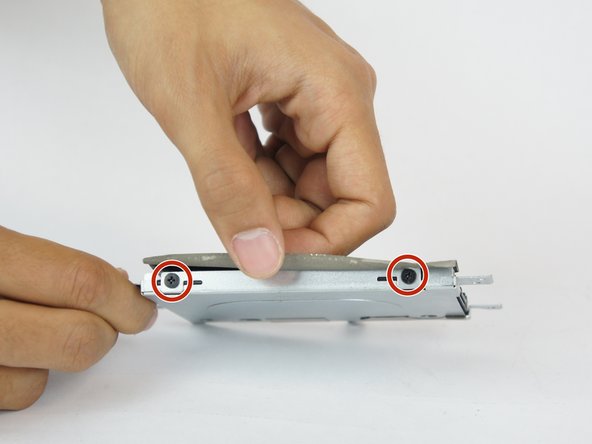
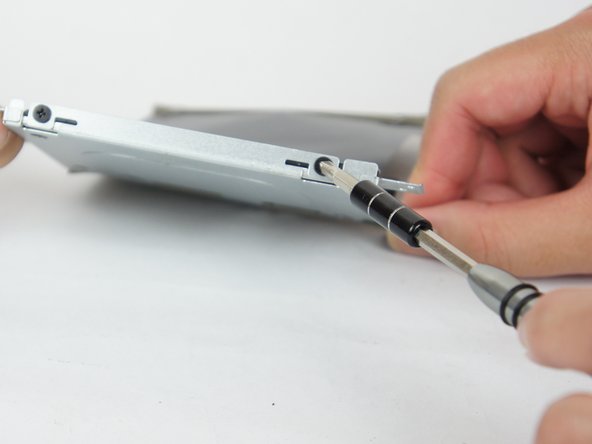
    • Using the JIS #0 Screwdriver, unscrew the ten 10 mm screws that hold the back casing in place

  2. Asus VivoBook Q302LA-BHI3T09 Hard Drive Replacement: étape 2, image 1 de 2 Asus VivoBook Q302LA-BHI3T09 Hard Drive Replacement: étape 2, image 2 de 2
    • Insert the flat edge of the opening tool in between the back casing to remove the back casing.

    • Try to use the opening tool at multiple points. Lifting the back casing abruptly could damage the laptop.

  3. Asus VivoBook Q302LA-BHI3T09 Hard Drive Replacement: étape 3, image 1 de 2 Asus VivoBook Q302LA-BHI3T09 Hard Drive Replacement: étape 3, image 2 de 2
    • Using the JIS #0 Screwdriver, remove the five 3.0 mm screws that hold down the hard drive casing.

  4. Asus VivoBook Q302LA-BHI3T09 Hard Drive Replacement: étape 4, image 1 de 3 Asus VivoBook Q302LA-BHI3T09 Hard Drive Replacement: étape 4, image 2 de 3 Asus VivoBook Q302LA-BHI3T09 Hard Drive Replacement: étape 4, image 3 de 3
    • Lift the hard drive up and remove the power supply cable connected to it.

    • Make sure to pull on the plastic head and not the actual wires to prevent tearing them.

  5. Asus VivoBook Q302LA-BHI3T09 Hard Drive Replacement: étape 5, image 1 de 3 Asus VivoBook Q302LA-BHI3T09 Hard Drive Replacement: étape 5, image 2 de 3 Asus VivoBook Q302LA-BHI3T09 Hard Drive Replacement: étape 5, image 3 de 3
    • Carefully peel back and remove the plastic hard drive cover to reveal the two 3.0 mm screws on the hard drive casing.

    • Using a JIS #0 screwdriver, unscrew the two 3.0 mm screws on the side of the metal casing to remove the hard drive itself.

Conclusion

To reassemble your device, follow these instructions in reverse order.

2 autres ont terminé cette réparation.

Deric Wright

Membre depuis le 02/14/18

636 Réputation

3 tutoriels rédigés

Équipe

USF Tampa, Team S5-G5, Eyestone Spring 2018 Membre de l'équipe USF Tampa, Team S5-G5, Eyestone Spring 2018

USFT-EYESTONE-S18S5G5

4 membres

5 tutoriels rédigés

0 commentaires

Ajouter un commentaire

Nombre de vues :

Dernières 24 heures : 0

7 derniers jours : 1

30 derniers jours : 8

Total : 843