Aller au contenu principal
Pour réparer ensemble - Je crée un compte

Asus VivoTab Smart Battery Replacement

Ce dont vous avez besoin

    1. Asus VivoTab Smart Battery Replacement, Battery: étape 1, image 1 de 3 Asus VivoTab Smart Battery Replacement, Battery: étape 1, image 2 de 3 Asus VivoTab Smart Battery Replacement, Battery: étape 1, image 3 de 3
      • Power off the device before you begin disassembly.

      • Place the device face down on a flat surface.

      • Remove the back panel with the plastic opening tool by sliding the tool around the edge of the panel.

      Demander à FixBot

      Ajouter un commentaire

    2. Asus VivoTab Smart Battery Replacement: étape 2, image 1 de 3 Asus VivoTab Smart Battery Replacement: étape 2, image 2 de 3 Asus VivoTab Smart Battery Replacement: étape 2, image 3 de 3
      Outil utilisé dans cette étape :
      Tweezers
      $4.99
      • Remove the tape covering the 3 ribbons by peeling it off with your hands or with the tweezers.

      • Carefully detach the ribbons from the device's motherboard by pulling outward using tweezers.

      Demander à FixBot

      Ajouter un commentaire

    3. Asus VivoTab Smart Battery Replacement: étape 3, image 1 de 3 Asus VivoTab Smart Battery Replacement: étape 3, image 2 de 3 Asus VivoTab Smart Battery Replacement: étape 3, image 3 de 3
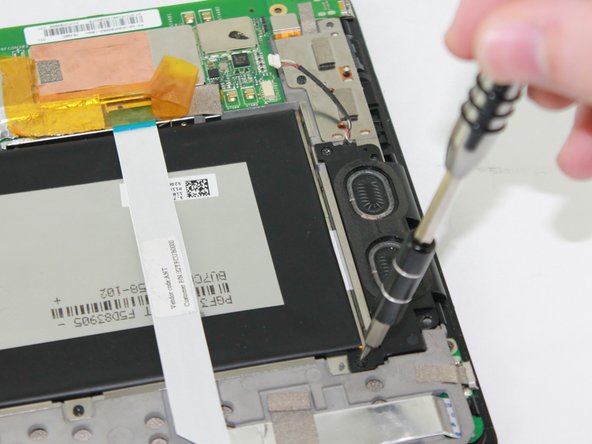
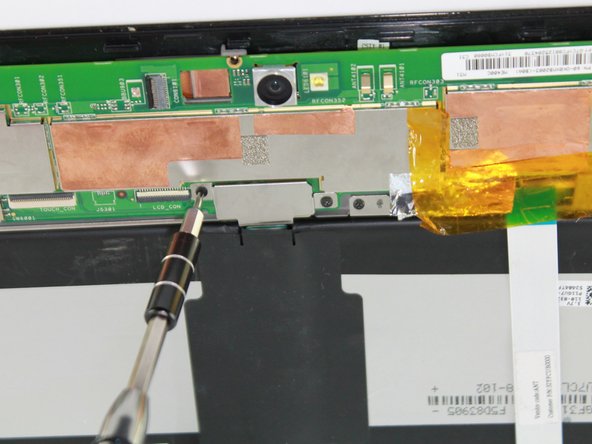
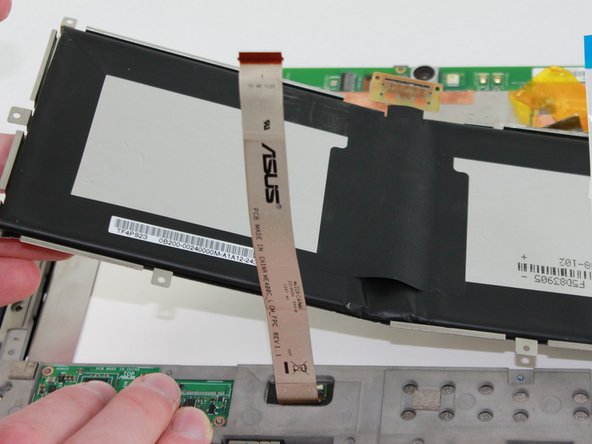
      • The Philips #00 Screwdriver listed in the recommended tools will fit all the screws.

      • Remove the tape covering the areas marked by the black arrows

      • Remove two 3.7 mm Phillips #00 screws

      • Remove eleven 2.7 mm Phillips #00 screws

      Demander à FixBot

      Ajouter un commentaire

    4. Asus VivoTab Smart Battery Replacement: étape 4, image 1 de 2 Asus VivoTab Smart Battery Replacement: étape 4, image 2 de 2
      • Be careful not to damage the speaker wire.

      • Gently unplug the speaker from the motherboard by grabbing the wire near the plastic white plug with tweezers and gently pulling.

      • Lift up on the speaker with your fingers to remove it.

      Demander à FixBot

      Ajouter un commentaire

    5. Asus VivoTab Smart Battery Replacement: étape 5, image 1 de 1
      • Gently lift the battery pressure plate off of the motherboard.

      Demander à FixBot

      Ajouter un commentaire

    6. Asus VivoTab Smart Battery Replacement: étape 6, image 1 de 2 Asus VivoTab Smart Battery Replacement: étape 6, image 2 de 2
      • Use tweezers to separate the battery tray from the device

      • Lift the battery tray from the device using your hands.

      Demander à FixBot

      Ajouter un commentaire

    7. Asus VivoTab Smart Battery Replacement: étape 7, image 1 de 1
      • The battery is secured to the tray by a strong adhesive. Take care not to bend the tray when removing the battery.

      • Detach the battery from the tray by pulling the battery up from the tray with your hands.

      • If it is very difficult to lift the battery from the tray, you can use a blow dryer to heat the back side of the tray. This will weaken the adhesive and make it easier to remove.

      Demander à FixBot

      Ajouter un commentaire

Conclusion

To reassemble your device, follow these instructions in reverse order.

Annulation : je n'ai pas terminé ce tutoriel.

4 autres ont terminé cette réparation.

Zach Hatten

Membre depuis le 10/06/16

563 Réputation

4 tutoriels rédigés

Équipe

USF Tampa, Team 2-4, Sullivan Fall 2016 Membre de l'équipe USF Tampa, Team 2-4, Sullivan Fall 2016

USFT-SULLIVAN-F16S2G4

4 membres

60 tutoriels rédigés

2 commentaires de tutoriel

Hi

So where is the next step ?!

Albert einstein - Réponse Partager

Hi

So where is the next step ?!

Please answer to me. This is so

Albert einstein - Réponse Partager

Ajouter un commentaire

Nombre de vues :

Dernières 24 heures : 3

7 derniers jours : 33

30 derniers jours : 71

Total : 4,084