Aller au contenu principal

Asus Vivobook Q301LA-BHI5T02 Track Pad Replacement

Ce dont vous avez besoin

  1. Asus Vivobook Q301LA-BHI5T02 Track Pad Replacement, Back Cover: étape 1, image 1 de 1
    • Make sure the computer is turned off.

    • Flip the device over so that the back cover is facing you.

  2. Asus Vivobook Q301LA-BHI5T02 Track Pad Replacement: étape 2, image 1 de 2 Asus Vivobook Q301LA-BHI5T02 Track Pad Replacement: étape 2, image 2 de 2
    • Remove the four 5mm Phillips #1 screws from the top of the laptop.

    • Remove the two 6mm Phillips #1 screws from the sides of the laptop.

    • Remove the four 2mm Phillips #1 screws from the bottom of the laptop.

  3. Asus Vivobook Q301LA-BHI5T02 Track Pad Replacement: étape 3, image 1 de 3 Asus Vivobook Q301LA-BHI5T02 Track Pad Replacement: étape 3, image 2 de 3 Asus Vivobook Q301LA-BHI5T02 Track Pad Replacement: étape 3, image 3 de 3
    • Use a plastic opening tool to gently pry the bottom of the laptop up. Slowly slide it along the edges, twisting it every so often to pop the bottom of the laptop out of the clips holding it in place.

  4. Asus Vivobook Q301LA-BHI5T02 Track Pad Replacement: étape 4, image 1 de 1
    • Lift off the cover and remove the back cover from the device.

  5. Asus Vivobook Q301LA-BHI5T02 Track Pad Replacement, Battery: étape 5, image 1 de 2 Asus Vivobook Q301LA-BHI5T02 Track Pad Replacement, Battery: étape 5, image 2 de 2
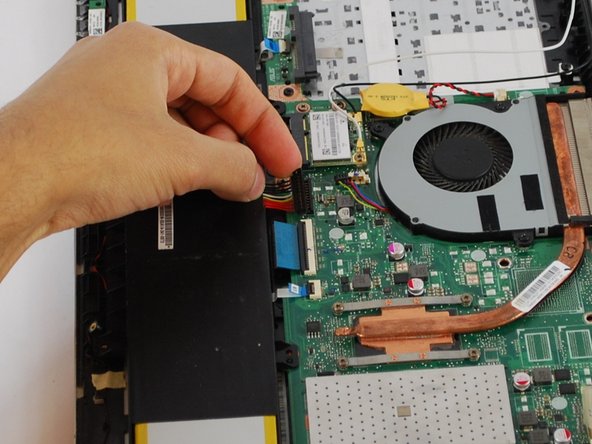
    • Using a Phillips #1 Screwdriver remove the six 3 mm screws keeping the battery in place.

  6. Asus Vivobook Q301LA-BHI5T02 Track Pad Replacement: étape 6, image 1 de 2 Asus Vivobook Q301LA-BHI5T02 Track Pad Replacement: étape 6, image 2 de 2
    • Unplug the battery connector from the mother board.

  7. Asus Vivobook Q301LA-BHI5T02 Track Pad Replacement: étape 7, image 1 de 2 Asus Vivobook Q301LA-BHI5T02 Track Pad Replacement: étape 7, image 2 de 2
    • Gently remove the battery from the slot.

  8. Asus Vivobook Q301LA-BHI5T02 Track Pad Replacement, Fan and Heatsink: étape 8, image 1 de 3 Asus Vivobook Q301LA-BHI5T02 Track Pad Replacement, Fan and Heatsink: étape 8, image 2 de 3 Asus Vivobook Q301LA-BHI5T02 Track Pad Replacement, Fan and Heatsink: étape 8, image 3 de 3
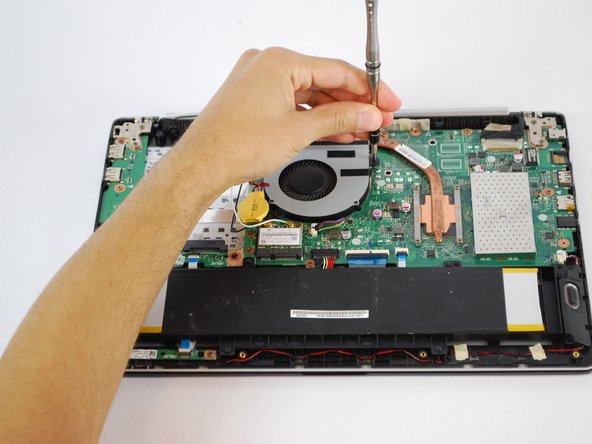
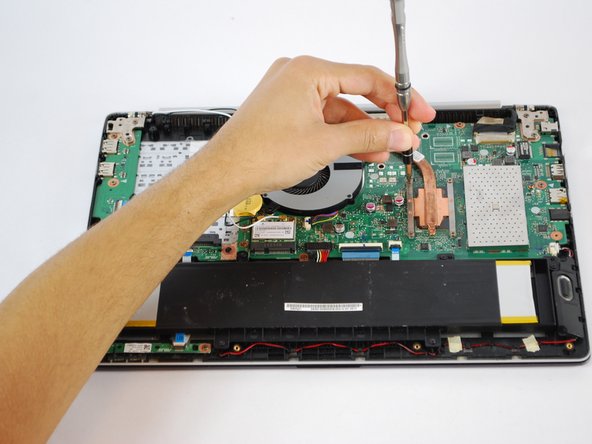
    • Using a Phillips #1 Screwdriver remove the three 3 mm black screws and four 2 mm copper screws holding the fan and heat sink in place.

  9. Asus Vivobook Q301LA-BHI5T02 Track Pad Replacement: étape 9, image 1 de 2 Asus Vivobook Q301LA-BHI5T02 Track Pad Replacement: étape 9, image 2 de 2
    • Remove the wire connecting the fan to the motherboard.

  10. Asus Vivobook Q301LA-BHI5T02 Track Pad Replacement: étape 10, image 1 de 2 Asus Vivobook Q301LA-BHI5T02 Track Pad Replacement: étape 10, image 2 de 2
    • Gently remove the fan and heat sink from the motherboard.

    • On reassembly, be sure to clean the CPU and heat sink and reapply thermal compound to the CPU. Follow this guide to learn how.

  11. Asus Vivobook Q301LA-BHI5T02 Track Pad Replacement, Motherboard: étape 11, image 1 de 1
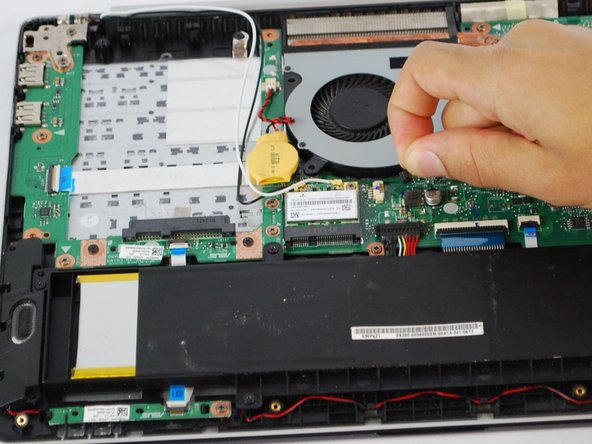
    • Remove the four 4.0 mm Phillips #1 screws shown.

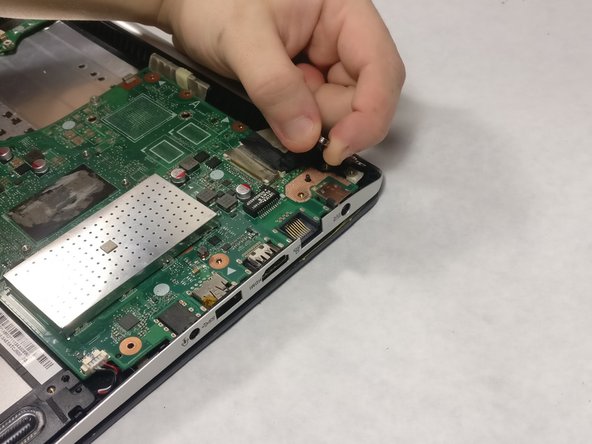
    • Remove the two 5.0 mm Phillips #1 screws shown.

    • Remove the three 3.0 mm Phillips #1 screws shown.

  12. Asus Vivobook Q301LA-BHI5T02 Track Pad Replacement: étape 12, image 1 de 2 Asus Vivobook Q301LA-BHI5T02 Track Pad Replacement: étape 12, image 2 de 2
    • Using a plastic opening tool, pry open the hinge shown until your fingers can fit under it.

    • Pull the hinge the rest of the way up.

  13. Asus Vivobook Q301LA-BHI5T02 Track Pad Replacement: étape 13, image 1 de 1
    • Disconnect the motherboard from the two connectors shown.

  14. Asus Vivobook Q301LA-BHI5T02 Track Pad Replacement: étape 14, image 1 de 1
    • Disconnect the motherboard from the connector shown.

  15. Asus Vivobook Q301LA-BHI5T02 Track Pad Replacement: étape 15, image 1 de 1
    • Pull the motherboard loose.

  16. Asus Vivobook Q301LA-BHI5T02 Track Pad Replacement: étape 16, image 1 de 1
    • Disconnect the motherboard from the connector shown and it is now removed from your device.

  17. Asus Vivobook Q301LA-BHI5T02 Track Pad Replacement, Track Pad: étape 17, image 1 de 1
    • Remove the four 2.0 mm Phillips #1 screws holding the track pad in place.

  18. Asus Vivobook Q301LA-BHI5T02 Track Pad Replacement: étape 18, image 1 de 1
    • Remove the tape connecting the track pad to the frame of the device. The track pad is now completely disconnected from the device.

Conclusion

To reassemble your device, follow these instructions in reverse order.

Samuel Foster

Membre depuis le 11/06/18

157 Réputation

2 tutoriels rédigés

Équipe

UMass Dartmouth, Team S5-G3, Gulbrandsen Fall 2018 Membre de l'équipe UMass Dartmouth, Team S5-G3, Gulbrandsen Fall 2018

UMASSD-GULBRANDSEN-F18S5G3

3 membres

5 tutoriels rédigés

0 commentaires

Ajouter un commentaire

Nombre de vues :

Dernières 24 heures : 0

7 derniers jours : 1

30 derniers jours : 2

Total : 232