Aller au contenu principal

Asus X401A RAM Replacement

Ce dont vous avez besoin

  1. Asus X401A RAM Replacement, RAM: étape 1, image 1 de 2 Asus X401A RAM Replacement, RAM: étape 1, image 2 de 2
    • Before beginning your repair, unplug and turn off laptop to avoid risk of electric shock.

    • Turn laptop over and remove battery by sliding latches, and pulling up and out.

  2. Asus X401A RAM Replacement: étape 2, image 1 de 2 Asus X401A RAM Replacement: étape 2, image 2 de 2
    Outil utilisé dans cette étape :
    Magnetic Project Mat
    $19.95
    J'achète
    • Using a Phillips Head #1 screwdriver, unscrew ten screws from the back of the laptop.

    • Eight screws are 3mm.

    • Two screws are 4mm. Place screws on magnetic mat.

  3. Asus X401A RAM Replacement: étape 3, image 1 de 2 Asus X401A RAM Replacement: étape 3, image 2 de 2
    • Pry open computer using plastic opening tool. You will be separating the keyboard from the back of the computer.

    • Do not completely separate the keyboard and back of the laptop. There are ribbon cables that need to be disconnected first.

    • When reassembling, you will hear snapping noise as you press the keyboard and back of the computer together.

  4. Asus X401A RAM Replacement: étape 4, image 1 de 2 Asus X401A RAM Replacement: étape 4, image 2 de 2
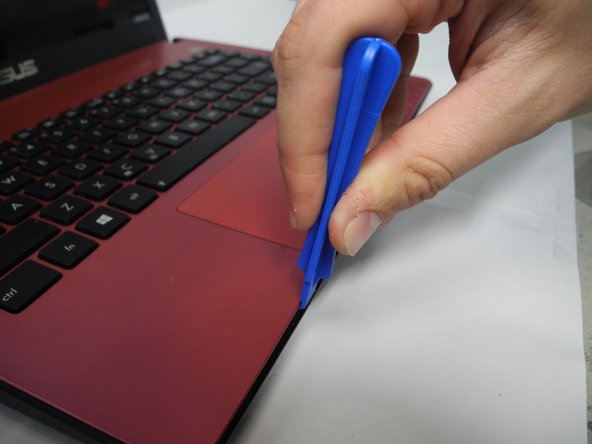
    • There are two ribbon cables connecting the keyboard to the motherboard.

    • The larger cable is a ZIF (Zero Insertion Force) cable. As the name implies, you do not need to use force to insert or disconnect this cable. Disconnect this ribbon cable by unlocking the holding latch and pulling out gently.

    • The smaller ribbon cable requires nothing more than pulling it out gently.

  5. Asus X401A RAM Replacement: étape 5, image 1 de 1
    • Disconnect the red, black, and white wires connecting the speakers by pulling gently.

  6. Asus X401A RAM Replacement: étape 6, image 1 de 1
    • Using a Phillips Head #1 screwdriver, unscrew the seven 3 mm screws holding the motherboard in place. These are marked with white arrows on the motherboard (not shown in image).

    • Remove the two 3 mm screws holding the fan in place

  7. Asus X401A RAM Replacement: étape 7, image 1 de 3 Asus X401A RAM Replacement: étape 7, image 2 de 3 Asus X401A RAM Replacement: étape 7, image 3 de 3
    • Remove the two 3mm screws holding the USB and charging port on the frame.

    • Disconnect the USB and charging port from the motherboard. There will be a ribbon cable as well as some wires to disconnect. Use a spudger if necessary.

  8. Asus X401A RAM Replacement: étape 8, image 1 de 3 Asus X401A RAM Replacement: étape 8, image 2 de 3 Asus X401A RAM Replacement: étape 8, image 3 de 3
    • Use the spudger to lift the connection between the screen and motherboard.

    • You may be able to lift this connector without removing the yellow tape, but if it is in the way, removing it will not harm the laptop.

  9. Asus X401A RAM Replacement: étape 9, image 1 de 3 Asus X401A RAM Replacement: étape 9, image 2 de 3 Asus X401A RAM Replacement: étape 9, image 3 de 3
    • Use spudger to lift motherboard, frame, and fan.

    • Once lifted gently pull the motherboard to the left to remove the ports on the right side from the frame.

    • Set the frame aside and turn over the motherboard.

  10. Asus X401A RAM Replacement: étape 10, image 1 de 3 Asus X401A RAM Replacement: étape 10, image 2 de 3 Asus X401A RAM Replacement: étape 10, image 3 de 3
    • Release tension brackets on both sides of RAM and slide it up and out at a 45 degree angle.

    • When reassembling, slide RAM in as far you can at a 45 degree angle and snap it down into place.

Conclusion

To reassemble your device, follow these instructions in reverse order.

4 autres ont terminé cette réparation.

Lesley Pfening

Membre depuis le 02/07/17

360 Réputation

2 tutoriels rédigés

Équipe

Ohio State, Team 1-4, Wilder Spring 2017 Membre de l'équipe Ohio State, Team 1-4, Wilder Spring 2017

OSU-WILDER-S17S1G4

4 membres

5 tutoriels rédigés

0 commentaires

Ajouter un commentaire

Nombre de vues :

Dernières 24 heures : 0

7 derniers jours : 7

30 derniers jours : 18

Total : 1,837