Aller au contenu principal

Asus ZenBook Flip UX360C Motherboard Replacement

Ce dont vous avez besoin

  1. Asus ZenBook Flip UX360C Motherboard Replacement, Motherboard: étape 1, image 1 de 1
    • Remove all ten T5 screws on the back cover near the edges.

    • Remove two Phillips #1 screws located under the rubber feet near the screen.

  2. Asus ZenBook Flip UX360C Motherboard Replacement: étape 2, image 1 de 3 Asus ZenBook Flip UX360C Motherboard Replacement: étape 2, image 2 de 3 Asus ZenBook Flip UX360C Motherboard Replacement: étape 2, image 3 de 3
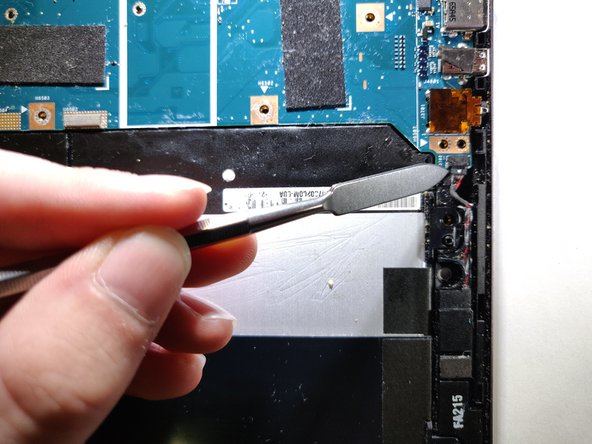
    • Use a metal spudger to gently separate the keyboard from the computer case.

    • Do not completely remove the keyboard as there are two ribbon cables that connect the keyboard to the motherboard.

    • Lift the keyboard slightly, and use a plastic spudger to release the two ZIF connections to free each ribbon cable.

    • Remove the keyboard.

  3. Asus ZenBook Flip UX360C Motherboard Replacement: étape 3, image 1 de 1
    • Use the Phillips #1 screwdriver to remove all 5 mm screws.

  4. Asus ZenBook Flip UX360C Motherboard Replacement: étape 4, image 1 de 1
    • Use a plastic opening tool or nylon spudger to lift the monitor connections off of the main board.

  5. Asus ZenBook Flip UX360C Motherboard Replacement: étape 5, image 1 de 2 Asus ZenBook Flip UX360C Motherboard Replacement: étape 5, image 2 de 2
    • Clip off the battery from the main board.

    • Use of a metal spudger can cause damage to the device or harm to the user, especially near the battery! Use an ESD safe tool for this step instead.

  6. Asus ZenBook Flip UX360C Motherboard Replacement: étape 6, image 1 de 2 Asus ZenBook Flip UX360C Motherboard Replacement: étape 6, image 2 de 2
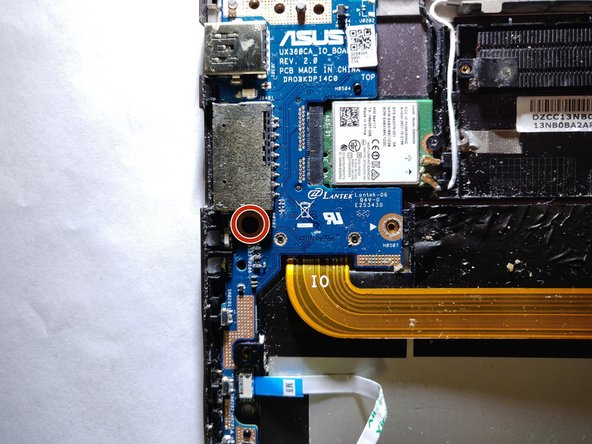
    • Remove the black foam above the screw on the I/O board.

    • Remove the 5 mm #1 Phillips head screw.

    • Use of a metal spudger can cause damage to the device or harm to the user, especially near the battery! Use an ESD safe tool for this step instead.

  7. Asus ZenBook Flip UX360C Motherboard Replacement: étape 7, image 1 de 2 Asus ZenBook Flip UX360C Motherboard Replacement: étape 7, image 2 de 2
    • Pull the I/O board away from the chip to detach it.

    • Remove the I/O board and main board.

Conclusion

To reassemble your device, follow these instructions in reverse order.

Jonathan Heintz

Membre depuis le 02/27/19

145 Réputation

1 tutoriel rédigé

Un commentaire

where can i buy the motherboard?

Thevan - Réponse

Ajouter un commentaire

Nombre de vues :

Dernières 24 heures : 0

7 derniers jours : 4

30 derniers jours : 19

Total : 2,979