Introduction
This guide will be helpful for repairing the speaker if the troubleshooting page recommends that you replace it. This is a necessary step when you have determined no other way to repair your current speaker. Be wary of accidentally damaging other parts of the device when replacing the speaker.
Ce dont vous avez besoin
-
-
Look at the side of the speaker that has the red interface plate. Using a Phillips head PH1 screwdriver head, remove screws on the top and bottom of the black face plate. There will be one screw on top and one on the bottom.
-
Both screws are 0.55 cm in depth
-
-
-
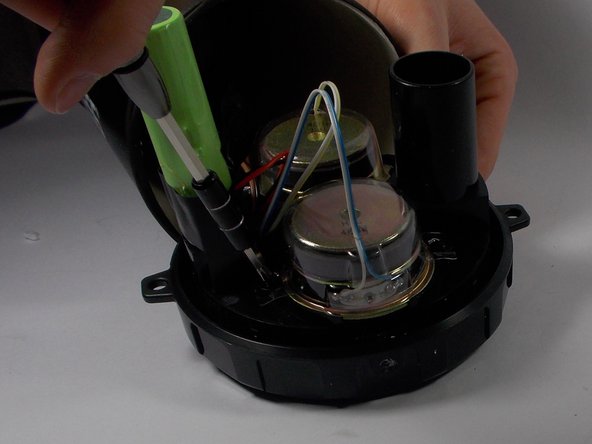
For the top horn replacement, you will be working with the blue and white wire pair.
-
For the bottom horn replacement you with the yellow and white wire pair.
-
-
-
-
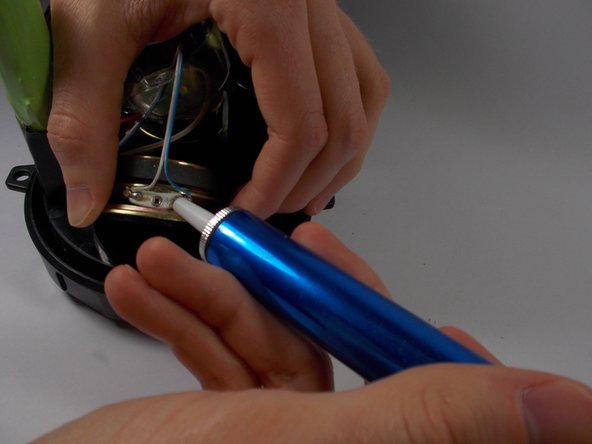
Use a soldering iron to heat the two contact points.
-
Then use a desoldering pump to remove the liquid solder.
-


To reassemble your device, follow these instructions in reverse order.
To reassemble your device, follow these instructions in reverse order.
Annulation : je n'ai pas terminé ce tutoriel.
3 autres ont terminé cette réparation.
Équipe

UMass Dartmouth, Team 8-6, Botvin Spring 2016 Membre de l'équipe UMass Dartmouth, Team 8-6, Botvin Spring 2016
UMASSD-BOTVIN-S16S8G6
3 membres
8 tutoriels rédigés