Aller au contenu principal

Azpen A740 Battery Replacement

Ce dont vous avez besoin

  1. Azpen A740 Battery Replacement, Back Panel: étape 1, image 1 de 1
    • Use the plastic opening tool or black spudger tool to lift the back panel off the tablet.

  2. Azpen A740 Battery Replacement, Battery: étape 2, image 1 de 2 Azpen A740 Battery Replacement, Battery: étape 2, image 2 de 2
    • Use the set of plastic opening tools to separate the inner backing from the electronics.

    • Use the Phillips screwdriver to remove the 3.8 mm screws, holding the inner backing of Azpen A740 Tablet.

  3. Azpen A740 Battery Replacement: étape 3, image 1 de 1
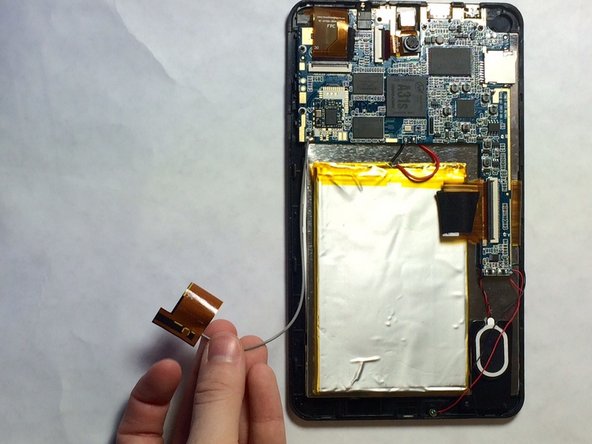
    • Disconnect the black, red, and grey wires leading to the battery from the motherboard using a soldering iron.

    • In order to desolder these connections follow the instructions on IFixit's How to Solder and Desolder Connections

  4. Azpen A740 Battery Replacement: étape 4, image 1 de 2 Azpen A740 Battery Replacement: étape 4, image 2 de 2
    • Remove the black tape that is holding the battery in place.

  5. Azpen A740 Battery Replacement: étape 5, image 1 de 1
    • Remove the battery from the case using the blue prying or black spudger.

    • As you remove the battery it may be difficult to remove. Take your time to remove it carefully and try to avoid bending it.

Conclusion

To reassemble your device, follow these instructions in reverse order.

Maile Sinclair

Membre depuis le 01/21/15

228 Réputation

2 tutoriels rédigés

Équipe

USF Tampa, Team 4-5, Brown Winter 2015 Membre de l'équipe USF Tampa, Team 4-5, Brown Winter 2015

USFT-BROWN-W15S4G5

3 membres

12 tutoriels rédigés

0 commentaires

Ajouter un commentaire

Nombre de vues :

Dernières 24 heures : 5

7 derniers jours : 5

30 derniers jours : 9

Total : 1,594