Aller au contenu principal

Backbone One Right Bumper Replacement

Ce dont vous avez besoin

  1. Backbone One Right Bumper Replacement, Remove the screws: étape 1, image 1 de 1
    • Use a Phillips screwdriver to remove the four 5.9 mm-long screws.

  2. Backbone One Right Bumper Replacement, Rotate the upper part: étape 2, image 1 de 3 Backbone One Right Bumper Replacement, Rotate the upper part: étape 2, image 2 de 3 Backbone One Right Bumper Replacement, Rotate the upper part: étape 2, image 3 de 3
    • Lift up the upper cover of the controller.

    • Swing the upper cover over and place it on the controller case.

    • Make sure that the interconnecting cable has no tension.

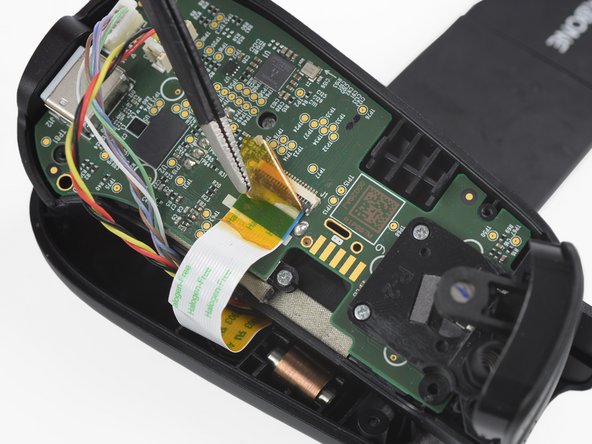
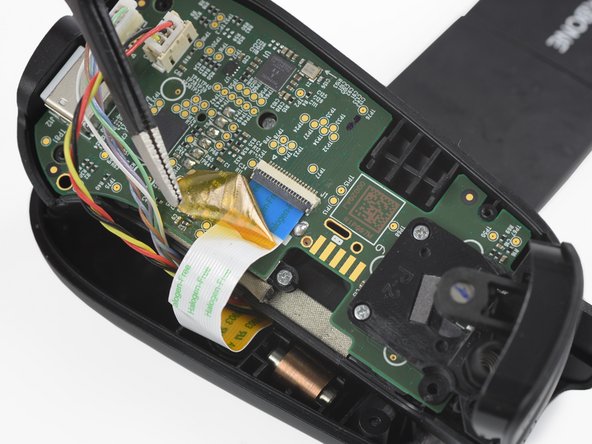
  3. Backbone One Right Bumper Replacement, Remove the protective tape: étape 3, image 1 de 3 Backbone One Right Bumper Replacement, Remove the protective tape: étape 3, image 2 de 3 Backbone One Right Bumper Replacement, Remove the protective tape: étape 3, image 3 de 3
    Outil utilisé dans cette étape :
    Tweezers
    $4.99
    J'achète
    • Use a pair of tweezers to remove the yellow protective tape which is placed over the interconnect cable and the connector.

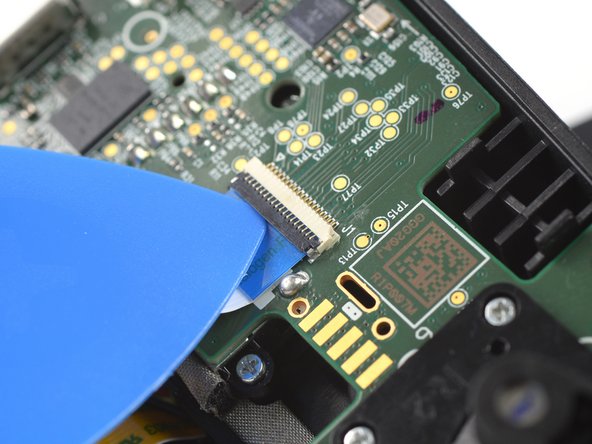
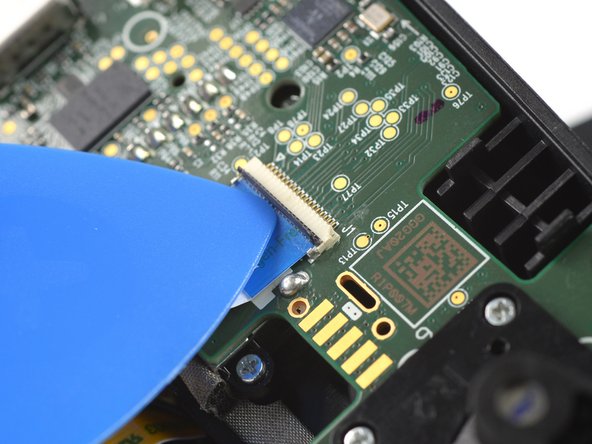
  4. Backbone One Right Bumper Replacement, Open the interconnect cable ZIF connector: étape 4, image 1 de 3 Backbone One Right Bumper Replacement, Open the interconnect cable ZIF connector: étape 4, image 2 de 3 Backbone One Right Bumper Replacement, Open the interconnect cable ZIF connector: étape 4, image 3 de 3
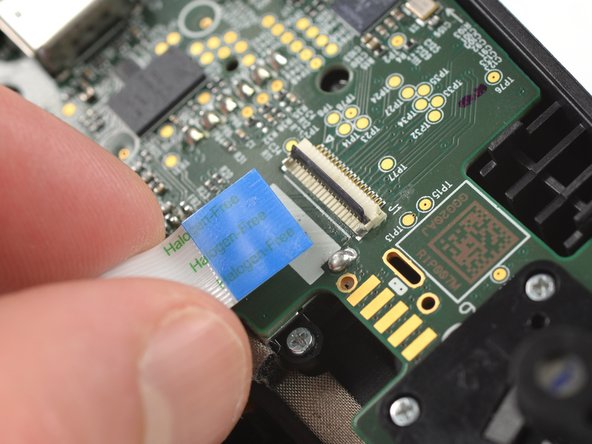
    • Use the tip of an opening pick to open the gray flap of the interconnect cable ZIF connector by pushing it upwards.

  5. Backbone One Right Bumper Replacement, Disconnect the interconnect cable: étape 5, image 1 de 2 Backbone One Right Bumper Replacement, Disconnect the interconnect cable: étape 5, image 2 de 2
    • Disconnect the cable by pulling it straight out the ZIF connector.

  6. Backbone One Right Bumper Replacement, Disconnect the phone connector cables: étape 6, image 1 de 3 Backbone One Right Bumper Replacement, Disconnect the phone connector cables: étape 6, image 2 de 3 Backbone One Right Bumper Replacement, Disconnect the phone connector cables: étape 6, image 3 de 3
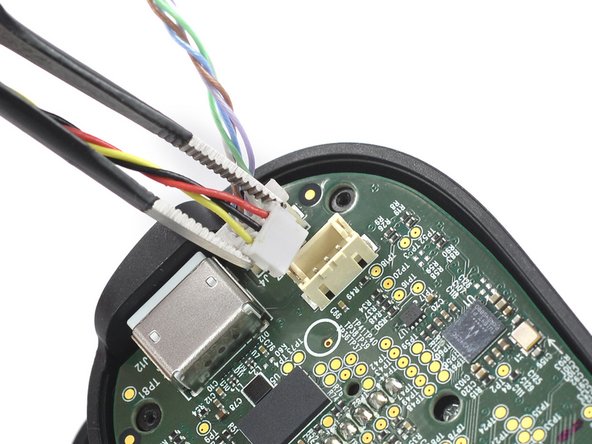
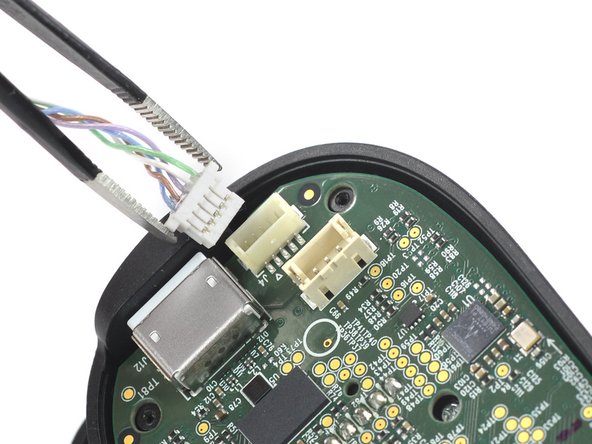
    • Use a pair of tweezers to disconnect the phone connector cables out from their sockets.

  7. Backbone One Right Bumper Replacement, Separate the upper case: étape 7, image 1 de 1
    • Separate the the upper case of the left controller handle.

  8. Backbone One Right Bumper Replacement, Remove the screws: étape 8, image 1 de 1
    • Use a Phillips screwdriver to remove the three 5.9 mm-long screws.

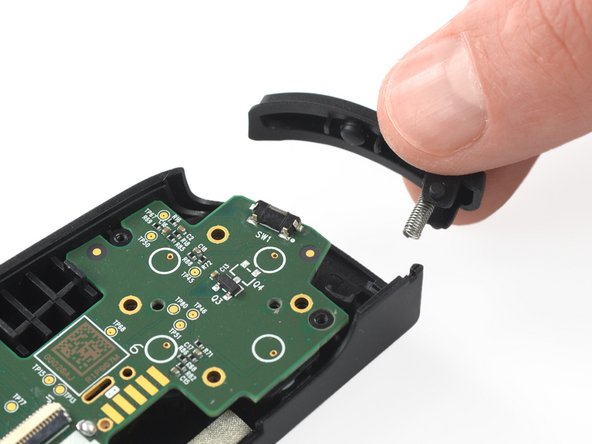
  9. Backbone One Right Bumper Replacement, Remove the trigger: étape 9, image 1 de 2 Backbone One Right Bumper Replacement, Remove the trigger: étape 9, image 2 de 2
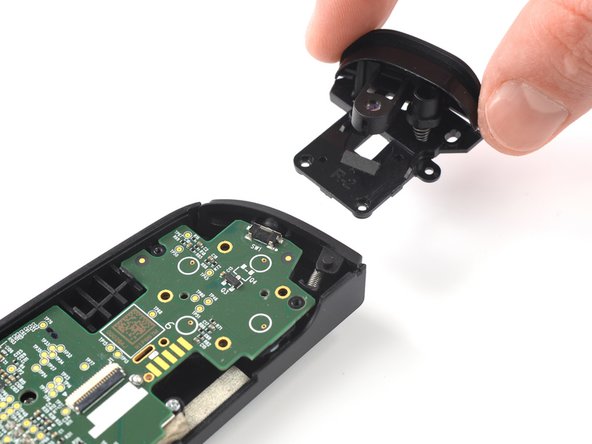
    • Remove the trigger.

  10. Backbone One Right Bumper Replacement, Remove the bumper: étape 10, image 1 de 2 Backbone One Right Bumper Replacement, Remove the bumper: étape 10, image 2 de 2
    • Remove the bumper.

Conclusion

To reassemble your device, follow these instructions in reverse order.

Repair didn’t go as planned? Ask our Answers community for help.

Adriana Zwink

Membre depuis le 12/18/19

48 633 Réputation

167 tutoriels rédigés

Équipe

iFixit Membre de l'équipe iFixit

Staff

136 membres

17 299 tutoriels rédigés

0 commentaires

Ajouter un commentaire

Nombre de vues :

Dernières 24 heures : 0

7 derniers jours : 6

30 derniers jours : 16

Total : 349