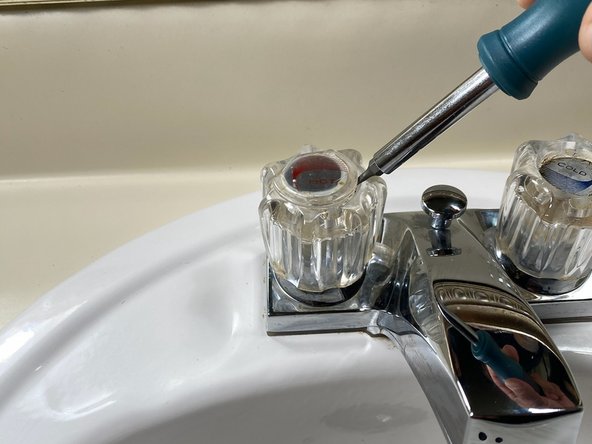
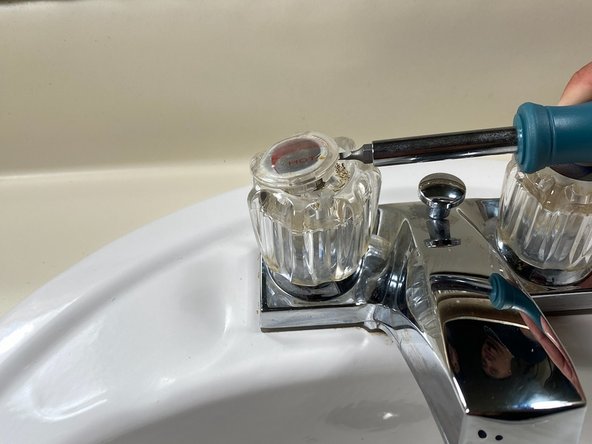
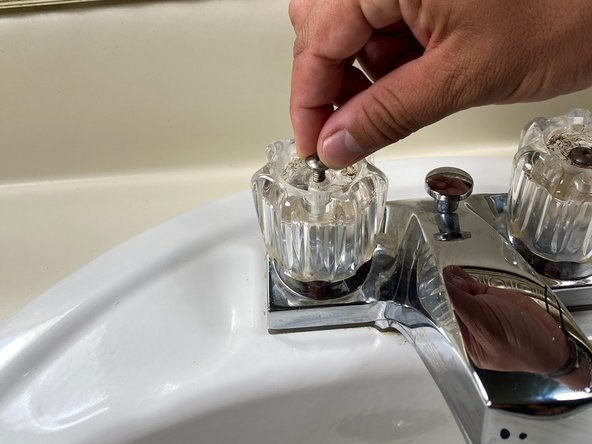
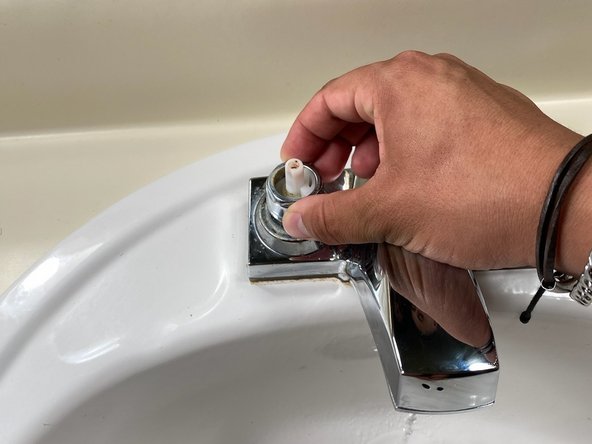
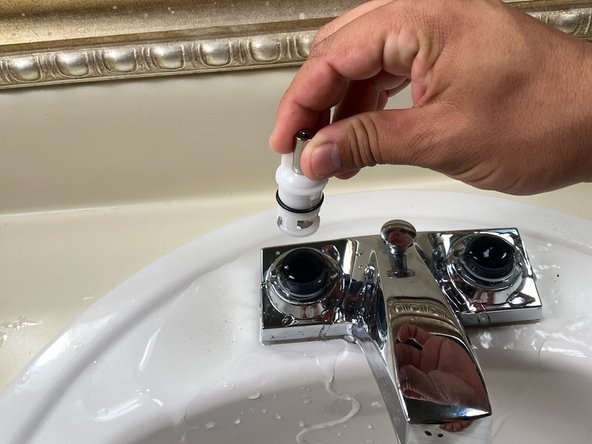
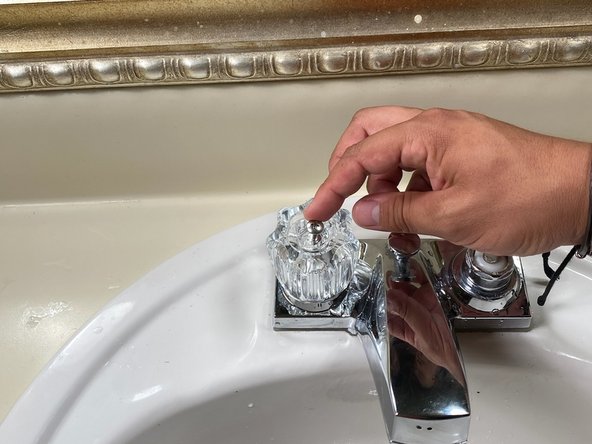
Aller au contenu principal

Bathroom Sink Knob Replacement with the "Danco Faucet Remodeling Kit for Delta"

Ce dont vous avez besoin

  1. Bathroom Sink Knob Replacement with the "Danco Faucet Remodeling Kit for Delta", Knobs: étape 1, image 1 de 2 Bathroom Sink Knob Replacement with the "Danco Faucet Remodeling Kit for Delta", Knobs: étape 1, image 2 de 2
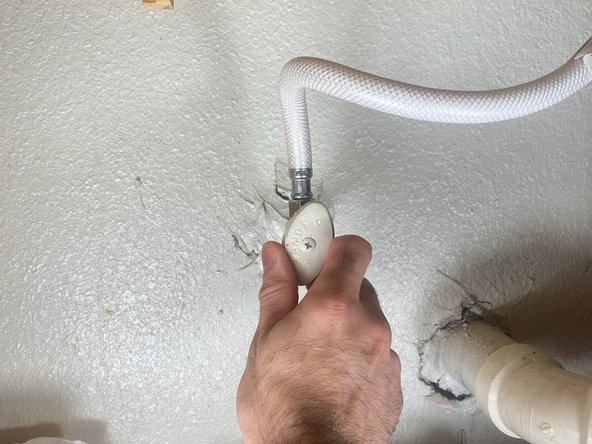
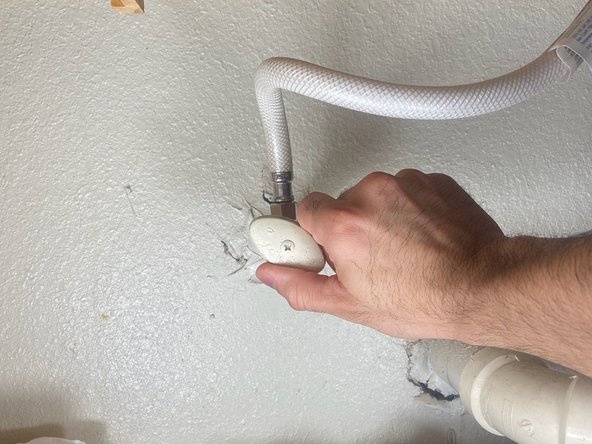
    • Underneath the sink there are two valves that supply water to each knob. Turn off the supply by twisting the valves tightly to the right.

    • The water supply needs to be off before starting the replacement. Failure to do so can result in water spouting all over the area, causing damage.

  2. Bathroom Sink Knob Replacement with the "Danco Faucet Remodeling Kit for Delta": étape 2, image 1 de 2 Bathroom Sink Knob Replacement with the "Danco Faucet Remodeling Kit for Delta": étape 2, image 2 de 2
    • Double-check that the water supply is off by twisting the faucet knobs to the left.

  3. Bathroom Sink Knob Replacement with the "Danco Faucet Remodeling Kit for Delta": étape 3, image 1 de 2 Bathroom Sink Knob Replacement with the "Danco Faucet Remodeling Kit for Delta": étape 3, image 2 de 2
    • With the 1/8” flathead screwdriver, insert through the groove on the edge of the hot-n-cold caps, loosen, and remove them.

  4. Bathroom Sink Knob Replacement with the "Danco Faucet Remodeling Kit for Delta": étape 4, image 1 de 2 Bathroom Sink Knob Replacement with the "Danco Faucet Remodeling Kit for Delta": étape 4, image 2 de 2
    • Using the PZ1 starhead screwdriver, loosen the 19.1 mm oval head screw.

  5. Bathroom Sink Knob Replacement with the "Danco Faucet Remodeling Kit for Delta": étape 5, image 1 de 3 Bathroom Sink Knob Replacement with the "Danco Faucet Remodeling Kit for Delta": étape 5, image 2 de 3 Bathroom Sink Knob Replacement with the "Danco Faucet Remodeling Kit for Delta": étape 5, image 3 de 3
    • Remove the 19.1 mm oval head screw by pulling it up from the knob.

    • Lift the knob from the faucet to remove it.

  6. Bathroom Sink Knob Replacement with the "Danco Faucet Remodeling Kit for Delta": étape 6, image 1 de 2 Bathroom Sink Knob Replacement with the "Danco Faucet Remodeling Kit for Delta": étape 6, image 2 de 2
    • Use an adjustable wrench to loosen the bonnet nut.

  7. Bathroom Sink Knob Replacement with the "Danco Faucet Remodeling Kit for Delta": étape 7, image 1 de 2 Bathroom Sink Knob Replacement with the "Danco Faucet Remodeling Kit for Delta": étape 7, image 2 de 2
    • Remove the bonnet nut from the faucet.

  8. Bathroom Sink Knob Replacement with the "Danco Faucet Remodeling Kit for Delta": étape 8, image 1 de 2 Bathroom Sink Knob Replacement with the "Danco Faucet Remodeling Kit for Delta": étape 8, image 2 de 2
    • Remove the escutcheon by pulling it out from the valve.

  9. Bathroom Sink Knob Replacement with the "Danco Faucet Remodeling Kit for Delta": étape 9, image 1 de 2 Bathroom Sink Knob Replacement with the "Danco Faucet Remodeling Kit for Delta": étape 9, image 2 de 2
    • Place the new escutcheon by pushing it down into the valve.

  10. Bathroom Sink Knob Replacement with the "Danco Faucet Remodeling Kit for Delta": étape 10, image 1 de 2 Bathroom Sink Knob Replacement with the "Danco Faucet Remodeling Kit for Delta": étape 10, image 2 de 2
    • Install the new bonnet nut by placing it over and around the escutcheon.

  11. Bathroom Sink Knob Replacement with the "Danco Faucet Remodeling Kit for Delta": étape 11, image 1 de 2 Bathroom Sink Knob Replacement with the "Danco Faucet Remodeling Kit for Delta": étape 11, image 2 de 2
    • Using an adjustable wrench, tighten the bonnet nut by twisting it to the right.

  12. Bathroom Sink Knob Replacement with the "Danco Faucet Remodeling Kit for Delta": étape 12, image 1 de 2 Bathroom Sink Knob Replacement with the "Danco Faucet Remodeling Kit for Delta": étape 12, image 2 de 2
    • Install the new knob by placing it on top and around the escutcheon and bonnet nut.

  13. Bathroom Sink Knob Replacement with the "Danco Faucet Remodeling Kit for Delta": étape 13, image 1 de 2 Bathroom Sink Knob Replacement with the "Danco Faucet Remodeling Kit for Delta": étape 13, image 2 de 2
    • Insert the 19.1 mm oval head screw into the top of the knob.

  14. Bathroom Sink Knob Replacement with the "Danco Faucet Remodeling Kit for Delta": étape 14, image 1 de 2 Bathroom Sink Knob Replacement with the "Danco Faucet Remodeling Kit for Delta": étape 14, image 2 de 2
    • Using the PZ1 starhead screwdriver, tighten the screw by twisting it to the right.

  15. Bathroom Sink Knob Replacement with the "Danco Faucet Remodeling Kit for Delta": étape 15, image 1 de 2 Bathroom Sink Knob Replacement with the "Danco Faucet Remodeling Kit for Delta": étape 15, image 2 de 2
    • Install the new hot-n-cold caps by snapping them onto the top of the knobs.

  16. Bathroom Sink Knob Replacement with the "Danco Faucet Remodeling Kit for Delta": étape 16, image 1 de 2 Bathroom Sink Knob Replacement with the "Danco Faucet Remodeling Kit for Delta": étape 16, image 2 de 2
    • Turn on the water supply by twisting the valves to the left.

Conclusion

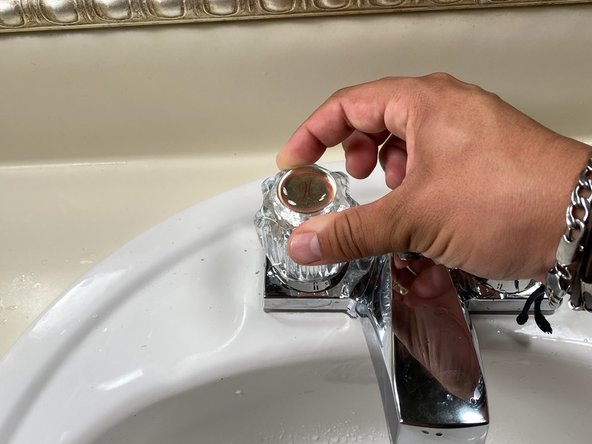
Test that the replacement was done correctly and that the water supply is on by twisting the faucet knobs to the right. Enjoy your new remodeled faucet!

Une autre personne a terminé cette réparation.

Benjamin Figueroa

Membre depuis le 09/23/23

295 Réputation

1 tutoriel rédigé

Équipe

Austin Community College, Team 1-5, Watkins Fall 2023 Membre de l'équipe Austin Community College, Team 1-5, Watkins Fall 2023

AUSTINCC-WATKINS-F23S1G5

1 membre

1 tutoriel rédigé

0 commentaires

Ajouter un commentaire

Nombre de vues :

Dernières 24 heures : 0

7 derniers jours : 7

30 derniers jours : 15

Total : 139