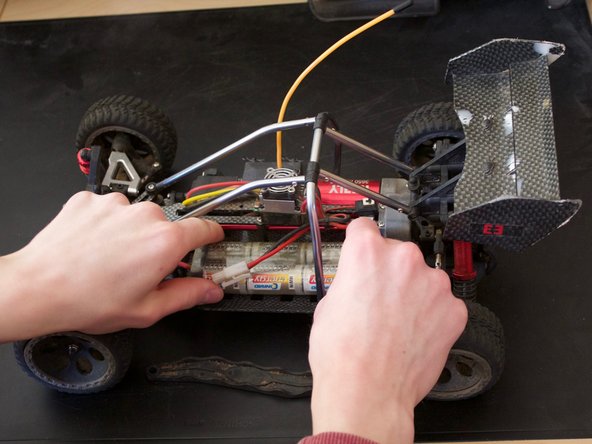
Aller au contenu principal

Batterieausabau

Ce dont vous avez besoin

  1. Batterieausabau, trim loss: étape 1, image 1 de 1
    • These two pins must be removed.

  2. Batterieausabau: étape 2, image 1 de 1
    • Here, a screwdriver or other stable thin object (in the picture: letter opener) can be helpful

  3. Batterieausabau: étape 3, image 1 de 2 Batterieausabau: étape 3, image 2 de 2
    • TIP: if you remove the cladding more often (for example, for thorough cleaning), it may be helpful to provide the splints with some insulating tape, so the use of tools is unnecessary

  4. Batterieausabau: étape 4, image 1 de 1
    • The panel is now dismantled

  5. Batterieausabau, Batterieausabau: étape 5, image 1 de 1
    • These two pins must be removed

  6. Batterieausabau: étape 6, image 1 de 1
    • TIP: Since this work has to be done more often, it is recommended to provide the cotter pins with some insulating tape so that they can be removed without tools

  7. Batterieausabau: étape 7, image 1 de 1
    • The battery holder can now be pulled off upwards

  8. Batterieausabau: étape 8, image 1 de 1
    • Now the battery connection is disconnected

  9. Batterieausabau: étape 9, image 1 de 2 Batterieausabau: étape 9, image 2 de 2
    • And the battery can be removed upwards

  10. Batterieausabau: étape 10, image 1 de 1
    • The battery can now be charged

Conclusion

Repeat the steps in order to reassemble your device.

Merci à ces traducteurs :

de en

100%

Israel nous aide à réparer le monde ! Vous voulez contribuer ?
Commencez à traduire ›

Leonard Kesting

Membre depuis le 08/14/16

1 229 Réputation

9 tutoriels rédigés

0 commentaires

Ajouter un commentaire

Nombre de vues :

Dernières 24 heures : 0

7 derniers jours : 0

30 derniers jours : 3

Total : 292