Aller au contenu principal

Beboncool Gamepad for Nintendo Switch Vibration Motors Replacement

Ce dont vous avez besoin

  1. Beboncool Gamepad for Nintendo Switch Vibration Motors Replacement, Beboncool Nintendo Switch Gamepad Disassembly: étape 1, image 1 de 3 Beboncool Gamepad for Nintendo Switch Vibration Motors Replacement, Beboncool Nintendo Switch Gamepad Disassembly: étape 1, image 2 de 3 Beboncool Gamepad for Nintendo Switch Vibration Motors Replacement, Beboncool Nintendo Switch Gamepad Disassembly: étape 1, image 3 de 3
    • Use the plastic opening tool to remove the blue plastic grips from the sides of the controller.

  2. Beboncool Gamepad for Nintendo Switch Vibration Motors Replacement: étape 2, image 1 de 2 Beboncool Gamepad for Nintendo Switch Vibration Motors Replacement: étape 2, image 2 de 2
    • Use the Phillips #0 screwdriver to remove the seven 5mm screws from the back of the controller.

  3. Beboncool Gamepad for Nintendo Switch Vibration Motors Replacement: étape 3, image 1 de 3 Beboncool Gamepad for Nintendo Switch Vibration Motors Replacement: étape 3, image 2 de 3 Beboncool Gamepad for Nintendo Switch Vibration Motors Replacement: étape 3, image 3 de 3
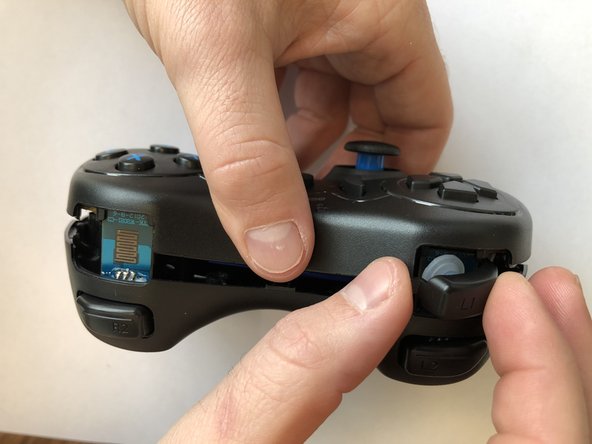
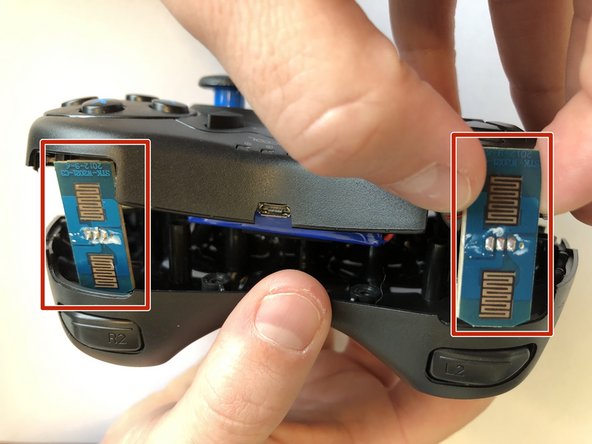
    • Gently separate the two halves of the controller.

    • As the two covers come apart the L1 and R1 button, will fall free from the controller. Be sure not to lose them if they should pop out and fall.

    • Be sure to slide the small circuit boards out of the covers to be able to separate the two halves

  4. Beboncool Gamepad for Nintendo Switch Vibration Motors Replacement: étape 4, image 1 de 2 Beboncool Gamepad for Nintendo Switch Vibration Motors Replacement: étape 4, image 2 de 2
    • Use the Phillips #0 screwdriver to remove the two 3.5mm screws holding the circuit board in place.

  5. Beboncool Gamepad for Nintendo Switch Vibration Motors Replacement: étape 5, image 1 de 3 Beboncool Gamepad for Nintendo Switch Vibration Motors Replacement: étape 5, image 2 de 3 Beboncool Gamepad for Nintendo Switch Vibration Motors Replacement: étape 5, image 3 de 3
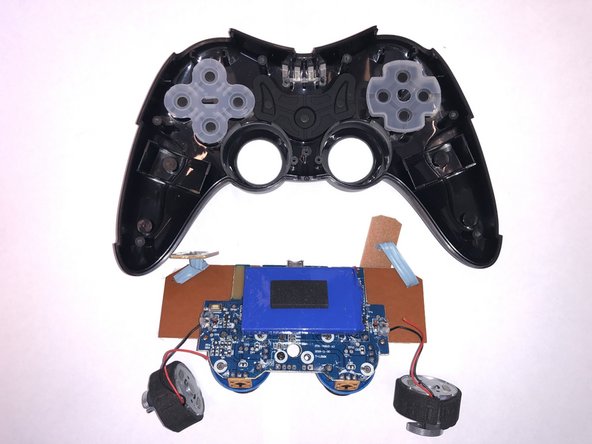
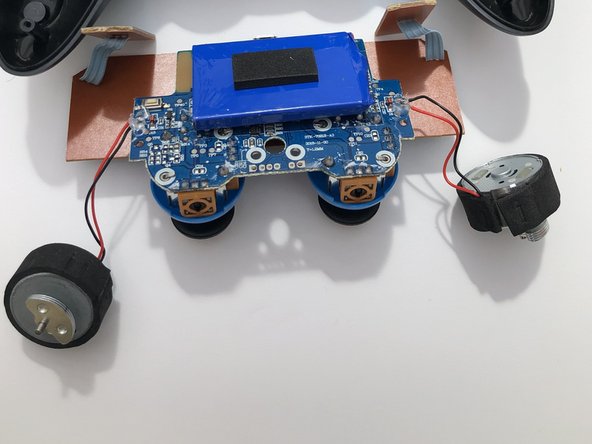
    • Lift the motherboard from the back case with the vibration motors and button boards attached.

  6. Beboncool Gamepad for Nintendo Switch Vibration Motors Replacement, Vibration Motors: étape 6, image 1 de 3 Beboncool Gamepad for Nintendo Switch Vibration Motors Replacement, Vibration Motors: étape 6, image 2 de 3 Beboncool Gamepad for Nintendo Switch Vibration Motors Replacement, Vibration Motors: étape 6, image 3 de 3
    • Locate the two solder points corresponding to the malfunctioning vibrational motor.

  7. Beboncool Gamepad for Nintendo Switch Vibration Motors Replacement: étape 7, image 1 de 2 Beboncool Gamepad for Nintendo Switch Vibration Motors Replacement: étape 7, image 2 de 2
    Outil utilisé dans cette étape :
    Tweezers
    $4.99
    J'achète
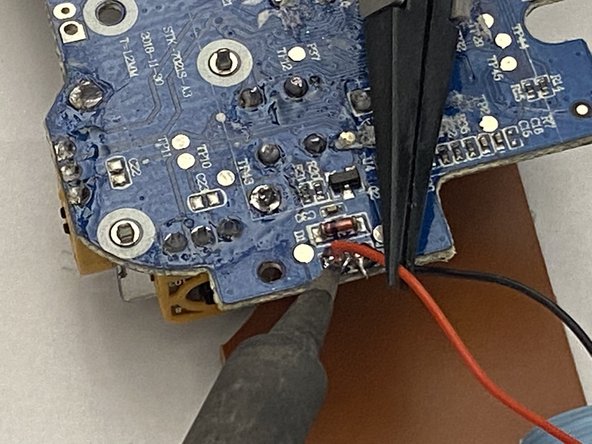
    • Desolder the two connection points corresponding to the malfunctioning vibration motor.

    • Once the solder has been sufficiently melted, carefully pull the wires away from the solder point with tweezers.

    • For help with soldering best practices, check out this Soldering and Desoldering Connections Guide.

Conclusion

To reassemble your device, follow these instructions in reverse order.

0 commentaires

Ajouter un commentaire

Nombre de vues :

Dernières 24 heures : 0

7 derniers jours : 3

30 derniers jours : 11

Total : 210