Aller au contenu principal
Pour réparer ensemble - Je crée un compte

Best Budget Kettle Disassembly

Ce dont vous avez besoin

  1. Best Budget Kettle Disassembly, Best Budget Kettle Disassembly: étape 1, image 1 de 1
    • Fully assembled kettle.

    Demander à FixBot

    Ajouter un commentaire

  2. Best Budget Kettle Disassembly: étape 2, image 1 de 1
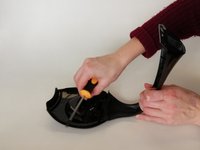
    • Using the three-winged screwdriver, remove the three-winged screw from the bottom of the hot plate.

    Demander à FixBot

    Ajouter un commentaire

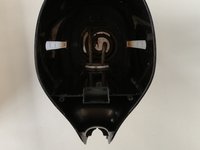
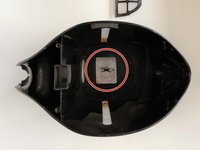
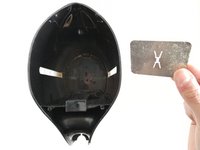
  3. Best Budget Kettle Disassembly: étape 3, image 1 de 3 Best Budget Kettle Disassembly: étape 3, image 2 de 3 Best Budget Kettle Disassembly: étape 3, image 3 de 3
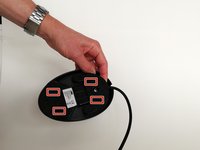
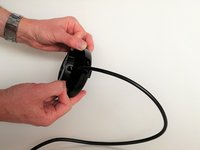
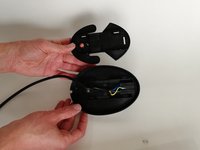
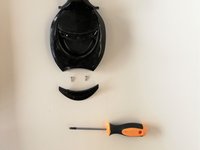
    • Release the snap fits by sliding the metal spudger into each of the 4 slots and pressing the spudger to the side and pulling up on the cover.

    • This step is difficult to do with one person. We found it helpful to have one person holding the base and pulling up on the piece that was separating, while another person released the snapfits with the spudger.

    Demander à FixBot

    Ajouter un commentaire

  4. Best Budget Kettle Disassembly: étape 4, image 1 de 2 Best Budget Kettle Disassembly: étape 4, image 2 de 2
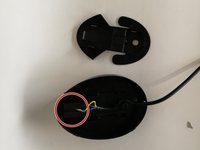
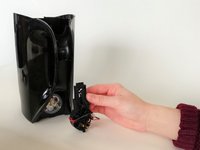
    • Remove the electrical subassembly from the base of the hot plate; it will lift out with no resistance.

    Demander à FixBot

    Ajouter un commentaire

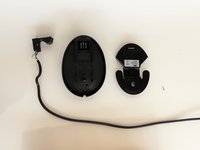
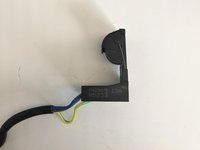
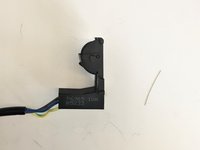
  5. Best Budget Kettle Disassembly: étape 5, image 1 de 2 Best Budget Kettle Disassembly: étape 5, image 2 de 2
    • Remove the wire spring from the electrical subassembly by sliding it out of the hook on the hinge and pulling it of of the subassembly.

    Demander à FixBot

    Ajouter un commentaire

  6. Best Budget Kettle Disassembly: étape 6, image 1 de 1
    • Remove the hood of the electrical subassembly by pulling on one side of the hood to release the snapfit hinge.

    Demander à FixBot

    Ajouter un commentaire

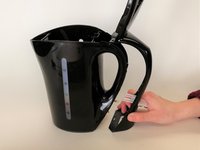
  7. Best Budget Kettle Disassembly: étape 7, image 1 de 2 Best Budget Kettle Disassembly: étape 7, image 2 de 2
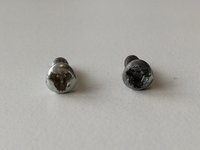
    • Using the three-winged screwdriver, unscrew two three-winged screws from the top of the handle cover and two three-winged screws from the bottom of the handle cover and separate the handle cover from the kettle

    • Watch out not to ruin them by using the wrong tools (as in the second picture), because the screws are not that high quality.

    Demander à FixBot

    Ajouter un commentaire

  8. Best Budget Kettle Disassembly: étape 8, image 1 de 2 Best Budget Kettle Disassembly: étape 8, image 2 de 2
    • Using the Phillips head screwdriver, unscrew two Phillips head screws from the underside of the lid to separate the lid handle from the lid.

    Demander à FixBot

    Ajouter un commentaire

  9. Best Budget Kettle Disassembly: étape 9, image 1 de 1
    • Remove the on/off switch by pulling apart the snap fits and sliding the switch out of the hole in the handle.

    Demander à FixBot

    Ajouter un commentaire

  10. Best Budget Kettle Disassembly: étape 10, image 1 de 1
    • Remove the filter from the kettle by pulling up on it in order to slide it out of the tracks it is in.

    Demander à FixBot

    Ajouter un commentaire

  11. Best Budget Kettle Disassembly: étape 11, image 1 de 1
    • Using the Phillips head screwdriver, unscrew the three Phillips head screws in the handle.

    Demander à FixBot

    Ajouter un commentaire

  12. Best Budget Kettle Disassembly: étape 12, image 1 de 2 Best Budget Kettle Disassembly: étape 12, image 2 de 2
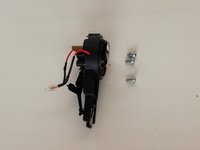
    • Pull the electronic part out of the kettle.

    • Watch out because the screws attached to the electronic part will come loose too.

    Demander à FixBot

    Ajouter un commentaire

  13. Best Budget Kettle Disassembly: étape 13, image 1 de 2 Best Budget Kettle Disassembly: étape 13, image 2 de 2
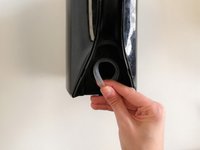
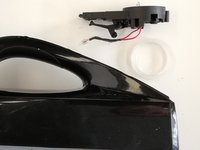
    • Remove the silicone ring from the hole in which the heating element was placed. It can be easily removed by pulling on it.

    Demander à FixBot

    Ajouter un commentaire

  14. Best Budget Kettle Disassembly: étape 14, image 1 de 2 Best Budget Kettle Disassembly: étape 14, image 2 de 2
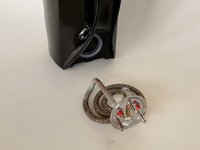
    • Get the heating element out of the kettle. It has to be removed from the inside.

    • It can be easily lifted out with no resistance.

    Demander à FixBot

    Ajouter un commentaire

  15. Best Budget Kettle Disassembly: étape 15, image 1 de 1
    • Click the lid off the electronic component by pulling the notch.

    • Watch out because things will come loose and fall out.

    Demander à FixBot

    Ajouter un commentaire

  16. Best Budget Kettle Disassembly: étape 16, image 1 de 1
    • Remove all parts from the electronic part. The copper parts and the springs can be removed by hand.

    • Push the part with the side where the prongs stick out against a hard surface to pop out the prongs. Then by pulling they can be removed.

    • The wires cannot be removed without breaking them.

    Demander à FixBot

    Ajouter un commentaire

  17. Best Budget Kettle Disassembly: étape 17, image 1 de 2 Best Budget Kettle Disassembly: étape 17, image 2 de 2
    • Remove the metal plate from the bottom of the inside of the kettle by pulling up on it to release it from its snapfit.

    Demander à FixBot

    Ajouter un commentaire

  18. Best Budget Kettle Disassembly: étape 18, image 1 de 1
    • Fully dissembled kettle.

    Demander à FixBot

    Ajouter un commentaire

Conclusion

To reassemble your device, follow these instructions in reverse order.

Annulation : je n'ai pas terminé ce tutoriel.

Olivia Burke

Membre depuis le 03/07/18

277 Réputation

1 tutoriel rédigé

0 commentaires de tutoriel

Ajouter un commentaire

Nombre de vues :

Dernières 24 heures : 2

7 derniers jours : 16

30 derniers jours : 77

Total : 4,111