Introduction
This guide will help you take apart the handheld vacuum using the most appropriate tools to replace the battery.
Ce dont vous avez besoin
-
-
Push the silver button to disconnect the dirt dish from the handheld vacuum.
-
-
-
-
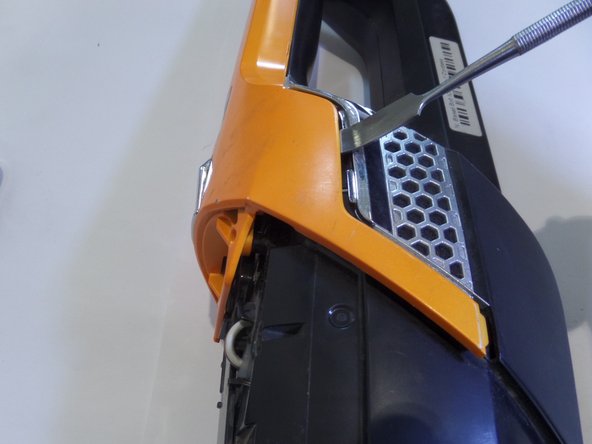
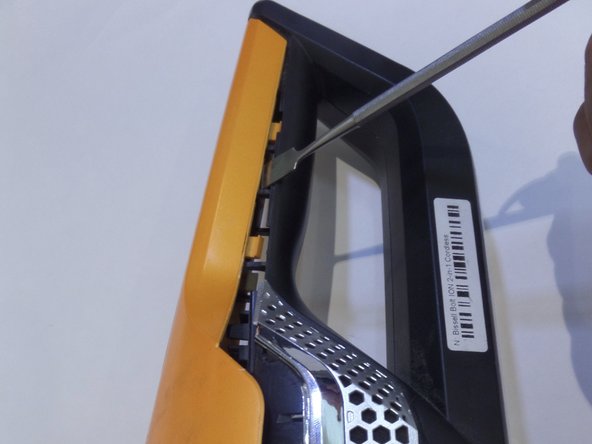
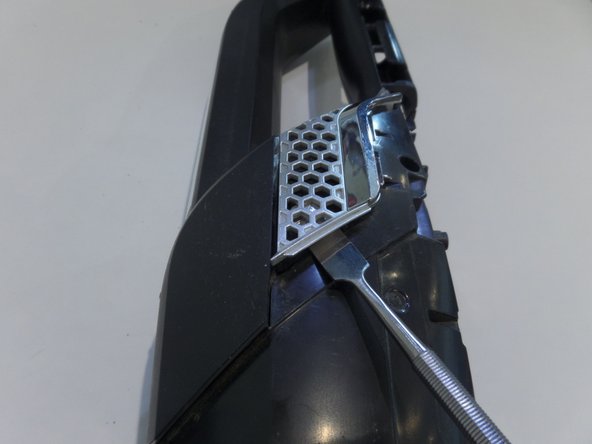
With metal spudger remove the metal clip on both sides.
-
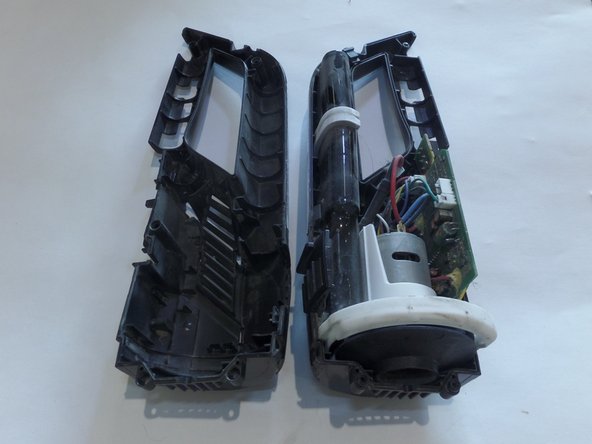
Pull device apart using great force
Use a sharp knife blade to cut the product label down the seam on the bottom of the handle to make separation of the halves easier.
Disconnect the two pin and the four pin VH connectors from the PCB assembly. Cut off the bullet splices from the red and black wires (be careful to not shorten the wires) to allow the battery to be removed. It would probably be wise at this point to use a small clean paint brush to clean the PCB assembly and inside of the handle. Bissel does not supply a replacement battery. Good Luck manufacturing a replacement.
-


To reassemble your device, follow these instructions in reverse order.
To reassemble your device, follow these instructions in reverse order.
Annulation : je n'ai pas terminé ce tutoriel.
13 autres ont terminé cette réparation.
Équipe

CSU Fullerton, Team S1-G3, Bruce Fall 2017 Membre de l'équipe CSU Fullerton, Team S1-G3, Bruce Fall 2017
CSUF-BRUCE-F17S1G3
3 membres
5 tutoriels rédigés
23 commentaires
Do you have the specs for the replacement battery? Model number? Any suggested sources?
There is no replacement battery. The vacuum does have a two year warranty. If you call Bissell, they will replace the vacuum.
They will replace it with a refurbished one. In 6 months the same thing will happen and they don't warranty the replacement.
elarvick -
So why show how to take it apart if I can't replace the battery??
Bissell does not offer an official replacement battery, but FYI it is a 5 cell, 18VDC, 2000mAh battery. So find a way to give the unit 18V at 2 amps in a form factor that will fit in the case.
There are quite a lot of wires leading to the battery aside from the two main power lines. I know nothing about battery charging/reading so no idea what they are for. Eight wires leading to/from the battery in total.
/KRM
where did you get the replacement batt?
The 5ea, LGDAMF11865, 2150 mAh rated, 3.65V Lithium Ion batteries are spot welded together in a series configuration. Besides the red and black wires supplying the current, there are four other wires, possibly supplying the PCB assembly with lower voltages or sensing the individual battery conditions. there is a pair of green wires connected to a thermocouple that lies tight against the center of the battery assembly. I suppose one could find these batteries online (Alibaba.com) and make the attempt to re-manufacture the assembly. I have personally never witnessed a lithium ion battery explosion but have seen the effects of one that had exploded in a GPS receiver that made a 1/4'“ thick square aluminum housing buckle out so it was like a ball! This project just became not worth my time or health., I’ll buy a new vacuum that DOES provide replaceable, rechargeable batteries if there is one.
Anyone know why mine would run continuously, then die and not turn on? it was brand new and Bissell replaced it but I just wonder why it failed and if I could get it fired back up? if not it will definitely be a part supply. Thank you
@BrandenGreen after reading the reviews on Amazon, it seems like battery failure in this model is very common. Happened to mine as well.
I had a Bissell BOLT Ion Pet vacuum that stopped holding a charge after a month or so. They were kind enough to replace it with another (I think refurbished) vacuum. Because I didn’t use it very often, it sat in the charger until it, too, stopped holding a charge. When I contacted Bissell about the second one, they very politely pointed out that I had just passed the two-year warranty period. So essentially they said, “We’ve noted your issue, thanks for letting us know” and that was it. So now I need a new vacuum — but I won’t ever buy another Bissell, that’s for sure.
This description makes sense. Lithium ion battery chargers need six wires going to the battery (for a 5 cell pack) and the last two would go to a temperature probe. It needs this many wires because it needs to track the individual cell voltages. This is all legit ( I'm an electrical engineer) and should be really good if implemented properly. It doesn't make sense that there would be this many problems with the battery maintaining its charge.
Mine had Ni-MH 1.2v 1300mah cells in it. Only 2 wires to the pack, but the pack was split up into 2 sections 10 cells on the bottom, and 2 more in the handle. Not sure if they used different battery types in different units sold under the same model or not. Mine is new, and dead. It was a floor model, so people probably ran it flat, and it won’t charge. I’m in the process of jumping each cell with another battery to see if I can revive them. It’s worked in the past, so hopefully it will work here. If not’ I’ll just pick up some RC car or airsoft battery packs with the Ni-MH sub C batteries, and make a new pack out of those being they’re already tabbed together.
Per Bissell’s site you are to remove the battery for disposal. They say that you can’t replace the battery once you cut the wires that is it.
The battery pack is comprised of 10 batteries in 2 sections 8 in the body, and 2 in the handle. These batteries are 1.2v 1300mah Ni-MH sub-c cells. You could hunt down the dead cells within the packs and replace those, but that may cause problems. Easiest way would be to use some RC car packs with the Ni-MH sub-c batteries, since they’re already linked together to replace all of them at once. Total cost would be around $20-$30 for the donor packs, and a few dollars worth of shrink tubing.
There is nothing in here about the actual battery or replacing it. What are you even doing?
I’ve had two of the Bissell Bolt Ion 2 in 1 vacuums (Model 1312), and, like everyone else here the battery died. The first one died just a few days after the warranty expired! Talk about planned obsolescence! I talked to Bissell and let them know what I thought of this machine, where there is NO PROVISION FOR BATTERY REPLACEMENT! At a reduced price, they sent me a refurbished replacement. While the first one lasted one year, the refurbished replacement lasted just over 2. After this one died, I decided to get a Shark vacuum. It works well, but I still like the ergonomics of the Bissell Bolt. Very lightweight and it has a “parking place” with the charging stand. Oh well. Time to say goodbye to Bissell.
It looks to me that the poster (Jasmine) provided the procedure so that, although screwed by Bissell, those who bought the thing can at least take it apart and recycle the battery in a responsible way. Unless one is an electrical engineer, it does not seem practical to try.
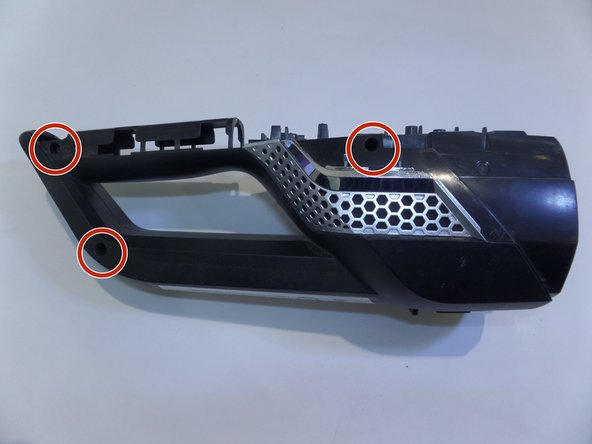
All screws are #2 Phillips, not #0.
I have a schematic for the battery pack in my guide. I rebuilt a pack, and the vacuum cleaner is good as new.
Bissell ION Rechargeable Vacuums Lithium Ion battery pack schematic
Breikke ,
can you kindly provide a procedure for replacing the battery pack..
I bet its not simple but a guide would be great help to initiate a daring attempt, and suggest a source of the new 3.6v li batteries..
thanks a bunch,
the bissell company doesn't care for their customers - no after sales service. no after market batteries - don't buy.