Aller au contenu principal

Bissell OptiClean Cyclonic Vacuum Motor and Circuit Board Replacement

Ce dont vous avez besoin

  1. Bissell OptiClean Cyclonic Vacuum Motor and Circuit Board Replacement, Flex Hose with Handle: étape 1, image 1 de 2 Bissell OptiClean Cyclonic Vacuum Motor and Circuit Board Replacement, Flex Hose with Handle: étape 1, image 2 de 2
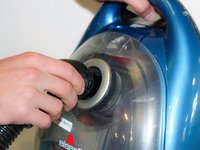
    • Grab hold of both the flex hose handle and the extension wand.

    • Pull straight out to detach the handle from the extension wand.

  2. Bissell OptiClean Cyclonic Vacuum Motor and Circuit Board Replacement: étape 2, image 1 de 1
    • Locate the lock clip on the other end of the flex hose.

  3. Bissell OptiClean Cyclonic Vacuum Motor and Circuit Board Replacement: étape 3, image 1 de 2 Bissell OptiClean Cyclonic Vacuum Motor and Circuit Board Replacement: étape 3, image 2 de 2
    • Hold down the lock clip to unlock the flex hose from the vacuum.

    • Remove the flex hose from the vacuum.

  4. Bissell OptiClean Cyclonic Vacuum Motor and Circuit Board Replacement, Filters: étape 4, image 1 de 3 Bissell OptiClean Cyclonic Vacuum Motor and Circuit Board Replacement, Filters: étape 4, image 2 de 3 Bissell OptiClean Cyclonic Vacuum Motor and Circuit Board Replacement, Filters: étape 4, image 3 de 3
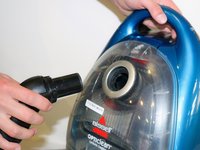
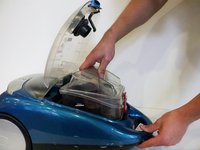
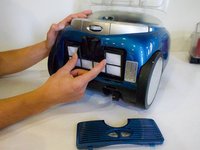
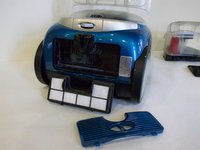
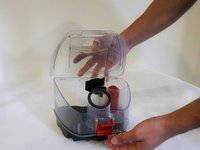
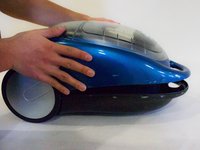
    • After removing hose, place vacuum on back and unclip the top compartment.

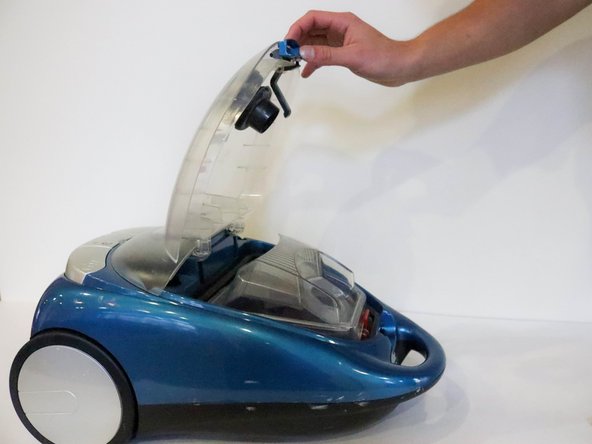
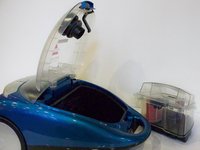
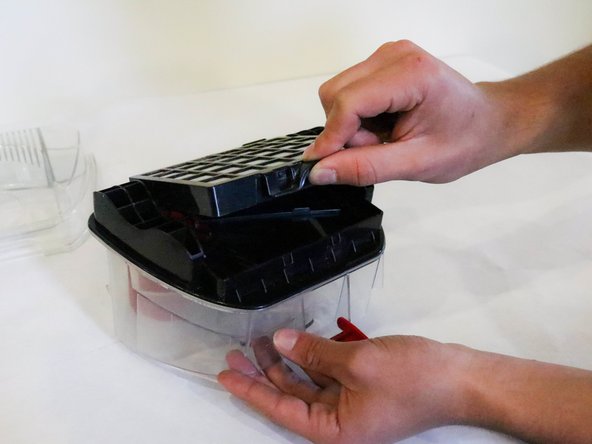
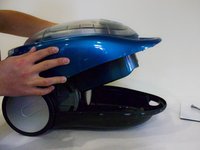
    • Open the compartment.

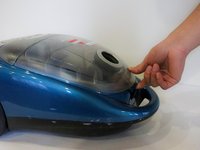
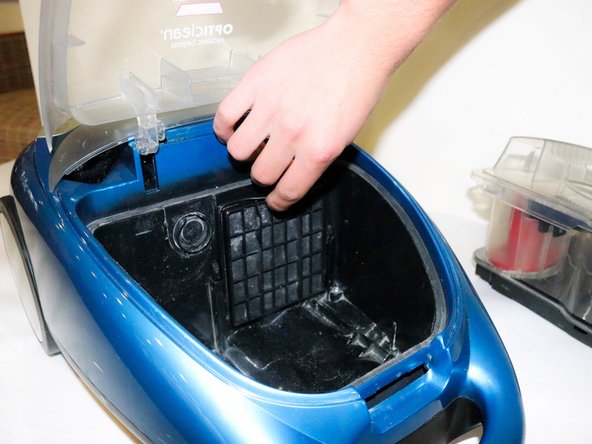
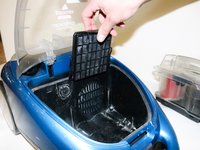
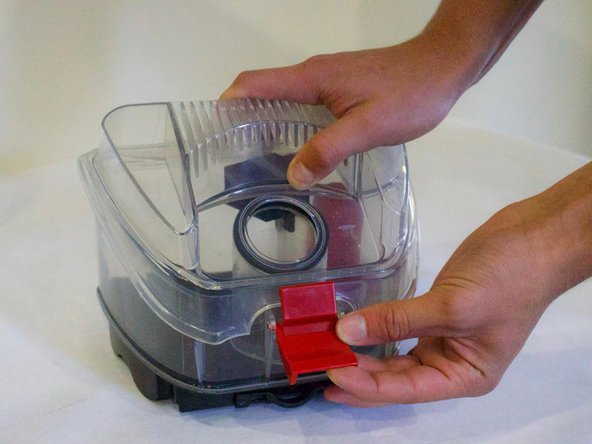
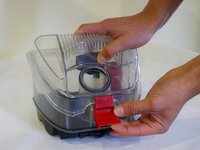
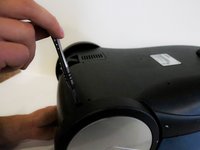
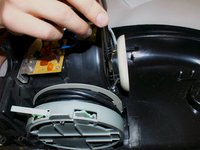
    • Pull the dirt collection box out of the vacuum.

  5. Bissell OptiClean Cyclonic Vacuum Motor and Circuit Board Replacement: étape 5, image 1 de 3 Bissell OptiClean Cyclonic Vacuum Motor and Circuit Board Replacement: étape 5, image 2 de 3 Bissell OptiClean Cyclonic Vacuum Motor and Circuit Board Replacement: étape 5, image 3 de 3
    • Place dirt collection box to the side.

    • Locate the Pre-Motor Filter.

    • Pull the filter out by grabbing the pull tab on top.

  6. Bissell OptiClean Cyclonic Vacuum Motor and Circuit Board Replacement: étape 6, image 1 de 3 Bissell OptiClean Cyclonic Vacuum Motor and Circuit Board Replacement: étape 6, image 2 de 3 Bissell OptiClean Cyclonic Vacuum Motor and Circuit Board Replacement: étape 6, image 3 de 3
    • Turn vacuum around and locate the filter cover on the bottom.

    • Place fingers in the opening and pull off the filter cover.

    • Place fingers on each tab on the Post-Motor HEPA Media Filter and pull out.

  7. Bissell OptiClean Cyclonic Vacuum Motor and Circuit Board Replacement: étape 7, image 1 de 3 Bissell OptiClean Cyclonic Vacuum Motor and Circuit Board Replacement: étape 7, image 2 de 3 Bissell OptiClean Cyclonic Vacuum Motor and Circuit Board Replacement: étape 7, image 3 de 3
    • Take filter out to clean or replace.

    • To clean Dirt Collection Box, unlatch lid and take off.

  8. Bissell OptiClean Cyclonic Vacuum Motor and Circuit Board Replacement: étape 8, image 1 de 3 Bissell OptiClean Cyclonic Vacuum Motor and Circuit Board Replacement: étape 8, image 2 de 3 Bissell OptiClean Cyclonic Vacuum Motor and Circuit Board Replacement: étape 8, image 3 de 3
    • Flip Dirt Collection Box over and locate the push tab.

    • Push the Dirt Cup HEPA Media Filter up to take it off.

    • Picture 3 Shows all the filters taken out of the vacuum.

  9. Bissell OptiClean Cyclonic Vacuum Motor and Circuit Board Replacement, Motor and Circuit Board: étape 9, image 1 de 2 Bissell OptiClean Cyclonic Vacuum Motor and Circuit Board Replacement, Motor and Circuit Board: étape 9, image 2 de 2
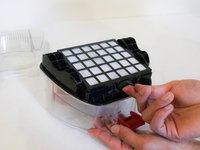
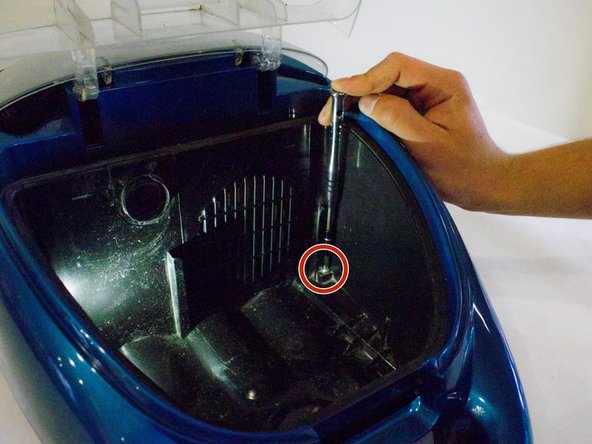
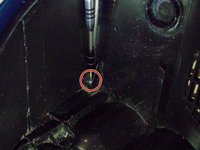
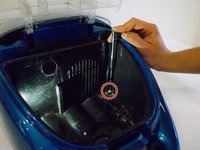
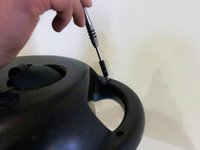
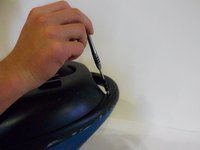
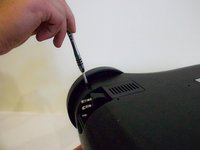
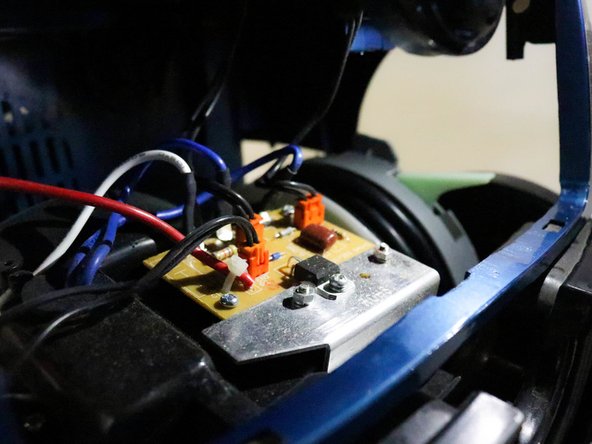
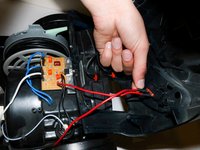
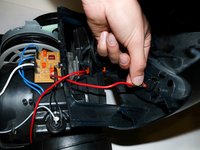
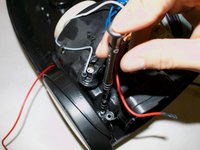
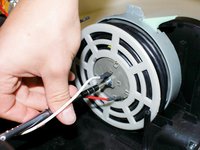
    • Unscrew the two screws underneath the dirt collection box inside the vacuum.

  10. Bissell OptiClean Cyclonic Vacuum Motor and Circuit Board Replacement: étape 10, image 1 de 1
    • Flip over vacuum.

  11. Bissell OptiClean Cyclonic Vacuum Motor and Circuit Board Replacement: étape 11, image 1 de 2 Bissell OptiClean Cyclonic Vacuum Motor and Circuit Board Replacement: étape 11, image 2 de 2
    • Unscrew both screws on the bottom of the handle.

  12. Bissell OptiClean Cyclonic Vacuum Motor and Circuit Board Replacement: étape 12, image 1 de 2 Bissell OptiClean Cyclonic Vacuum Motor and Circuit Board Replacement: étape 12, image 2 de 2
    • Unscrew both screws near the wheels.

  13. Bissell OptiClean Cyclonic Vacuum Motor and Circuit Board Replacement: étape 13, image 1 de 3 Bissell OptiClean Cyclonic Vacuum Motor and Circuit Board Replacement: étape 13, image 2 de 3 Bissell OptiClean Cyclonic Vacuum Motor and Circuit Board Replacement: étape 13, image 3 de 3
    • Flip over vacuum.

    • Gently lift off top.

    • Do not try to take off completely. There are still wires attached to the hull.

  14. Bissell OptiClean Cyclonic Vacuum Motor and Circuit Board Replacement: étape 14, image 1 de 2 Bissell OptiClean Cyclonic Vacuum Motor and Circuit Board Replacement: étape 14, image 2 de 2
    • Locate the circuit board.

  15. Bissell OptiClean Cyclonic Vacuum Motor and Circuit Board Replacement: étape 15, image 1 de 3 Bissell OptiClean Cyclonic Vacuum Motor and Circuit Board Replacement: étape 15, image 2 de 3 Bissell OptiClean Cyclonic Vacuum Motor and Circuit Board Replacement: étape 15, image 3 de 3
    • Unplug each orange plug.

    • Make sure you remember which orange plug goes where!

  16. Bissell OptiClean Cyclonic Vacuum Motor and Circuit Board Replacement: étape 16, image 1 de 2 Bissell OptiClean Cyclonic Vacuum Motor and Circuit Board Replacement: étape 16, image 2 de 2
    • Unplug the red wires. The wires may be a little difficult to take off. If they are, you may use a pair of pliers to pull the wires off.

    • Make sure not to wiggle the wires, as that may break the metal holding them.

  17. Bissell OptiClean Cyclonic Vacuum Motor and Circuit Board Replacement: étape 17, image 1 de 1
    • Remove the top.

  18. Bissell OptiClean Cyclonic Vacuum Motor and Circuit Board Replacement: étape 18, image 1 de 2 Bissell OptiClean Cyclonic Vacuum Motor and Circuit Board Replacement: étape 18, image 2 de 2
    • Unscrew the top two screws on the vacuum.

  19. Bissell OptiClean Cyclonic Vacuum Motor and Circuit Board Replacement: étape 19, image 1 de 2 Bissell OptiClean Cyclonic Vacuum Motor and Circuit Board Replacement: étape 19, image 2 de 2
    • Unscrew the back two scews.

  20. Bissell OptiClean Cyclonic Vacuum Motor and Circuit Board Replacement: étape 20, image 1 de 3 Bissell OptiClean Cyclonic Vacuum Motor and Circuit Board Replacement: étape 20, image 2 de 3 Bissell OptiClean Cyclonic Vacuum Motor and Circuit Board Replacement: étape 20, image 3 de 3
    • Lift motor and move it over the gain access to the spool.

    • Unscrew the screw on the spool.

    • Remove the plastic circle.

  21. Bissell OptiClean Cyclonic Vacuum Motor and Circuit Board Replacement: étape 21, image 1 de 1
    • Remove the motor.

    • And you are done!

Conclusion

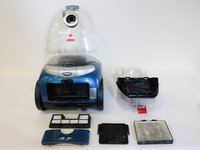
To reassemble your device, follow these instructions in reverse order.

Mathis Weyrich

Membre depuis le 01/18/18

276 Réputation

1 tutoriel rédigé

Équipe

Cal Poly, Team S12-G1, Banghart Winter 2018 Membre de l'équipe Cal Poly, Team S12-G1, Banghart Winter 2018

CPSU-BANGHART-W18S12G1

5 membres

5 tutoriels rédigés

Un commentaire

Thanks for all the very clear photos and descriptions. It was helpful to see where one of the gaskets belonged after I took things apart for a thorough cleaning.

It would be nice if the manuals for products came with such clear details and images.

I'm glad you and the contributors to this site care enough to provide information so appliances and electronics can be maintained and repaired rather than just discarded.

Jane S - Réponse

Ajouter un commentaire

Nombre de vues :

Dernières 24 heures : 0

7 derniers jours : 4

30 derniers jours : 10

Total : 518