Introduction
In the Black and Decker CHV1510, the battery pack is one of the main components to fail. This guide will show you how to replace the battery pack in your vacuum.
Ce dont vous avez besoin
-
-
Remove the six exterior 2 mm Phillips #0 screws securing the 2 halves of the white shell together.
-
-
-
-
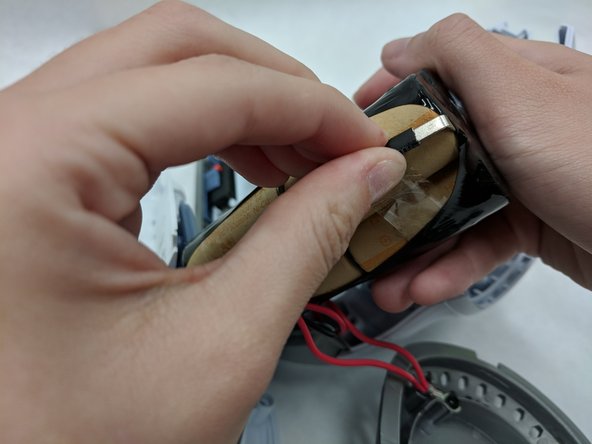
Disconnect the red wire from the battery pack (pull do not twist!) and do the same with the black wire
This is removing the battery pack, not replacing the battery pack. That would be the interesting part.
Okay then:
Step 7: connect replacement battery pack to the battery terminals, taking note of polarity.
Warning: if battery terminals are accidentally connected incorrectly in reverse polarity (i.e. black to red and vice versa) damage to the battery and device, and user injury may occur.
Step 8: Reassemble device by following disassembly instructions in reverse order.
Hope this helps.
danger -
Seems like a pointless excercise, as the original batteries are no good.
I have had two 15.6 DBs, including a warranty replacement, and maybe got 5 uses out of them before the batteries failed.
There are tips on replacing with NmH batteries on line, or get a new one with Lithium ion batteries.
I will second that. NmH batteries and maybe the charger are the problem, so it is pointless to thro more batteries in there.
Hi Peter, thank you for the above comments. Do you have any idea where to buy a NmH replacement battery ?
1. For the disassembly methodology, it would be better to remove the normally removable components first before removing the screws holding the motor/battery case together.
2. The link provided for battery replacement is no longer valid. Since online retailer merchandise web pages change frequently and therefore links soon go out of date, it’s best to search for a battery replacement at the time needed rather than provide a specific link. Be sure to search for your exact vacuum model number since the installed charger has to be compatible with the battery type.
1. Despite understandable reservations as to quality, eBay often has a good selection of replacement batteries. Preferred sellers are US -based as opposed to offshore and those that allow returns. Specification is crucial: type, (e.g., NiCd, Li-on), voltage, dimensions (new battery must obviously fit into vacuum case), battery terminals (type must be compatible with existing wiring - check against seller’s provided photo). If in doubt, send seller a question via eBay.
2. Check manufacturer recommendations for charging. Leaving a device permanently on charge when not in use may not necessarily be the best method for optimum battery life.
-
-
-
Holding the battery pack firmly, disconnect the red and black wires from the battery pack by pulling them gently.
These directions are fine, but they leave out the most difficult part: finding a replacement battery. Nobody sells them, so you can follow these directions and get the battery out, but you won’t have anything to replace it with.
-


To reassemble your device, follow these instructions in reverse order.
To reassemble your device, follow these instructions in reverse order.
Annulation : je n'ai pas terminé ce tutoriel.
2 autres ont terminé cette réparation.
Équipe

IUPUI, Team S7-G6, Baechle Fall 2017 Membre de l'équipe IUPUI, Team S7-G6, Baechle Fall 2017
IUPUI-BAECHLE-F17S7G6
3 membres
3 tutoriels rédigés
Un commentaire
The battery pack in no longer available and the 14 cells would cost more than a brand new dustbuster (Feb 25, 2021). I managed to get almost 10-years out of my CHV1510.