Aller au contenu principal

Black and Decker IR02V-T Power Cord Replacement

Ce dont vous avez besoin

  1. Black and Decker IR02V-T Power Cord Replacement, Power Cord: étape 1, image 1 de 3 Black and Decker IR02V-T Power Cord Replacement, Power Cord: étape 1, image 2 de 3 Black and Decker IR02V-T Power Cord Replacement, Power Cord: étape 1, image 3 de 3
    • Remove the two silicone covers which encase the screws.

    • Remove both 1 mm screws using a T5 Torx screwdriver.

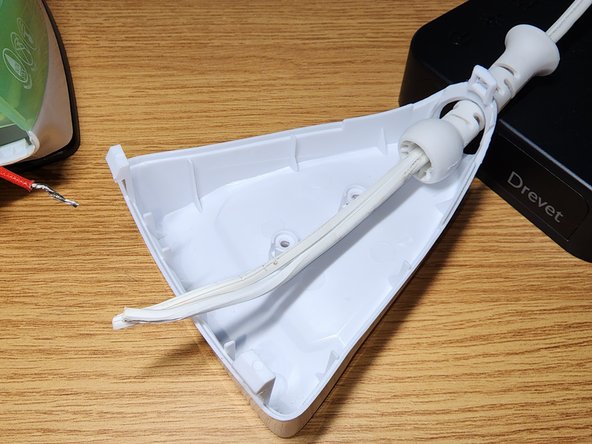
    • Pry open the plastic cover starting from the top of the iron.

  2. Black and Decker IR02V-T Power Cord Replacement: étape 2, image 1 de 3 Black and Decker IR02V-T Power Cord Replacement: étape 2, image 2 de 3 Black and Decker IR02V-T Power Cord Replacement: étape 2, image 3 de 3
    • Remove both caps from the end of the wire by using pliers.

    • Unfold the metal in the caps using the pliers to release the exposed wire.

    • Remove the two 1 mm screws holding down the wire using a Phillips #00 screwdriver.

    • Once the wires are exposed separate and fold to opposite sides.

  3. Black and Decker IR02V-T Power Cord Replacement: étape 3, image 1 de 3 Black and Decker IR02V-T Power Cord Replacement: étape 3, image 2 de 3 Black and Decker IR02V-T Power Cord Replacement: étape 3, image 3 de 3
    • Remove the old power cord from the iron completely.

    • Insert the new cord through the plastic cover and hole of the iron as demonstrated in the image.

  4. Black and Decker IR02V-T Power Cord Replacement: étape 4, image 1 de 3 Black and Decker IR02V-T Power Cord Replacement: étape 4, image 2 de 3 Black and Decker IR02V-T Power Cord Replacement: étape 4, image 3 de 3
    • Expose about half an inch of wire by removing the silicone that encases it.

    • Tie the new wire into a knot and connect the wires accordingly.

    • Place the caps over the exposed wire and use pliers to tighten the metal to secure the wire.

  5. Black and Decker IR02V-T Power Cord Replacement: étape 5, image 1 de 3 Black and Decker IR02V-T Power Cord Replacement: étape 5, image 2 de 3 Black and Decker IR02V-T Power Cord Replacement: étape 5, image 3 de 3
    • Once the caps are over the wires add the two 1 mm Phillips screws along with the small base plate which secures the wire.

    • When all wires are secure place the plastic cover and screw back in the 1mm Torx screws.

Ligne d'arrivée

Kevin B

Membre depuis le 11/10/22

146 Réputation

1 tutoriel rédigé

Équipe

CSU Los Angeles, Team 2-28, Briggs Fall 2022 Membre de l'équipe CSU Los Angeles, Team 2-28, Briggs Fall 2022

CSULA-BRIGGS-F22S2G28

1 membre

1 tutoriel rédigé

0 commentaires

Ajouter un commentaire

Nombre de vues :

Dernières 24 heures : 0

7 derniers jours : 5

30 derniers jours : 34

Total : 778