Cette version peut contenir des modifications incorrectes. Passez au dernier aperçu vérifié.
Ce dont vous avez besoin
-
Cette étape n’est pas traduite. Aidez à la traduire
-
Remove the carriage lever by pulling it away from the toaster.
-
-
Cette étape n’est pas traduite. Aidez à la traduire
-
Turn the toaster upside down.
-
Unscrew all four 4mm screws on the bottom using a Phillip's head #2 (PH2) screwdriver.
-
Or a slightly different model has six screws that require an allen wrench (hex key). Ones that have a ball end will not work. I had to use one that had more of a Star of David, pointy pattern to it.
-
-
Cette étape n’est pas traduite. Aidez à la traduire
-
Detach the bottom from the front cover using the plastic opening tool.
-
-
-
Cette étape n’est pas traduite. Aidez à la traduire
-
Turn the toaster right side up.
-
Lift the front cover.
-
-
Cette étape n’est pas traduite. Aidez à la traduire
-
Detach the bundled cable connector from the toaster by carefully pulling it away from the circuit board.
-
-
Cette étape n’est pas traduite. Aidez à la traduire
-
Lift the top cover up and remove it from the toaster.
-
-
Cette étape n’est pas traduite. Aidez à la traduire
-
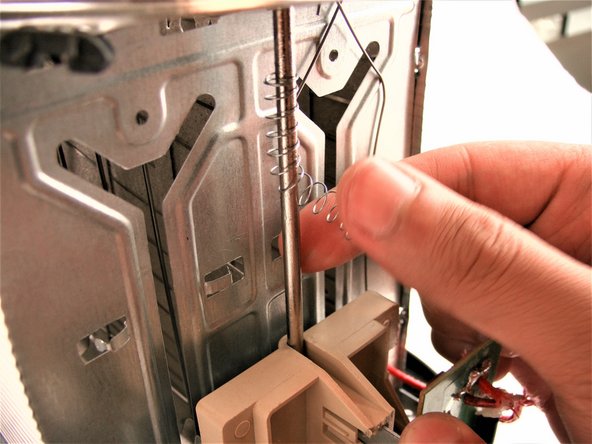
Use needle nose tweezers to free one end of the spring.
-
Turn the spring until it is completely free.
-
-
Cette étape n’est pas traduite. Aidez à la traduire
-
Remove spring for replacement.
-
Repeat steps for bottom spring.
-


Annulation : je n'ai pas terminé ce tutoriel.
Une autre personne a terminé cette réparation.
Équipe

USF Tampa, Team 8-1, Eyestone Spring 2017 Membre de l'équipe USF Tampa, Team 8-1, Eyestone Spring 2017
USFT-EYESTONE-S17S8G1
3 membres
5 tutoriels rédigés
Un commentaire
Hi there, thanks for this guide. I have a little issue : one of the screws is quite unusual, probably because it’s not meant to be repaired by a poor peasant. It has a little pin in it and I can’t unscrew it with the tools I have. Any tips ?