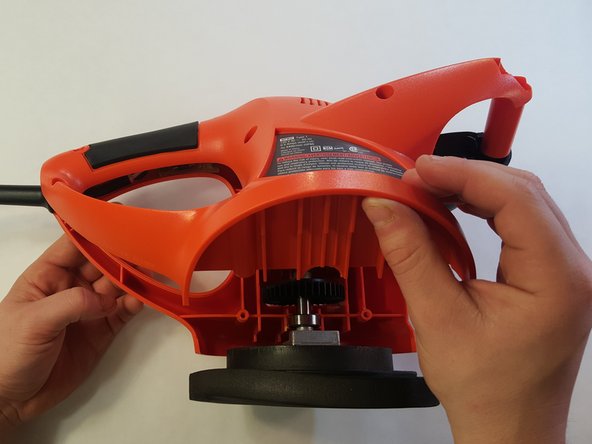
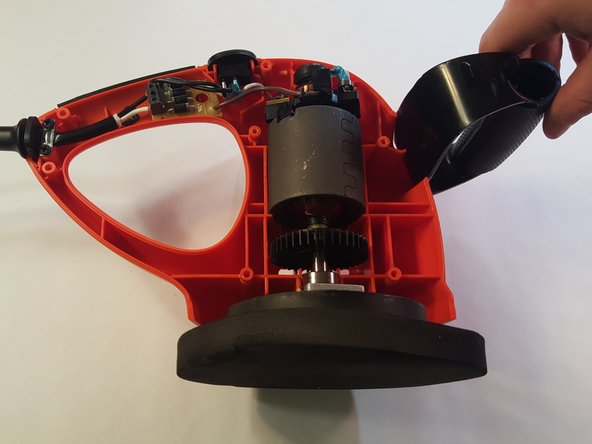
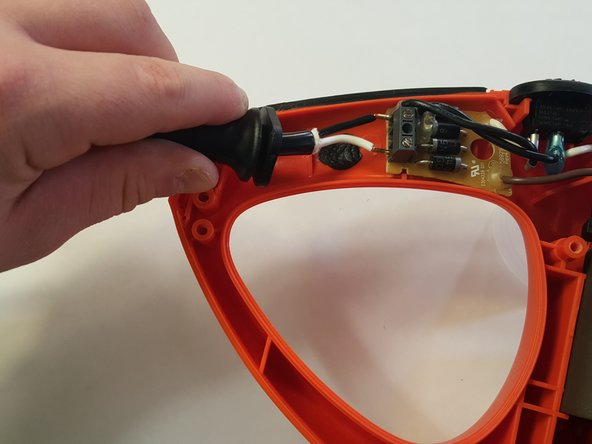
Aller au contenu principal

Black and Decker WP900 Power Switch Replacement

Ce dont vous avez besoin

  1. Black and Decker WP900 Power Switch Replacement, Power Switch: étape 1, image 1 de 1
    • Using the plastic tool, detach the handle tab as shown.

    • Make sure the device is unplugged.

  2. Black and Decker WP900 Power Switch Replacement: étape 2, image 1 de 1
    • Using the Philips #1 screwdriver, unscrew all of the screws. There should be 8-30mm screws to remove.

    • Be sure to keep track of where each screw was placed in the device for later reassembly.

  3. Black and Decker WP900 Power Switch Replacement: étape 3, image 1 de 3 Black and Decker WP900 Power Switch Replacement: étape 3, image 2 de 3 Black and Decker WP900 Power Switch Replacement: étape 3, image 3 de 3
    • Remove the back panel of the external casing, leaving all internal components resting in the front panel.

    • Remove the black handle from the main external casing.

  4. Black and Decker WP900 Power Switch Replacement: étape 4, image 1 de 1
    • Loosen the power cord and control panel. Using the Phillip's #1 screwdriver, remove two 22mm screws.

    • The metal bracket will detach with the two screws.

    • Using the Flathead 3/32" screwdriver, remove two 22mm screws.

  5. Black and Decker WP900 Power Switch Replacement: étape 5, image 1 de 2 Black and Decker WP900 Power Switch Replacement: étape 5, image 2 de 2
    • Gently pull the power cord out from the control module.

    • Remember, when reassembling the device, the black wire should be on the top

  6. Black and Decker WP900 Power Switch Replacement: étape 6, image 1 de 1
    • Firmly grasping the motor, dislodge the internal components from the frontal external casing.

    • Switch and control panel will be attached to magnet body.

  7. Black and Decker WP900 Power Switch Replacement: étape 7, image 1 de 1
    • Remove the switch from the wires.

    • Gently, pull and release the two wired connections.

    • The switch can now be replaced. Be sure not to damage the two connections to the control module in the process.

Conclusion

To reassemble your device, follow these instructions in reverse order.

Cameron

Membre depuis le 02/15/16

231 Réputation

2 tutoriels rédigés

Équipe

IUPUI, Team 8-8, Wilson Spring 2016 Membre de l'équipe IUPUI, Team 8-8, Wilson Spring 2016

IUPUI-WILSON-S16S8G8

4 membres

4 tutoriels rédigés

0 commentaires

Ajouter un commentaire

Nombre de vues :

Dernières 24 heures : 0

7 derniers jours : 1

30 derniers jours : 3

Total : 975