Aller au contenu principal

BlackBerry 8820 Motherboard Replacement

Ce dont vous avez besoin

  1. BlackBerry 8820 Motherboard Replacement, Disassembling BlackBerry 8820 Outer Casing: étape 1, image 1 de 1
    • Remove the battery cover by applying pressure and sliding down the silver square on the back of the phone.

  2. BlackBerry 8820 Motherboard Replacement: étape 2, image 1 de 2 BlackBerry 8820 Motherboard Replacement: étape 2, image 2 de 2
    • Remove the battery by prying under it with your finger or the plastic opening tool.

    • Remove the four small 3/8" long screws using a 1/16" diameter torx screwdriver.

  3. BlackBerry 8820 Motherboard Replacement: étape 3, image 1 de 2 BlackBerry 8820 Motherboard Replacement: étape 3, image 2 de 2
    • Use a nylon spudger to carefully remove the two side bars of plastic.

  4. BlackBerry 8820 Motherboard Replacement: étape 4, image 1 de 1
    • Use a nylon spudger to carefully pry the back casing off.

    • There are two small clamps on each edge that need to be unhooked before the casing will come off.

  5. BlackBerry 8820 Motherboard Replacement: étape 5, image 1 de 1
    • Pry off the front casing.

    • Be aware of sensors and other sensitive areas of the newly exposed electronics.

  6. BlackBerry 8820 Motherboard Replacement, Motherboard: étape 6, image 1 de 2 BlackBerry 8820 Motherboard Replacement, Motherboard: étape 6, image 2 de 2
    • Remove the bottom casing clip, it will easily unsnap when pulled

  7. BlackBerry 8820 Motherboard Replacement: étape 7, image 1 de 2 BlackBerry 8820 Motherboard Replacement: étape 7, image 2 de 2
    • Unhook both sides of the white wire from the motherboard using the plastic opening tool from before

  8. BlackBerry 8820 Motherboard Replacement: étape 8, image 1 de 2 BlackBerry 8820 Motherboard Replacement: étape 8, image 2 de 2
    • At the top of the phone, locate the gloss SATA cable strap connecting the LCD screen to the phone.

    • Using the prying tool, unattach this cable by levering under the connector

    • When removing the ribbon cable handle with care; it is prone to breaking

  9. BlackBerry 8820 Motherboard Replacement: étape 9, image 1 de 2 BlackBerry 8820 Motherboard Replacement: étape 9, image 2 de 2
    • WARNING: Be sure to have disconnected the SATA cable strap prior to attempting this.

    • Using the prying tool, lever up the old screen as shown.

  10. BlackBerry 8820 Motherboard Replacement: étape 10, image 1 de 3 BlackBerry 8820 Motherboard Replacement: étape 10, image 2 de 3 BlackBerry 8820 Motherboard Replacement: étape 10, image 3 de 3
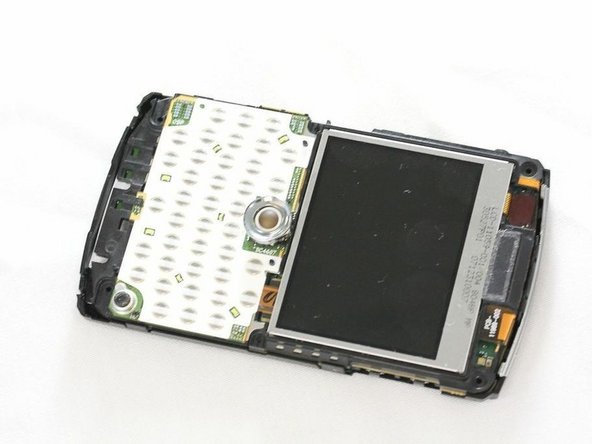
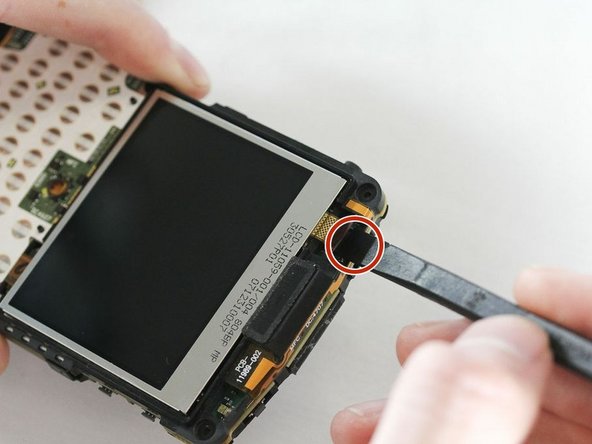
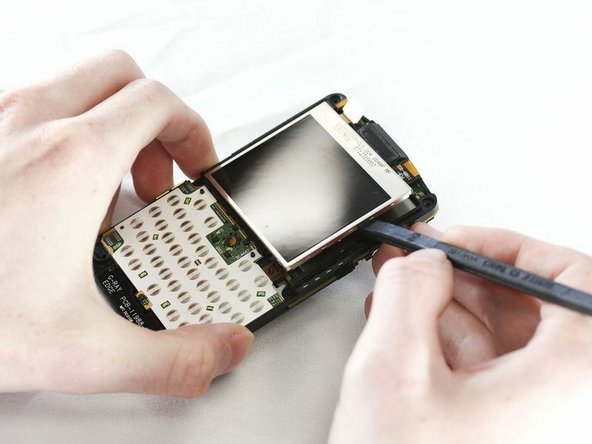
    • There will be two small clips on each side of the motherboard. Using the plastic opening tool unhook each clip one at a time

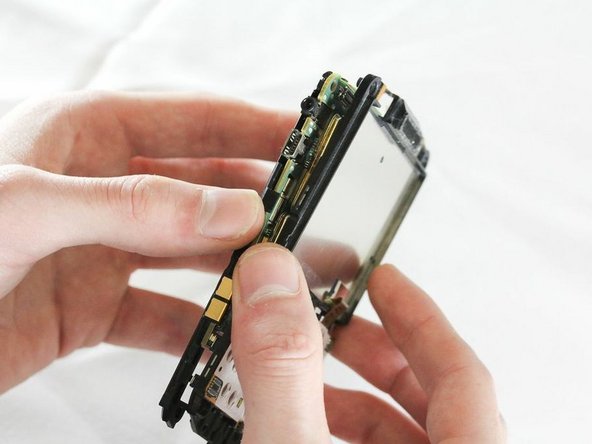
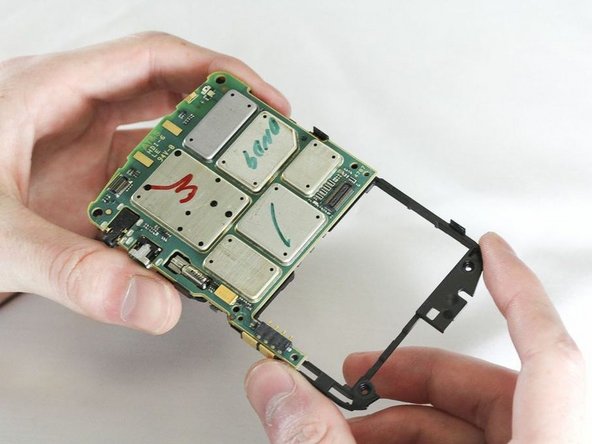
    • Once all four clips are unhooked you should be able to pull the motherboard from the casing using your hands.

    • After you remove the old motherboard, you can then replace it with a new one.

Conclusion

To reassemble your device, follow these instructions in reverse order.

3 autres ont terminé cette réparation.

ryan

Membre depuis le 04/12/13

44 Réputation

5 tutoriels rédigés

Équipe

Cal Poly, Team 13-64, Johann Spring 2013 Membre de l'équipe Cal Poly, Team 13-64, Johann Spring 2013

CPSU-JOHANN-S13S13G64

4 membres

7 tutoriels rédigés

0 commentaires

Ajouter un commentaire

Nombre de vues :

Dernières 24 heures : 0

7 derniers jours : 1

30 derniers jours : 6

Total : 883