Cette version peut contenir des modifications incorrectes. Passez au dernier aperçu vérifié.
Ce dont vous avez besoin
-
Cette étape n’est pas traduite. Aidez à la traduire
-
Press the cover release button on the bottom of your device. Lift and remove the back cover.
-
-
Cette étape n’est pas traduite. Aidez à la traduire
-
From the top, use your fingernail to lift the battery out.
-
-
-
Cette étape n’est pas traduite. Aidez à la traduire
-
Remove the six 7.0mm Torx screws securing the rear case to the rest of the phone.
-
-
Cette étape n’est pas traduite. Aidez à la traduire
-
Use the plastic opening tool to remove the rear case.
-
-
Cette étape n’est pas traduite. Aidez à la traduire
-
With the same plastic opening tool, lift the motherboard up and out.
-
Remove the motherboard assembly from left to right, raise the bottom of the circuit board first, slide back to allow the board to come free of the slot way it is inserted into at the top, and use caution near the audio jack on the right side of the device.
-
-
Cette étape n’est pas traduite. Aidez à la traduire
-
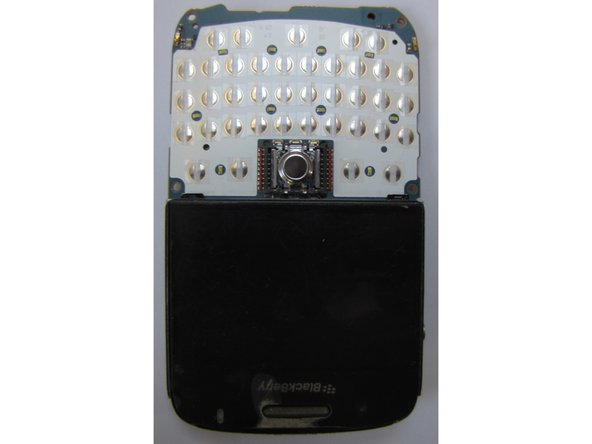
Holding the front cover, push the keyboard in with your thumbs.
-
Start at the top two corners, then repeat with the bottom two corners.
-


Annulation : je n'ai pas terminé ce tutoriel.
6 autres ont terminé cette réparation.
Équipe

Cal Poly, Team 8-17, Maness Winter 2012 Membre de l'équipe Cal Poly, Team 8-17, Maness Winter 2012
CPSU-MANESS-W12S8G17
4 membres
7 tutoriels rédigés
2 commentaires
This article describes removing the keypad button set and shows/describes nothing of replacing the keyboard electronics which controls the functionality of the keypad buttons. The keyboard electronics are on the reverse side of the motherboard assembly as seen in step 7. They are sealed beneath a sheet of plastic that contain a set of contact pads for the keyboard button set.
Most problems with this keyboard are likely associated with certain keys not functioning at all or responding in ways other than that intended. Repair/replacement looks improbable.
I had quite a few of the keyboard letters/numbers, spacebar and end call not functioning. Since I had the phone apart I decided to spray all of the keyboard white area and all the gold contact points around the perimeter with an electronic contact cleaner and wiped with a Q-tip. Reassembled it and - WOW - everything worked again. Thank you for the guide.
Ross -