Aller au contenu principal

Blackberry Torch 9810 Motherboard Replacement

Ce dont vous avez besoin

  1. Blackberry Torch 9810 Motherboard Replacement, Phone cover: étape 1, image 1 de 2 Blackberry Torch 9810 Motherboard Replacement, Phone cover: étape 1, image 2 de 2
    • Remove the back cover of the phone

  2. Blackberry Torch 9810 Motherboard Replacement, Battery Removal: étape 2, image 1 de 1
    • Remove the battery

  3. Blackberry Torch 9810 Motherboard Replacement, Remove Screws: étape 3, image 1 de 1
    • Unscrew the four screws using the T6 screw driver

    • If you remove the screw in red, you void the warranty!

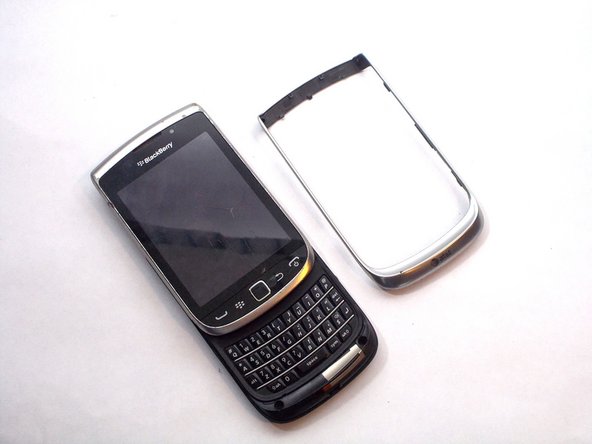
  4. Blackberry Torch 9810 Motherboard Replacement, Wiggle Wiggle: étape 4, image 1 de 2 Blackberry Torch 9810 Motherboard Replacement, Wiggle Wiggle: étape 4, image 2 de 2
    • Remove front silver trim by using plastic opening tools and wiggle it off.

    • This is difficult to remove, but it should come off if you do it with caution.

  5. Blackberry Torch 9810 Motherboard Replacement, More Screws: étape 5, image 1 de 1
    • Once you remove the rim cover, you should find two more screws on the top. Unscrew them using the T6 screw driver.

    It opened using a T7 screw driver for my mobile at this step

    ershanu - Réponse

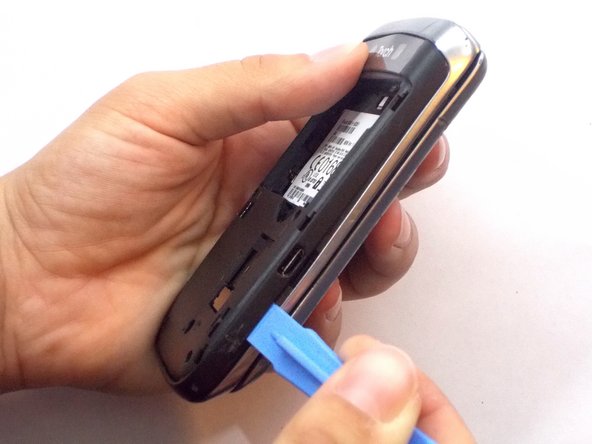
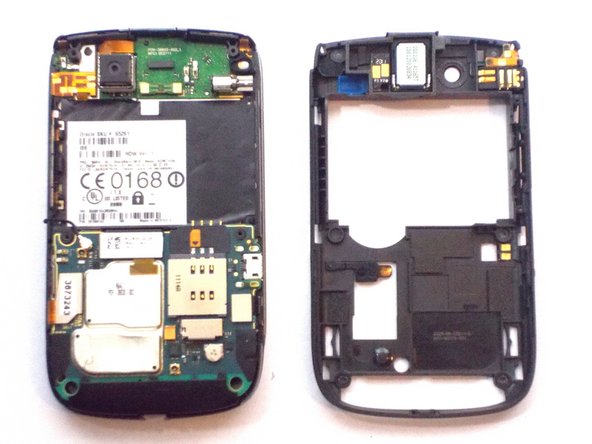
  6. Blackberry Torch 9810 Motherboard Replacement, Remove the Back: étape 6, image 1 de 3 Blackberry Torch 9810 Motherboard Replacement, Remove the Back: étape 6, image 2 de 3 Blackberry Torch 9810 Motherboard Replacement, Remove the Back: étape 6, image 3 de 3
    • Use the plastic removal tool to remove the entire back cover.

  7. Blackberry Torch 9810 Motherboard Replacement, Small Antenna Wire: étape 7, image 1 de 1
    • Unplug the black antenna wire from the logic board.

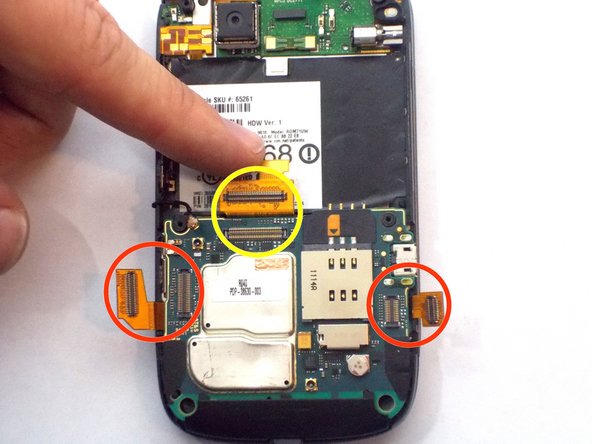
  8. Blackberry Torch 9810 Motherboard Replacement, Remove Ribbon Cables: étape 8, image 1 de 2 Blackberry Torch 9810 Motherboard Replacement, Remove Ribbon Cables: étape 8, image 2 de 2
    • Peel off the three ribbon cables

    • They are orange and located on each side as well as on the top of the logic board

    • The cable circled in yellow is glued to the silver cap. Pull the ribbon cable upward towards the battery area.

  9. Blackberry Torch 9810 Motherboard Replacement, Logic Board: étape 9, image 1 de 1
    • Take out your logic board

Conclusion

To reassemble your device, follow these instructions in reverse order.

5 autres ont terminé cette réparation.

Jocelyn Adorno

Membre depuis le 10/16/14

296 Réputation

4 tutoriels rédigés

Équipe

UMass Dartmouth, Team 6-6, Vijaybhaskar Fall 2014 Membre de l'équipe UMass Dartmouth, Team 6-6, Vijaybhaskar Fall 2014

UMASSD-VIJAYBHASKAR-F14S6G6

3 membres

4 tutoriels rédigés

0 commentaires

Ajouter un commentaire

Nombre de vues :

Dernières 24 heures : 1

7 derniers jours : 1

30 derniers jours : 9

Total : 3,393