Aller au contenu principal

Blu L120 Rear Facing Camera Replacement

Ce dont vous avez besoin

  1. Blu L120 Rear Facing Camera Replacement, Remove back panel: étape 1, image 1 de 3 Blu L120 Rear Facing Camera Replacement, Remove back panel: étape 1, image 2 de 3 Blu L120 Rear Facing Camera Replacement, Remove back panel: étape 1, image 3 de 3
    • Remove the cover by lifting the notch towards the bottom of the phone. Use your fingernail to lift it up.

  2. Blu L120 Rear Facing Camera Replacement, Screw Removal: étape 2, image 1 de 3 Blu L120 Rear Facing Camera Replacement, Screw Removal: étape 2, image 2 de 3 Blu L120 Rear Facing Camera Replacement, Screw Removal: étape 2, image 3 de 3
    • Remove these nine screws with a small phillips screwdriver. They are all the same size.

    • There is a small screw hidden under the warranty sticker. You may either remove or poke through it .

  3. Blu L120 Rear Facing Camera Replacement, Rear Panel  removal: étape 3, image 1 de 3 Blu L120 Rear Facing Camera Replacement, Rear Panel  removal: étape 3, image 2 de 3 Blu L120 Rear Facing Camera Replacement, Rear Panel  removal: étape 3, image 3 de 3
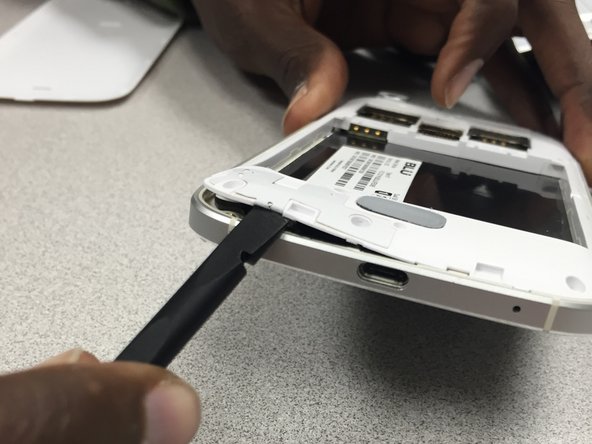
    • Use the pry tool to gently separate the panel from the frame, starting from the bottom left corner and continue along the edge of the phone.

    • *WARNING* by doing this, you will void the manufacturers warranty.

  4. Blu L120 Rear Facing Camera Replacement, Separate back panel from frame: étape 4, image 1 de 3 Blu L120 Rear Facing Camera Replacement, Separate back panel from frame: étape 4, image 2 de 3 Blu L120 Rear Facing Camera Replacement, Separate back panel from frame: étape 4, image 3 de 3
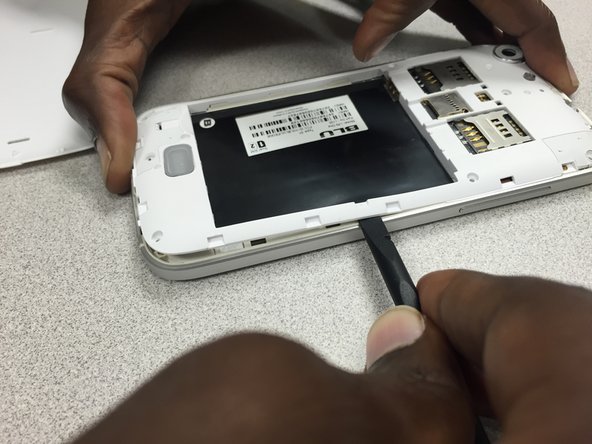
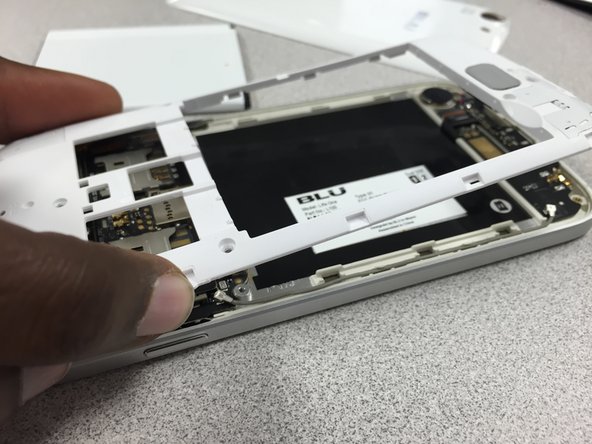
    • Continue using the pry tool around the back panel of the phone to separate both pieces.

    • Once you have gone around the entire frame, use both hands to pull it apart.

  5. Blu L120 Rear Facing Camera Replacement, Camera Removal: étape 5, image 1 de 3 Blu L120 Rear Facing Camera Replacement, Camera Removal: étape 5, image 2 de 3 Blu L120 Rear Facing Camera Replacement, Camera Removal: étape 5, image 3 de 3
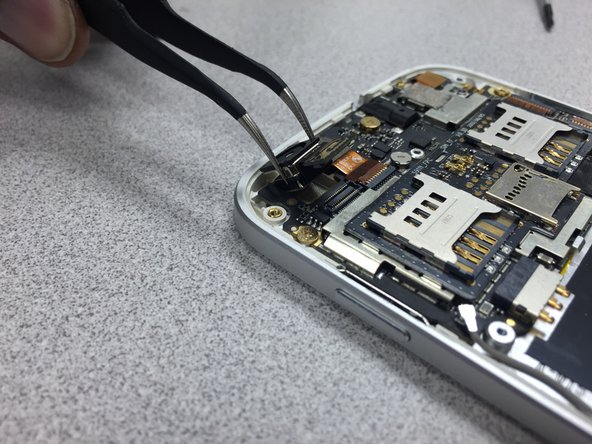
    • Use the pry tool to disconnect the camera from the device.

    • Gently lift the camera up and use the tweezers to remove it from the phone.

    • Reinstall the camera. Then follow the guide in reverse to put the phone back together.

Conclusion

To reassemble your device, follow these instructions in reverse order.

Julio

Membre depuis le 10/25/14

695 Réputation

6 tutoriels rédigés

Équipe

Gateway, Team 1-5, Johnson Fall 2014 Membre de l'équipe Gateway, Team 1-5, Johnson Fall 2014

GCC-JOHNSON-F14S1G5

3 membres

6 tutoriels rédigés

0 commentaires

Ajouter un commentaire

Nombre de vues :

Dernières 24 heures : 0

7 derniers jours : 0

30 derniers jours : 0

Total : 199