Aller au contenu principal

Bosch 3727DEVS On/Off Switch Replacement

Ce dont vous avez besoin

  1. Bosch 3727DEVS On/Off Switch Replacement, On/Off Switch: étape 1, image 1 de 3 Bosch 3727DEVS On/Off Switch Replacement, On/Off Switch: étape 1, image 2 de 3 Bosch 3727DEVS On/Off Switch Replacement, On/Off Switch: étape 1, image 3 de 3
    • Ensure that the power chord is not plugged into an outlet.

    • Using the T20 Torx Screwdriver, remove the four 15.6 mm screws securing the top cover to the sander.

    • Lift the top cover off the sander.

  2. Bosch 3727DEVS On/Off Switch Replacement: étape 2, image 1 de 3 Bosch 3727DEVS On/Off Switch Replacement: étape 2, image 2 de 3 Bosch 3727DEVS On/Off Switch Replacement: étape 2, image 3 de 3
    • Using the T20 Torx Screwdriver, remove the two 15.6 mm screws securing the cable clip to the motor housing.

    • Lift the cable clip and cord from motor housing.

  3. Bosch 3727DEVS On/Off Switch Replacement: étape 3, image 1 de 3 Bosch 3727DEVS On/Off Switch Replacement: étape 3, image 2 de 3 Bosch 3727DEVS On/Off Switch Replacement: étape 3, image 3 de 3
    Outil utilisé dans cette étape :
    Flathead 3/32" or 2.5 mm Screwdriver
    $5.49
    J'achète
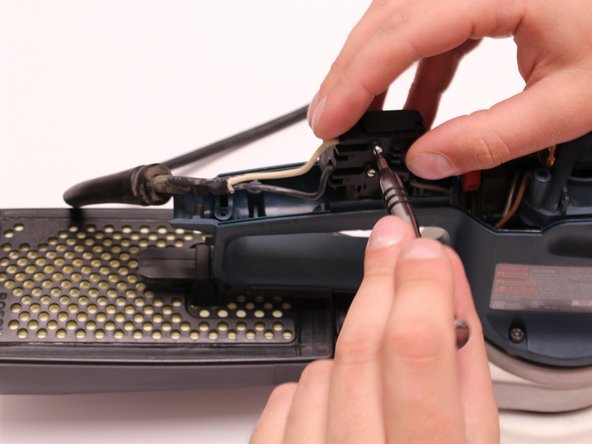
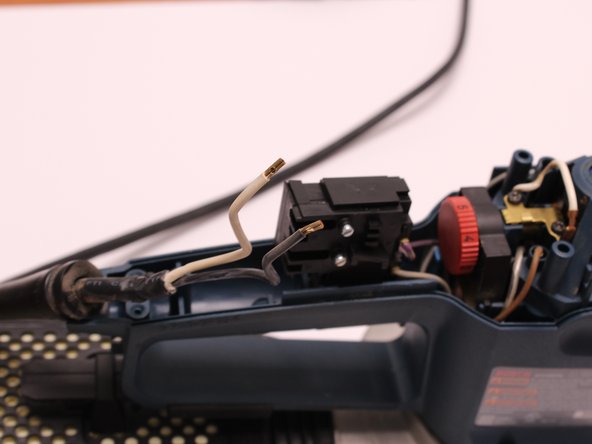
    • Using the 2.5 mm Flathead Screwdriver, loosen the two screws securing the white and black wires to the On/Off Switch.

  4. Bosch 3727DEVS On/Off Switch Replacement: étape 4, image 1 de 3 Bosch 3727DEVS On/Off Switch Replacement: étape 4, image 2 de 3 Bosch 3727DEVS On/Off Switch Replacement: étape 4, image 3 de 3
    • Remove the gray and purple wires by pulling on the wire terminals.

Conclusion

To reassemble your device, follow these instructions in reverse order.

Une autre personne a terminé cette réparation.

Peter Brouhle

Membre depuis le 01/29/16

146 Réputation

1 tutoriel rédigé

Équipe

0 commentaires

Ajouter un commentaire

Nombre de vues :

Dernières 24 heures : 0

7 derniers jours : 4

30 derniers jours : 9

Total : 435