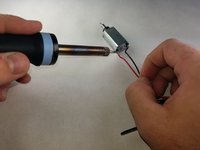
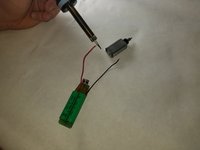
Aller au contenu principal

Braun 5514 Motor Replacement

Ce dont vous avez besoin

  1. Braun 5514 Motor Replacement, Motor: étape 1, image 1 de 1
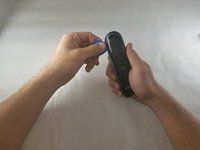
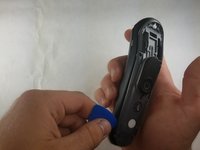
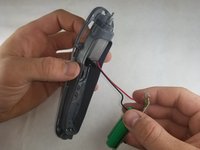
    • Remove any attached trimmer heads by gripping and pulling away from the body.

  2. Braun 5514 Motor Replacement: étape 2, image 1 de 3 Braun 5514 Motor Replacement: étape 2, image 2 de 3 Braun 5514 Motor Replacement: étape 2, image 3 de 3
    • Insert an opening pick between the top plate and the grey separator.

    • Slide the opening pick around the perimeter of the plate to release the hidden clips.

  3. Braun 5514 Motor Replacement: étape 3, image 1 de 1
    • Remove the four 7mm Torx T6 screws attaching the grey plastic frame to the black plastic casing.

  4. Braun 5514 Motor Replacement: étape 4, image 1 de 2 Braun 5514 Motor Replacement: étape 4, image 2 de 2
    • Use the opening pick to lift the grey frame from the black casing.

  5. Braun 5514 Motor Replacement: étape 5, image 1 de 2 Braun 5514 Motor Replacement: étape 5, image 2 de 2
    • Remove the circuit board assembly from the frame.

  6. Braun 5514 Motor Replacement: étape 6, image 1 de 1
    • Pull the small black plastic piece out of the frame.

  7. Braun 5514 Motor Replacement: étape 7, image 1 de 2 Braun 5514 Motor Replacement: étape 7, image 2 de 2
    • Desolder the wires attached to the motor.

    • Remember where the red and black wires attach in case the replacement motor doesn't have it labeled.

Conclusion

To reassemble your device, follow these instructions in reverse order.

3 autres ont terminé cette réparation.

Andrew Kluckhuhn

Membre depuis le 07/05/18

959 Réputation

2 tutoriels rédigés

Équipe

IUPUI, Team S2-G2, Harley Summer 2018 Membre de l'équipe IUPUI, Team S2-G2, Harley Summer 2018

IUPUI-HARLEY-SU18S2G2

4 membres

5 tutoriels rédigés

0 commentaires

Ajouter un commentaire

Nombre de vues :

Dernières 24 heures : 0

7 derniers jours : 17

30 derniers jours : 70

Total : 3,124