Aller au contenu principal
Pour réparer ensemble - Je crée un compte

Breville Duo-Temp 800ESXL Gasket Replacement

Ce dont vous avez besoin

    1. Breville Duo-Temp 800ESXL Gasket Replacement, Gasket: étape 1, image 1 de 3 Breville Duo-Temp 800ESXL Gasket Replacement, Gasket: étape 1, image 2 de 3 Breville Duo-Temp 800ESXL Gasket Replacement, Gasket: étape 1, image 3 de 3
      • With your left hand, strongly grip the handle of the portafilter.

      • Pull the handle to your left. This will unlock the portafilter.

      • If the portafilter lock is too tight, place your hand on the top or bottom of the machine to provide additional leverage.

      • Gently push down to release the portafilter.

      Demander à FixBot

      Ajouter un commentaire

    2. Breville Duo-Temp 800ESXL Gasket Replacement: étape 2, image 1 de 3 Breville Duo-Temp 800ESXL Gasket Replacement: étape 2, image 2 de 3 Breville Duo-Temp 800ESXL Gasket Replacement: étape 2, image 3 de 3
      • Slide the drip tray towards you to remove and set aside.

      • Two holes in the middle of the tray are available to make the tray easier to hold on to when removing.

      • Grasp the water reservoir using the front indention and the bottom of the tank.

      • Pull the water reservoir towards you to remove and set aside.

      • The drip tray and the water reservoir may contain water. Avoid spills if possible.

      Demander à FixBot

      Ajouter un commentaire

    3. Breville Duo-Temp 800ESXL Gasket Replacement: étape 3, image 1 de 1
      • Carefully lay the espresso machine on its side.

      • The espresso machine is top heavy with the drip tray and the water reservoir removed.

      Demander à FixBot

      Ajouter un commentaire

    4. Breville Duo-Temp 800ESXL Gasket Replacement: étape 4, image 1 de 3 Breville Duo-Temp 800ESXL Gasket Replacement: étape 4, image 2 de 3 Breville Duo-Temp 800ESXL Gasket Replacement: étape 4, image 3 de 3
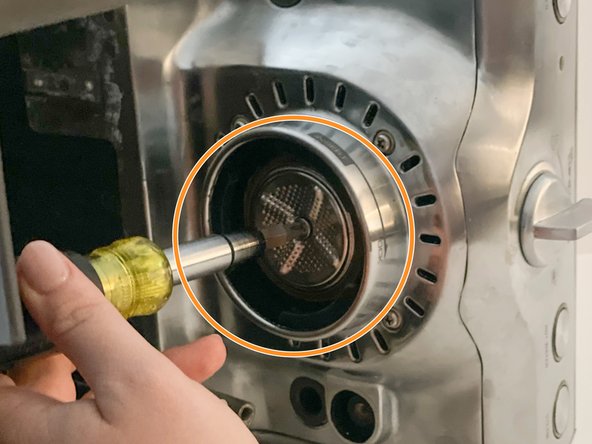
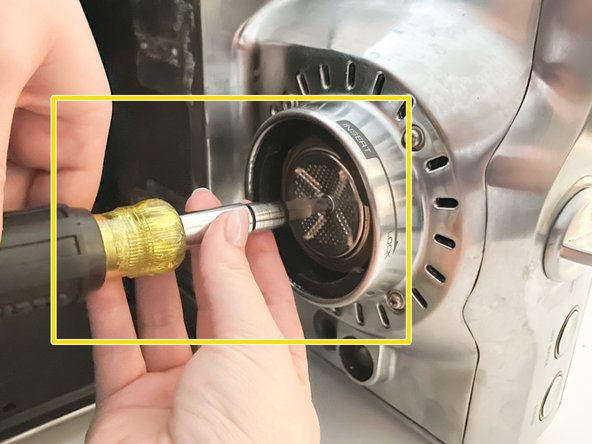
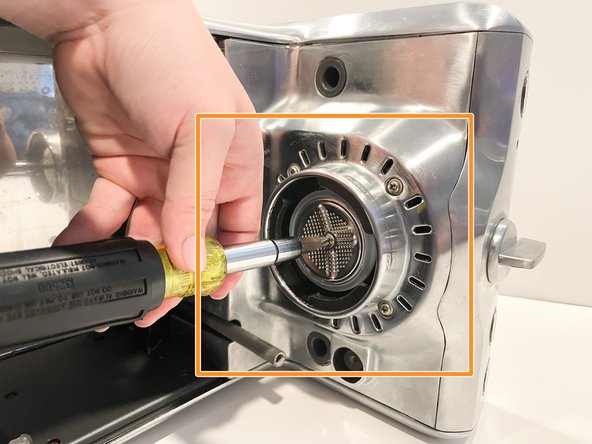
      • Line the Phillips screwdriver up with the screw located in the center of the group head screen.

      • Turn the screwdriver counter clockwise to remove the 6 mm Phillips #1 screw.

      • If the screw is tight, use both hands to turn the screw driver.

      • Applying pressure to the screwdriver will help prevent stripping the screw.

      Demander à FixBot

      Ajouter un commentaire

    5. Breville Duo-Temp 800ESXL Gasket Replacement: étape 5, image 1 de 2 Breville Duo-Temp 800ESXL Gasket Replacement: étape 5, image 2 de 2
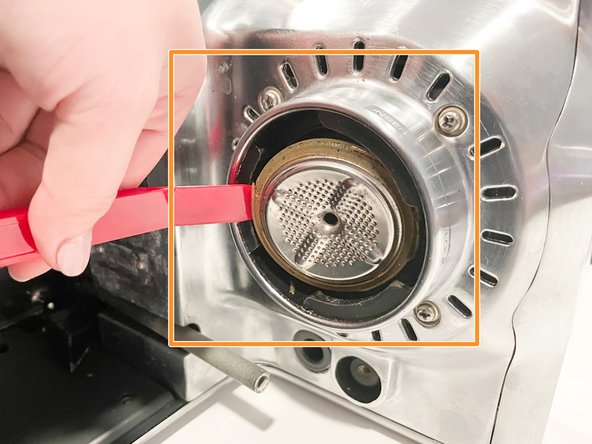
      • Insert the opening tool between the housing and the gasket.

      • Pry the gasket loose from the housing.

      • The screen is contained within the gasket and will not be damaged by prying the gasket loose.

      Demander à FixBot

      Ajouter un commentaire

    6. Breville Duo-Temp 800ESXL Gasket Replacement: étape 6, image 1 de 3 Breville Duo-Temp 800ESXL Gasket Replacement: étape 6, image 2 de 3 Breville Duo-Temp 800ESXL Gasket Replacement: étape 6, image 3 de 3
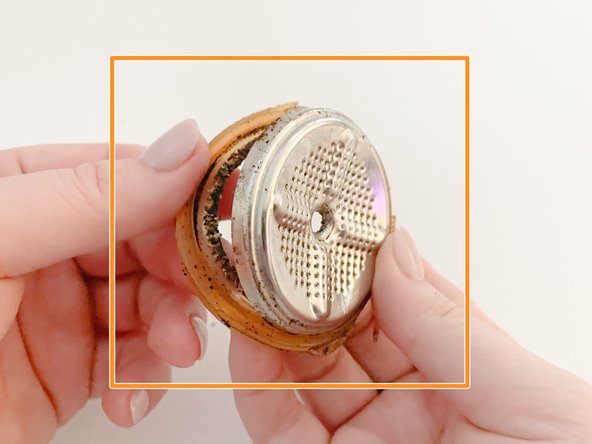
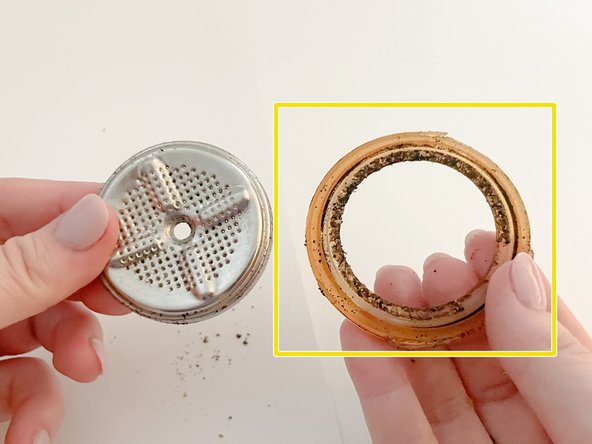
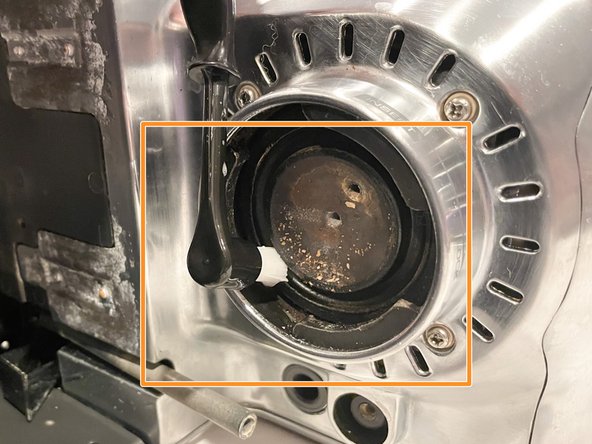
      • Remove the gasket and screen from the machine.

      • Peel back the gasket from the screen in a circular motion.

      • If the gasket is firmly stuck to the screen, soak in warm soapy water for approximately 30 minutes to loosen the coffee buildup.

      • Discard the old gasket.

      Demander à FixBot

      Ajouter un commentaire

    7. Breville Duo-Temp 800ESXL Gasket Replacement: étape 7, image 1 de 3 Breville Duo-Temp 800ESXL Gasket Replacement: étape 7, image 2 de 3 Breville Duo-Temp 800ESXL Gasket Replacement: étape 7, image 3 de 3
      • Soak the group head screen in warm soapy water.

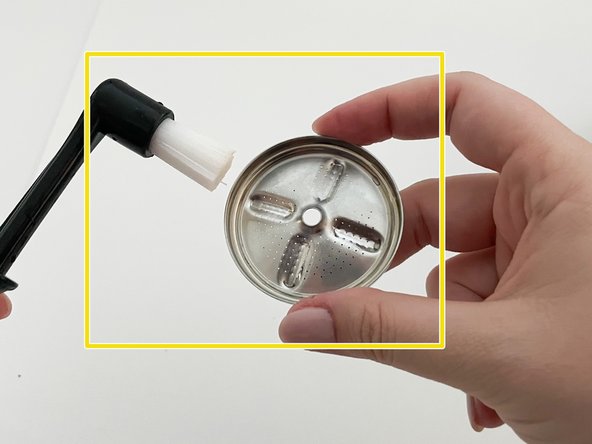
      • Clean the group head with a nylon espresso machine brush and warm soapy water.

      • Scrub the group head screen with a nylon espresso machine brush.

      • The group head screen should be completely free of coffee oils and build up.

      Demander à FixBot

      Ajouter un commentaire

    8. Breville Duo-Temp 800ESXL Gasket Replacement: étape 8, image 1 de 3 Breville Duo-Temp 800ESXL Gasket Replacement: étape 8, image 2 de 3 Breville Duo-Temp 800ESXL Gasket Replacement: étape 8, image 3 de 3
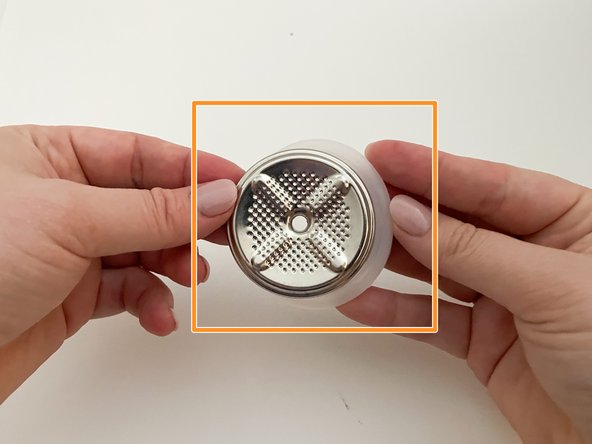
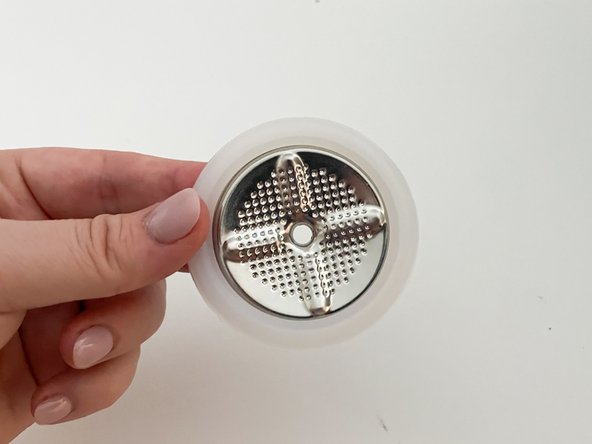
      • Place the group head screen inside the new gasket.

      • Firmly press the screen into the seal in a circular motion.

      • The screen fits snuggly but easily within the gasket.

      Demander à FixBot

      Ajouter un commentaire

    9. Breville Duo-Temp 800ESXL Gasket Replacement: étape 9, image 1 de 2 Breville Duo-Temp 800ESXL Gasket Replacement: étape 9, image 2 de 2
      • Place the gasket and screen back into the espresso machine.

      • Insert the 6 mm Phillips #1 screw back into the middle of the screen and tighten in a clockwise direction.

      • The tightness of the screw should be firm but not difficult to loosen. Do not over tighten the screw.

      Demander à FixBot

      Ajouter un commentaire

    10. Breville Duo-Temp 800ESXL Gasket Replacement: étape 10, image 1 de 2 Breville Duo-Temp 800ESXL Gasket Replacement: étape 10, image 2 de 2
      • Set the espresso machine upright.

      • Reattach the water reservoir and drip tray.

      Demander à FixBot

      Ajouter un commentaire

Conclusion

Your espresso machine is now ready to use. Fill your portafilter with coffee, brew and enjoy your espresso.

Annulation : je n'ai pas terminé ce tutoriel.

Carissa Baker

Membre depuis le 09/20/21

181 Réputation

1 tutoriel rédigé

Équipe

2 commentaires de tutoriel

thanks so much. Do you have a photo of the brew group without the screen on it? mine is so filthy and water was only coming out of one side-Lily

Lily White - Réponse Partager

Hi! Water is coming out of those holes on top when I try to make espresso. Does that mean I need to replace the gasket? What do you think the issue is? Thanks!

Haley Shanahan - Réponse Partager

Ajouter un commentaire

Nombre de vues :

Dernières 24 heures : 3

7 derniers jours : 25

30 derniers jours : 109

Total : 8,371