Aller au contenu principal
Brother CS6000i LCD Screen Replacement

Brother CS6000i LCD Screen Replacement

Wasim Benbrahim

Wasim Benbrahim et 3 autres contributeurs

Dernière mise à jour le December 31, 2024

10 - 20 minutes
Facile
Tutoriel étudiant vedette

This guide will be showing you how to replace the LCD screen on a Brother CS6000i sewing machine. The LCD screen helps the user identify what sewing mode and speed they are working with. Some common symptoms particularly related to a faulty LCD screen would be faulty diodes or a blank screen while the machine is in operation.

Before beginning make sure power is disconnected and needle is removed from machine to prevent injury from electrical shock and or sharp objects.

Ce dont vous avez besoin

iFixit touche une commission lorsque vous achetez par l'intermédiaire de ces liens.
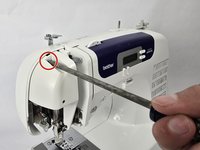
  1. Brother CS6000i LCD Screen Replacement, Body: étape 1, image 1 de 2 Brother CS6000i LCD Screen Replacement, Body: étape 1, image 2 de 2
    • Remove the five 20 mm Phillips #2 screws on the back of the device.

    • Remove the single 28 mm Phillips #2 screw on the back of the device.

    • Remove the single 23 mm Phillips #2 screw on the back of the device.

  2. Brother CS6000i LCD Screen Replacement: étape 2, image 1 de 2 Brother CS6000i LCD Screen Replacement: étape 2, image 2 de 2
    • Pull the white cover off.

  3. Brother CS6000i LCD Screen Replacement: étape 3, image 1 de 2 Brother CS6000i LCD Screen Replacement: étape 3, image 2 de 2
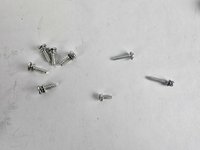
    • Remove the final screw, a 11 mm Phillips #2.

    • After removing all eight screws, you will have five 2 mm screws, one 28 mm screw, one 23 mm screw, and one 11 mm screw, all of which are Phillips #2.

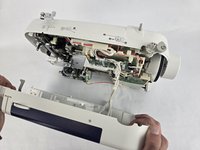
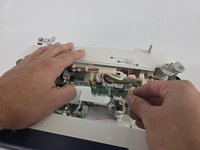
  4. Brother CS6000i LCD Screen Replacement: étape 4, image 1 de 3 Brother CS6000i LCD Screen Replacement: étape 4, image 2 de 3 Brother CS6000i LCD Screen Replacement: étape 4, image 3 de 3
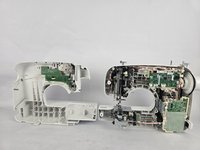
    • Slightly pull apart the two halves of the machine, taking care not to strain the attached cables.

    • Unhook the white wires that are connected to the motherboard.

    • Fully separate the two halves.

  5. Brother CS6000i LCD Screen Replacement, LCD Screen: étape 5, image 1 de 1
    • Remove the two 10 mm Philips #2 screws that secure the screen.

    • Unplug the ribbon cable located at the top of the circuit board, then gently remove the LCD screen.

Conclusion

To reassemble your device, follow these instructions in reverse order.

Une autre personne a terminé cette réparation.

Wasim Benbrahim

Membre depuis le 11/04/24

152 Réputation

1 tutoriel rédigé

Équipe

Cuesta, Team 20-1, Krynen Fall 2024 Membre de l'équipe Cuesta, Team 20-1, Krynen Fall 2024

CUESTA-KRYNEN-F24S20G1

5 membres

8 tutoriels rédigés

0 commentaires de tutoriel

Ajouter un commentaire

Nombre de vues :

Dernières 24 heures : 0

7 derniers jours : 2

30 derniers jours : 25

Total : 87