Cette version peut contenir des modifications incorrectes. Passez au dernier aperçu vérifié.
Ce dont vous avez besoin
-
Cette étape n’est pas traduite. Aidez à la traduire
-
Remove 2 screws from each side of the amplifier.
-
-
Cette étape n’est pas traduite. Aidez à la traduire
-
Remove 2 screws on rear of device. Slide top cover up and back from main case.
-
-
-
Cette étape n’est pas traduite. Aidez à la traduire
-
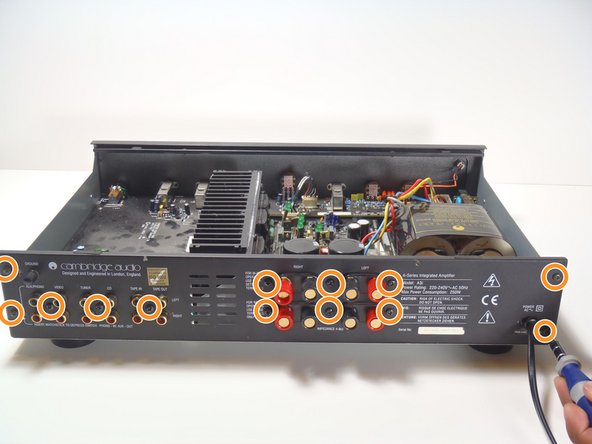
Remove 3 screws on bottom of case.
-
Remove 13 screws on rear panel.
-
-
Cette étape n’est pas traduite. Aidez à la traduire
-
Using a pair of pliers, squeeze the retainer for the power cord as shown and pull it toward the external side the panel.
-
It may require some wiggling, but it should slip out of the hole and then off of the cord.
-
-
Cette étape n’est pas traduite. Aidez à la traduire
-
Carefully de-solder ends of power cord from circuit board.
-
Keep track of the colors of the cords. The brown cord leads to the L on the circuit board, and this cord will lead to a fuse in the power plug. The blue cord leads to the N on the board.
-
Finally, pull the power cord through the rear panel to completely remove it.
-
-
Cette étape n’est pas traduite. Aidez à la traduire
-
Remove the 4 nuts holding down the transformer bracket using a 7mm nut driver or socket.
-


Annulation : je n'ai pas terminé ce tutoriel.
5 autres ont terminé cette réparation.

Équipe

Cal Poly, Team 28-36, Regan Spring 2010 Membre de l'équipe Cal Poly, Team 28-36, Regan Spring 2010
CPSU-REGAN-S10S28G36
4 membres
3 tutoriels rédigés