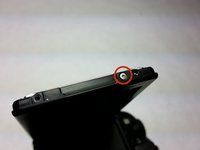
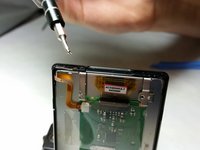
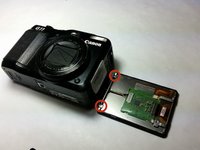
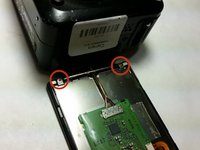
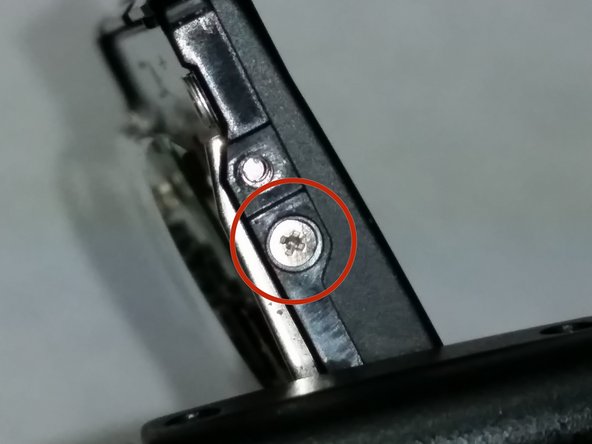
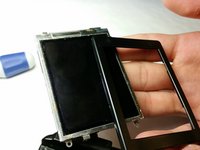
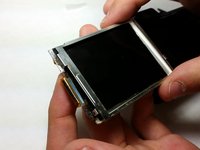
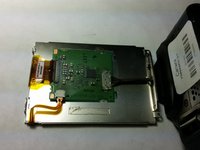
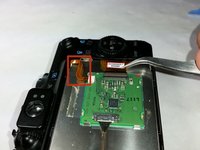
Aller au contenu principal

Canon PowerShot G11 LCD Screen Replacement

Ce dont vous avez besoin

  1. Canon PowerShot G11 LCD Screen Replacement, LCD Screen: étape 1, image 1 de 1
    • Remove the two 3.10mm Phillips #00 screws from the LCD case.

  2. Canon PowerShot G11 LCD Screen Replacement: étape 2, image 1 de 1
    • Open the LCD screen and turn it so the screen is facing the bottom of the camera, the screw is on the bottom of the LCD screen.

    • Remove the 3.10mm Philips #00 screw from the bottom end of the LCD screen.

  3. Canon PowerShot G11 LCD Screen Replacement: étape 3, image 1 de 1
    • Turn the LCD so that the screen is facing the top of the camera, the screw you need is on the bottom of the LCD screen.

    • Remove the 3.10mm Philips #00 screw.

  4. Canon PowerShot G11 LCD Screen Replacement: étape 4, image 1 de 1
    • Use the plastic opening tool on the indent at the top of the LCD screen to pop off the LCD case.

  5. Canon PowerShot G11 LCD Screen Replacement: étape 5, image 1 de 2 Canon PowerShot G11 LCD Screen Replacement: étape 5, image 2 de 2
    • Remove the 2.22mm Phillips #00 screw that is located next to the indent handle.

    • When the top screw is removed the small metal bracket will fall out, when reassembling the LCD screen remember to put it back on.

  6. Canon PowerShot G11 LCD Screen Replacement: étape 6, image 1 de 2 Canon PowerShot G11 LCD Screen Replacement: étape 6, image 2 de 2
    • Once the back panel is off remove the two 3.13mm Philips #00 screws.

    • There are magnets next the screws so when you reassemble the LCD screen make note of this, they will move the screws.

  7. Canon PowerShot G11 LCD Screen Replacement: étape 7, image 1 de 2 Canon PowerShot G11 LCD Screen Replacement: étape 7, image 2 de 2
    • On the bottom of the LCD screen carefully turn it so the screen is facing the top of the camera and remove the 2.22mm Phillips #00 screw.

    • Once this screw comes off the top case will come off and the LCD screen will be held by only the wires so handle it carefully so as not to damage the wires.

  8. Canon PowerShot G11 LCD Screen Replacement: étape 8, image 1 de 3 Canon PowerShot G11 LCD Screen Replacement: étape 8, image 2 de 3 Canon PowerShot G11 LCD Screen Replacement: étape 8, image 3 de 3
    • Remove the screen from the base of the LCD.

    • Do not pull because the wire strip is still attached to the LCD base.

    • Do not remove this wire, it is not needed when replacing the screen.

  9. Canon PowerShot G11 LCD Screen Replacement: étape 9, image 1 de 3 Canon PowerShot G11 LCD Screen Replacement: étape 9, image 2 de 3 Canon PowerShot G11 LCD Screen Replacement: étape 9, image 3 de 3
    • Use the tweezers to lift the small brown plastic snap before you remove the wire.

Conclusion

To reassemble your device, follow these instructions in reverse order.

2 autres ont terminé cette réparation.

Pablo Martinez

Membre depuis le 01/21/15

163 Réputation

1 tutoriel rédigé

Équipe

USF Tampa, Team 5-6, Brown Winter 2015 Membre de l'équipe USF Tampa, Team 5-6, Brown Winter 2015

USFT-BROWN-W15S5G6

3 membres

6 tutoriels rédigés

3 commentaires

Did this. The first time i put it ack together it did not work , Had totake apart and adjust wires okay after put bake together again.

Jim Murphy - Réponse

Followed these instructions and the result is excellent. Well done, and thanks very much. Saved me buying another camera!

Steve Rayner - Réponse

How do you get a new screen on there?

Jacob Fields - Réponse

Ajouter un commentaire

Nombre de vues :

Dernières 24 heures : 0

7 derniers jours : 14

30 derniers jours : 47

Total : 4,218