Aller au contenu principal

Canon Powershot SD750 Flash Replacement

Ce dont vous avez besoin

  1. Canon Powershot SD750 Flash Replacement, Camera Case: étape 1, image 1 de 1
    • Turn the camera to the side that has the attachment for the wrist strap.

    • Unscrew the two black 3.4 mm screws with a #00 Phillips screwdriver.

  2. Canon Powershot SD750 Flash Replacement: étape 2, image 1 de 1
    • Remove the plastic subsection by prying it with your fingers.

    • Note: It may be helpful to pry from the bottom of the camera with the battery door open.

    • The wrist strap attachment behind the subsection will come loose and may fall out.

  3. Canon Powershot SD750 Flash Replacement: étape 3, image 1 de 1
    • Turn the camera over to the side opposite of the wrist strap.

    • Remove the two silver 3.4 mm screws with a #00 Phillips screwdriver.

  4. Canon Powershot SD750 Flash Replacement: étape 4, image 1 de 1
    • Flip the camera upside down.

    • Remove the following screws with a #00 Phillips screwdriver.

    • One black 3.4 mm Phillips screw.

    • One silver 3.4 mm Phillips screw.

    • NOTE: Using your fingernails may help in removal.

  5. Canon Powershot SD750 Flash Replacement: étape 5, image 1 de 1
    • Place the camera on the side opposite of the wrist strap handle.

    • Then begin to pry the casing apart with both hands by applying pressure to the top and bottom of the camera.

    • Remove the small metal plate underneath the plastic covering and set aside. (It should be loosely attached)

    • Note: A rubber foam washer that separates the lens from the casing will fall off when the case is removed. Be sure to store it safely.

    • Note: When reassembling ensure the back plate screw tabs are over the wrist strap attachment and the front plate screw tabs go under orange casing.

  6. Canon Powershot SD750 Flash Replacement, LCD Screen: étape 6, image 1 de 1
    • Flip the camera right side up.

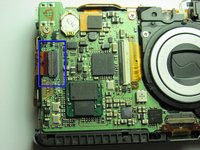
    • Remove the silver 3.5 mm screw (located on top of the camera) with a #00 Phillips screwdriver.

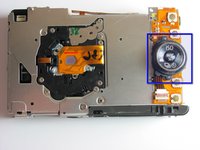
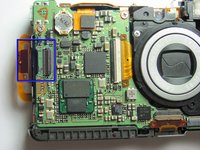
    • Grip the corner of the A/V digital port and pull up and outward.

    • Note: You may encounter some resistance when removing the A/V digital port. Apply enough pressure in order to remove this piece.

    • Note: When reassembling, snap the corner plate back into its position. (Push down and inward)

  7. Canon Powershot SD750 Flash Replacement: étape 7, image 1 de 1
    • Turn the camera forward so that the LCD screen is facing you.

    • Remove the silver 3.4 mm screw at the top right hand corner of the LCD screen with a #00 Phillips screwdriver.

  8. Canon Powershot SD750 Flash Replacement: étape 8, image 1 de 1
    • Slide the LCD screen to the left of the camera and then gently pull the LCD screen away from the camera.

    • Note: Hold the screen and frame together.

    • Be sure to align the screen properly.

    • Be gentile and do not tear the ribbon connector for the LCD screen to camera.

  9. Canon Powershot SD750 Flash Replacement: étape 9, image 1 de 2 Canon Powershot SD750 Flash Replacement: étape 9, image 2 de 2
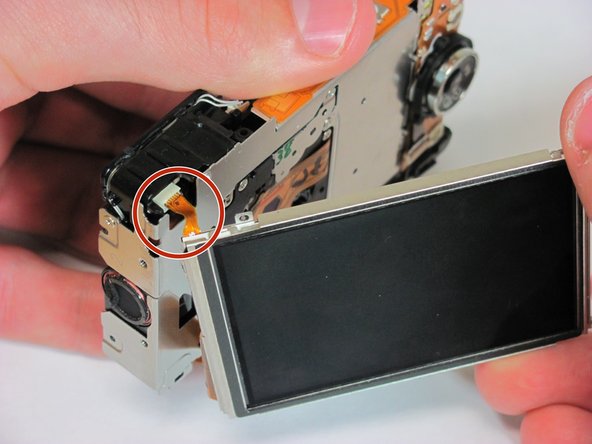
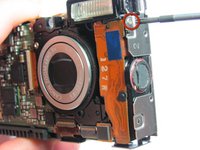
    • Locate the two ribbons connected to the camera and the LCD screen. (One is red and small and the other is wide and orange)

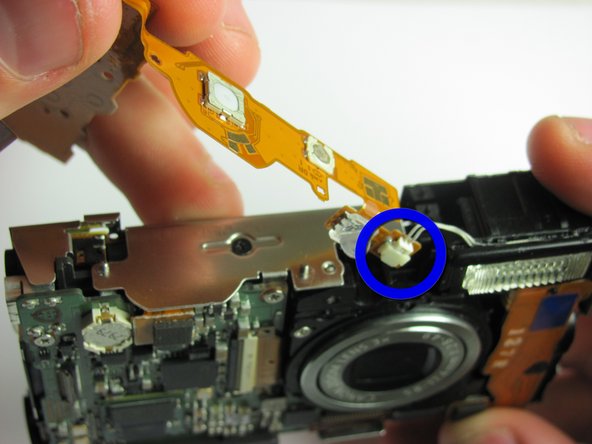
    • Remove the top left red ribbon by gripping the connector on the camera and sliding it straight out.

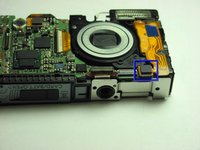
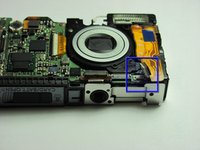
    • Remove the side orange ribbon by gripping the connector on the camera and sliding it straight out.

    • Note: It may be helpful to use tweezers when removing the connectors. (Pay close attention to how the ribbons are disconnected as this will help in replacing the screen later)

    • Note: When reassembling, use tweezers to reconnect the small red connector on the top left of the screen.

  10. Canon Powershot SD750 Flash Replacement, Flash: étape 10, image 1 de 2 Canon Powershot SD750 Flash Replacement, Flash: étape 10, image 2 de 2
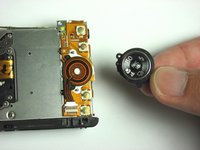
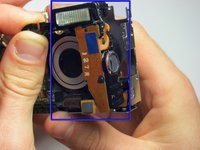
    • Remove the plastic and rubber circular button from the back of the camera by lifting it with your fingers.

    • Note: the LCD screen can be connected to the device at this step.

  11. Canon Powershot SD750 Flash Replacement: étape 11, image 1 de 1
    • Disconnect the orange and black plastic ribbon that was underneath the circular rubber button by flipping up the ZIF connector and then sliding the ribbon out with your fingers.

  12. Canon Powershot SD750 Flash Replacement: étape 12, image 1 de 2 Canon Powershot SD750 Flash Replacement: étape 12, image 2 de 2
    • Disconnect the ribbon that attaches to the left side of the motherboard by flipping up the ZIF connector and then sliding the ribbon out.

  13. Canon Powershot SD750 Flash Replacement: étape 13, image 1 de 1
    • Disconnect the white connector on the top right side of the camera by pulling the wire out of the connector with your fingers.

  14. Canon Powershot SD750 Flash Replacement: étape 14, image 1 de 2 Canon Powershot SD750 Flash Replacement: étape 14, image 2 de 2
    • Disconnect the connector at the bottom of the camera that attaches the flash to the motherboard by gripping it with you fingers and flipping it up.

  15. Canon Powershot SD750 Flash Replacement: étape 15, image 1 de 2 Canon Powershot SD750 Flash Replacement: étape 15, image 2 de 2
    • Remove the 3.4 mm Phillips screw on the right side of the camera

    • Then, maneuver the flash along with its components (capacitor and speaker) out of the camera.

Conclusion

To reassemble your device, follow these instructions in reverse order.

Une autre personne a terminé cette réparation.

Jeff Smith

Membre depuis le 09/30/10

4 Réputation

1 tutoriel rédigé

Équipe

Cal Poly, Team 14-37, Forte Fall 2010 Membre de l'équipe Cal Poly, Team 14-37, Forte Fall 2010

CPSU-FORTE-F10S14G37

4 membres

6 tutoriels rédigés

0 commentaires

Ajouter un commentaire

Nombre de vues :

Dernières 24 heures : 0

7 derniers jours : 1

30 derniers jours : 4

Total : 3,406