Aller au contenu principal

Canon Powershot SX500 IS Back Cover Replacement

Ce dont vous avez besoin

  1. Canon Powershot SX500 IS Back Cover Replacement, Battery: étape 1, image 1 de 1
    • Rotate the camera to expose the underside of the camera.

  2. Canon Powershot SX500 IS Back Cover Replacement: étape 2, image 1 de 1
    • Slide the rounded rectangle tab to the left to release the battery cover.

  3. Canon Powershot SX500 IS Back Cover Replacement: étape 3, image 1 de 1
    • Push the small orange tab forward to release the battery (Battery is ready for removal).

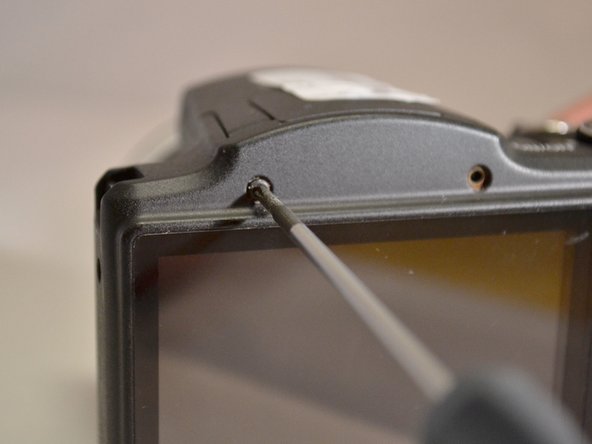
  4. Canon Powershot SX500 IS Back Cover Replacement, Back Cover: étape 4, image 1 de 3 Canon Powershot SX500 IS Back Cover Replacement, Back Cover: étape 4, image 2 de 3 Canon Powershot SX500 IS Back Cover Replacement, Back Cover: étape 4, image 3 de 3
    • Using the Phillips 00 screwdriver, remove the two 4mm top screws above the LCD screen.

  5. Canon Powershot SX500 IS Back Cover Replacement: étape 5, image 1 de 1
    • Using the Phillips 00 screwdriver, remove the two 4mm side screws to the left of the LCD screen.

  6. Canon Powershot SX500 IS Back Cover Replacement: étape 6, image 1 de 1
    • Using the Phillips 00 screwdriver, remove the two 4mm side screws to the left of the LCD screen.

  7. Canon Powershot SX500 IS Back Cover Replacement: étape 7, image 1 de 1
    • Using the Phillips 00 screwdriver, remove the three 4mm screws from the underside of the camera.

  8. Canon Powershot SX500 IS Back Cover Replacement: étape 8, image 1 de 2 Canon Powershot SX500 IS Back Cover Replacement: étape 8, image 2 de 2
    • Using the plastic pry tool, remove the back cover from camera.

Conclusion

To reassemble your device, follow these instructions in reverse order.

3 autres ont terminé cette réparation.

Jody Wilkerson

Membre depuis le 04/07/15

565 Réputation

4 tutoriels rédigés

0 commentaires

Ajouter un commentaire

Nombre de vues :

Dernières 24 heures : 1

7 derniers jours : 4

30 derniers jours : 5

Total : 485