Aller au contenu principal

Canon Vixia HF S10 Camcorder Mini Advance Shoe Replacement

Ce dont vous avez besoin

  1. Canon Vixia HF S10 Camcorder Mini Advance Shoe Replacement, Mini Advance Shoe: étape 1, image 1 de 1
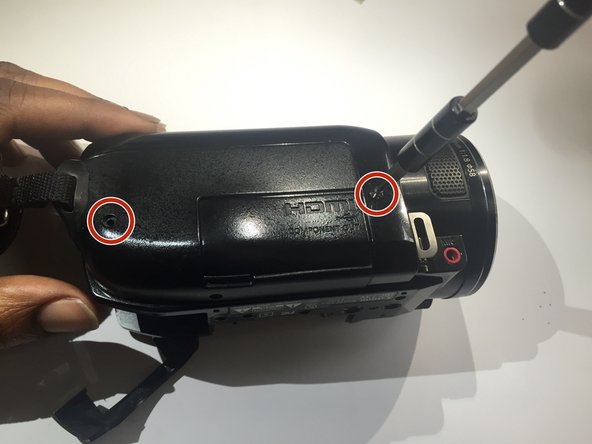
    • Flip the camcorder upside down and remove the three 3x4 mm Phillips screws highlighted in the diagram.

  2. Canon Vixia HF S10 Camcorder Mini Advance Shoe Replacement: étape 2, image 1 de 3 Canon Vixia HF S10 Camcorder Mini Advance Shoe Replacement: étape 2, image 2 de 3 Canon Vixia HF S10 Camcorder Mini Advance Shoe Replacement: étape 2, image 3 de 3
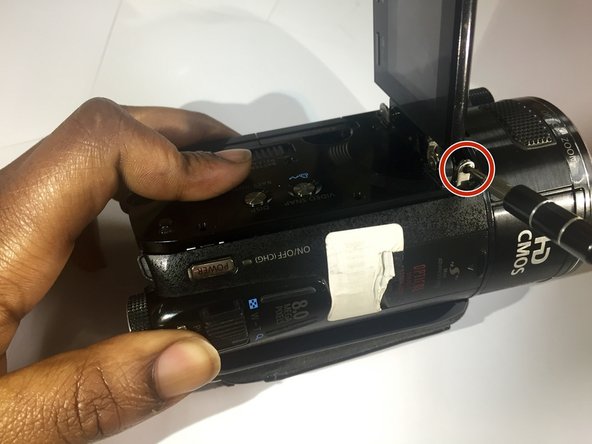
    • Open the LCD screen.

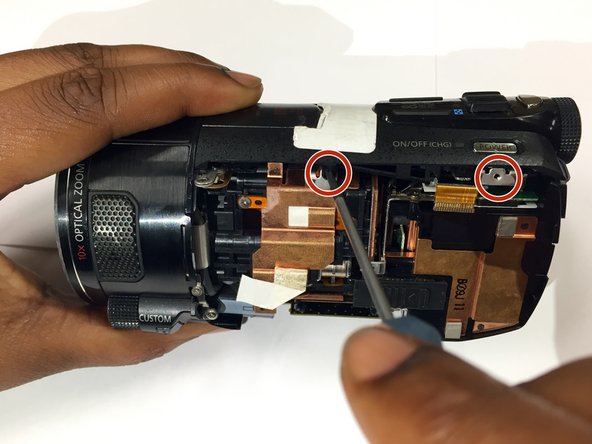
    • Remove the three 3x4 mm Phillips screws securing the black panel plastic case.

    • From the inner corner in between the panel and the LCD screen, remove the two 2x2.5 mm Phillips screws and the 3x4 mm Phillips screw.

  3. Canon Vixia HF S10 Camcorder Mini Advance Shoe Replacement: étape 3, image 1 de 2 Canon Vixia HF S10 Camcorder Mini Advance Shoe Replacement: étape 3, image 2 de 2
    • With the canon logo facing you, remove the plastic casing located in the back of the lens. Underneath this casing, you will find a hinge with a screw.

    • Remove the 2x2.5 mm Phillips screw holding hinge in place.

  4. Canon Vixia HF S10 Camcorder Mini Advance Shoe Replacement: étape 4, image 1 de 2 Canon Vixia HF S10 Camcorder Mini Advance Shoe Replacement: étape 4, image 2 de 2
    • Using your hands, remove the inside panel.

    • After removing the panel, remove the two 1x2.5 mm Phillips screws.

  5. Canon Vixia HF S10 Camcorder Mini Advance Shoe Replacement: étape 5, image 1 de 1
    • Turn the camcorder back to step one position and remove remaining screws on the bottom platform. There will be four 2x2.5 mm Phillips screws.

  6. Canon Vixia HF S10 Camcorder Mini Advance Shoe Replacement: étape 6, image 1 de 2 Canon Vixia HF S10 Camcorder Mini Advance Shoe Replacement: étape 6, image 2 de 2
    • Remove the strap from mount.

    • Remove the two 1x2.5 mm Phillips screws revealed under the strap on the side panel.

  7. Canon Vixia HF S10 Camcorder Mini Advance Shoe Replacement: étape 7, image 1 de 2 Canon Vixia HF S10 Camcorder Mini Advance Shoe Replacement: étape 7, image 2 de 2
    • Pry the side panel from the base of the camcorder by using the plastic opening tool.

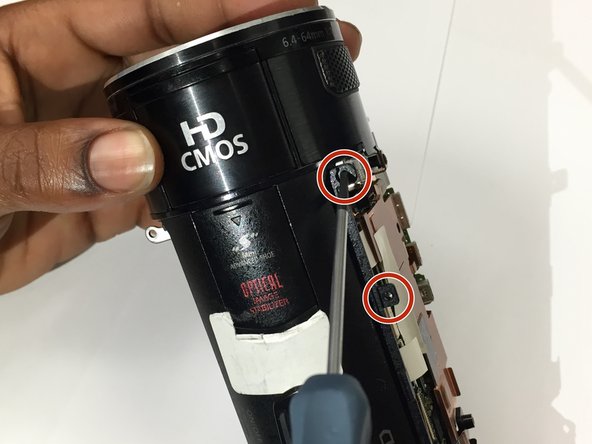
    • Remove the two 2x2.5mm Phillips screws located at the top.

  8. Canon Vixia HF S10 Camcorder Mini Advance Shoe Replacement: étape 8, image 1 de 1
    • Remove the two 3x4 mm Phillips screws located under the coverings labeled AV & DCIN. These covers can be found when the back of the camera is facing you.

  9. Canon Vixia HF S10 Camcorder Mini Advance Shoe Replacement: étape 9, image 1 de 3 Canon Vixia HF S10 Camcorder Mini Advance Shoe Replacement: étape 9, image 2 de 3 Canon Vixia HF S10 Camcorder Mini Advance Shoe Replacement: étape 9, image 3 de 3
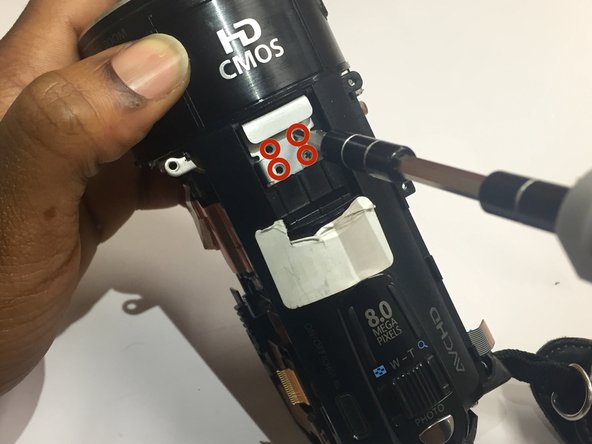
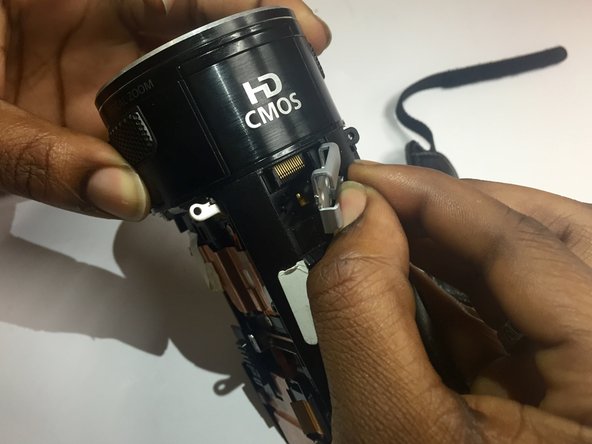
    • Slide open the "Optical Image Stabilizer" cover located at the top of the camcorder.

    • Remove the four 3x2.5 mm Phillips screws underneath.

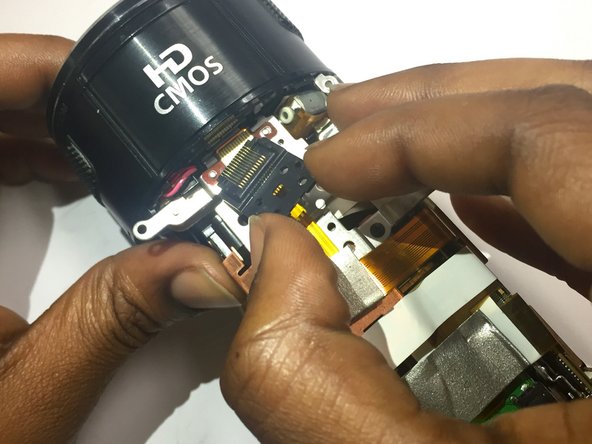
    • Using your fingers, remove the metal casing.

  10. Canon Vixia HF S10 Camcorder Mini Advance Shoe Replacement: étape 10, image 1 de 2 Canon Vixia HF S10 Camcorder Mini Advance Shoe Replacement: étape 10, image 2 de 2
    • Lift the top cover of the camcorder using your fingers.

    • Remove the the Mini Advance Shoe with your fingers

Conclusion

To reassemble your device, follow these instructions in reverse order.

Une autre personne a terminé cette réparation.

Pièces jointes

Briana

Membre depuis le 03/03/15

116 Réputation

1 tutoriel rédigé

Équipe

Sam Houston State, Team 13-1, Blackburne Winter 2015 Membre de l'équipe Sam Houston State, Team 13-1, Blackburne Winter 2015

SHSU-BLACKBURNE-W15S13G1

4 membres

9 tutoriels rédigés

0 commentaires

Ajouter un commentaire

Nombre de vues :

Dernières 24 heures : 0

7 derniers jours : 1

30 derniers jours : 6

Total : 587