Aller au contenu principal

Capresso Infinity Motor Replacement

Ce dont vous avez besoin

  1. Capresso Infinity Motor Replacement, Metal Outside Casing: étape 1, image 1 de 2 Capresso Infinity Motor Replacement, Metal Outside Casing: étape 1, image 2 de 2
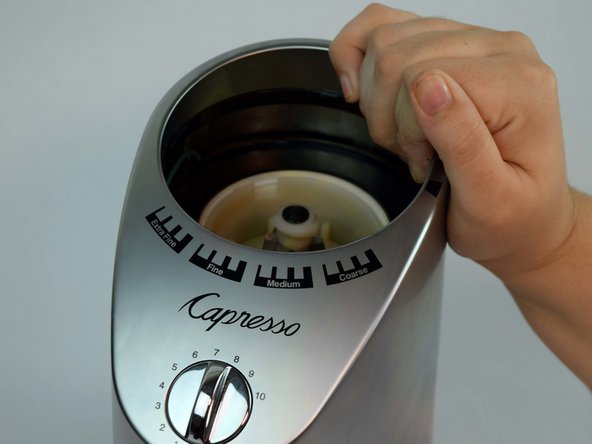
    • Twist the top plastic container to the left counterclockwise.

    • Pull upwards to remove.

  2. Capresso Infinity Motor Replacement: étape 2, image 1 de 3 Capresso Infinity Motor Replacement: étape 2, image 2 de 3 Capresso Infinity Motor Replacement: étape 2, image 3 de 3
    • Twist the top burr to the left counter clockwise.

    • Pull upwards to remove.

  3. Capresso Infinity Motor Replacement: étape 3, image 1 de 2 Capresso Infinity Motor Replacement: étape 3, image 2 de 2
    • Flip entire device upside down.

    • Remove two rubber coverings on the back of the device.

  4. Capresso Infinity Motor Replacement: étape 4, image 1 de 2 Capresso Infinity Motor Replacement: étape 4, image 2 de 2
    • Remove four 11.59mm T10 screws.

    • The screws will have small circular washers under them. Put them aside for reassembly.

  5. Capresso Infinity Motor Replacement: étape 5, image 1 de 3 Capresso Infinity Motor Replacement: étape 5, image 2 de 3 Capresso Infinity Motor Replacement: étape 5, image 3 de 3
    • Lift the metal outside casing off the black base.

    • Flip the outside casing forward so you have access to the inside of it.

  6. Capresso Infinity Motor Replacement: étape 6, image 1 de 3 Capresso Infinity Motor Replacement: étape 6, image 2 de 3 Capresso Infinity Motor Replacement: étape 6, image 3 de 3
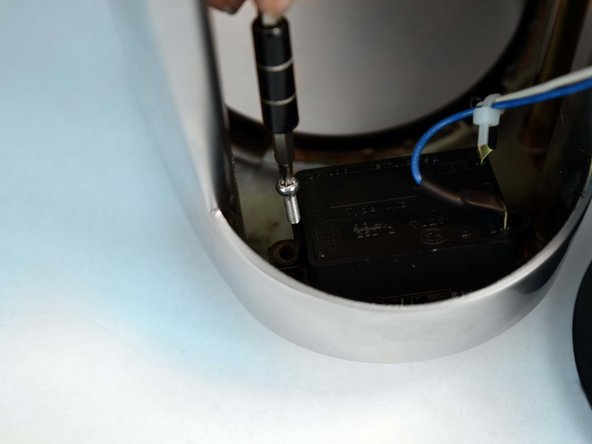
    • Remove one 11.59mm T10 screw.

    • Let the green wire fall, or place somewhere so it doesn't get in the way.

    • There will be a small metal retainer and washer, put them aside for reassembly.

  7. Capresso Infinity Motor Replacement: étape 7, image 1 de 3 Capresso Infinity Motor Replacement: étape 7, image 2 de 3 Capresso Infinity Motor Replacement: étape 7, image 3 de 3
    • Remove two 11.59mm T10 screws.

  8. Capresso Infinity Motor Replacement: étape 8, image 1 de 2 Capresso Infinity Motor Replacement: étape 8, image 2 de 2
    • Remove the time/on switch by pulling upwards.

  9. Capresso Infinity Motor Replacement, Bottom Conical Burr: étape 9, image 1 de 2 Capresso Infinity Motor Replacement, Bottom Conical Burr: étape 9, image 2 de 2
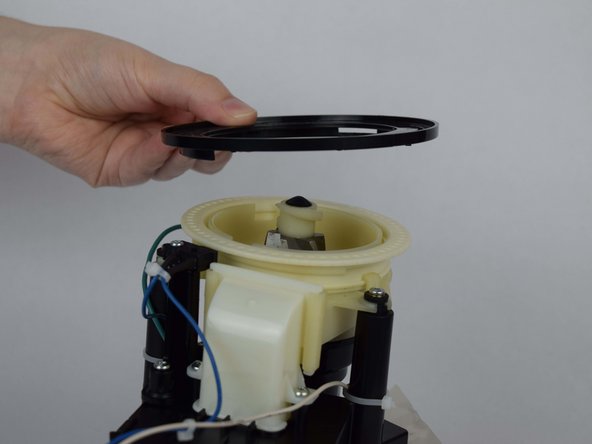
    • Grab the edge of the plastic black ring that sits on top of the device and gently pull up to release.

  10. Capresso Infinity Motor Replacement: étape 10, image 1 de 2 Capresso Infinity Motor Replacement: étape 10, image 2 de 2
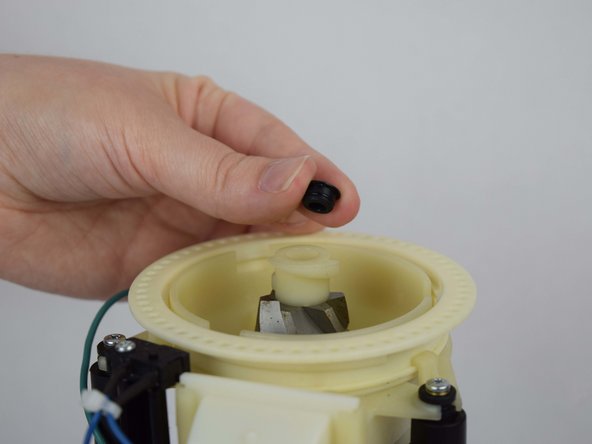
    • Remove the black rubber knob atop the bottom burr by gently pulling up.

  11. Capresso Infinity Motor Replacement: étape 11, image 1 de 3 Capresso Infinity Motor Replacement: étape 11, image 2 de 3 Capresso Infinity Motor Replacement: étape 11, image 3 de 3
    • Partially remove one 47.20mm T20 screw.

    • The screw does not need to come out completely, it just needs to be loose enough pull the burr out of the device.

  12. Capresso Infinity Motor Replacement: étape 12, image 1 de 2 Capresso Infinity Motor Replacement: étape 12, image 2 de 2
    • Remove the bottom burr piece by pulling upwards.

    • There will be 3 springs and 3 metal balls under the springs, located underneath the burr. Put them aside for reassembly.

  13. Capresso Infinity Motor Replacement: étape 13, image 1 de 2 Capresso Infinity Motor Replacement: étape 13, image 2 de 2
    • Remove the loosened screw by pulling it upwards.

  14. Capresso Infinity Motor Replacement: étape 14, image 1 de 3 Capresso Infinity Motor Replacement: étape 14, image 2 de 3 Capresso Infinity Motor Replacement: étape 14, image 3 de 3
    • Grip the plastic piece at the top of the conical burr and pull upwards to remove.

    • Grip the metal burr, and pull upwards to slide it off the plastic base.

  15. Capresso Infinity Motor Replacement, Spring and Bearing Positions: étape 15, image 1 de 1
    • This is the correct position of bearings and springs when the screw and bottom burr are removed.

  16. Capresso Infinity Motor Replacement, Motor: étape 16, image 1 de 3 Capresso Infinity Motor Replacement, Motor: étape 16, image 2 de 3 Capresso Infinity Motor Replacement, Motor: étape 16, image 3 de 3
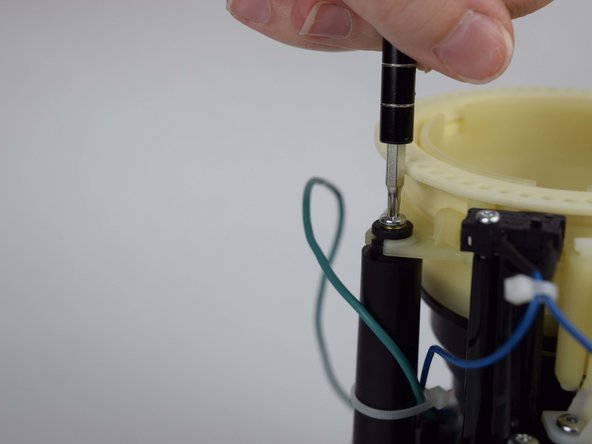
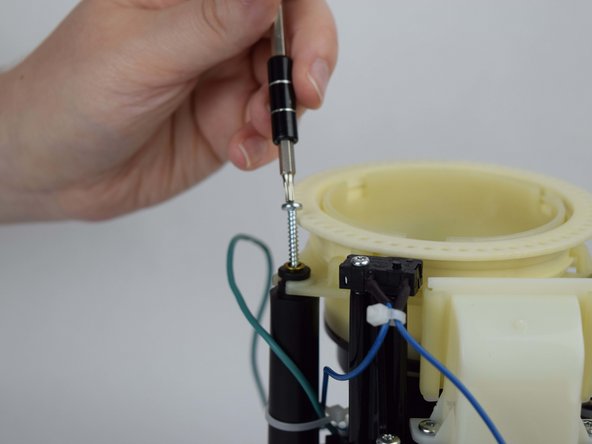
    • Remove the three 19.61 mm T10 screws surrounding the white plastic burr housing.

  17. Capresso Infinity Motor Replacement: étape 17, image 1 de 2 Capresso Infinity Motor Replacement: étape 17, image 2 de 2
    • Pry up the gold colored screw castings for each hole using a spudger.

    • Remove all three gold castings and set them aside for reassembly.

  18. Capresso Infinity Motor Replacement: étape 18, image 1 de 3 Capresso Infinity Motor Replacement: étape 18, image 2 de 3 Capresso Infinity Motor Replacement: étape 18, image 3 de 3
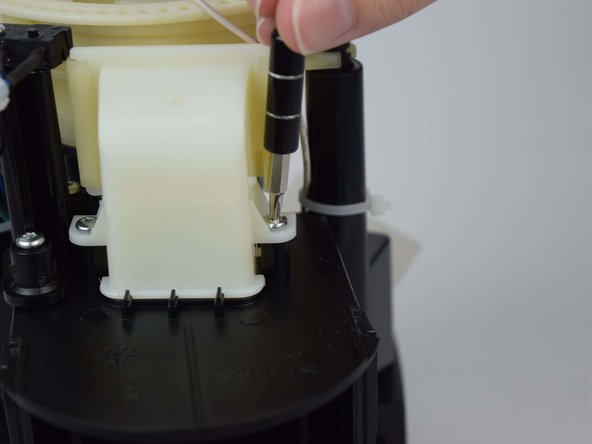
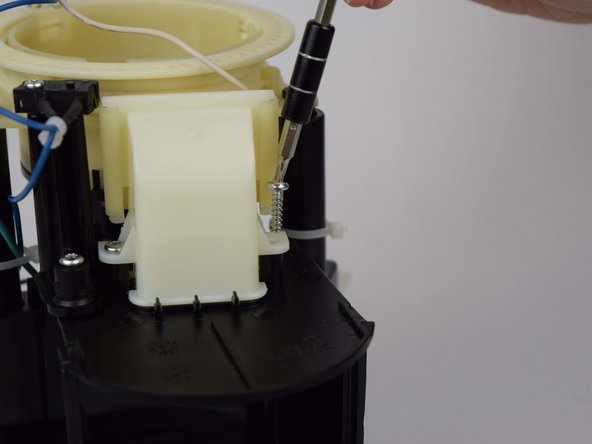
    • Remove the two 13.60 mm T10 screws holding the bean chute to the base.

  19. Capresso Infinity Motor Replacement: étape 19, image 1 de 3 Capresso Infinity Motor Replacement: étape 19, image 2 de 3 Capresso Infinity Motor Replacement: étape 19, image 3 de 3
    • Pull the white plastic burr housing and motor up and out of the base.

    • Place the motor and white plastic burr housing aside for future soldering.

  20. Capresso Infinity Motor Replacement: étape 20, image 1 de 1
    • Be careful when you are using the metal spudger in this step because it can cause harm if used incorrectly.

    • Remove rubber wraps covering both wires solder points using a metal spudger.

  21. Capresso Infinity Motor Replacement: étape 21, image 1 de 2 Capresso Infinity Motor Replacement: étape 21, image 2 de 2
    • This step requires soldering. Be careful and make sure you understand this tool and its dangers before using it.

    • Remove the two wires from the motor by unsoldering them.

    • Place the base aside to continue working on the motor.

  22. Capresso Infinity Motor Replacement: étape 22, image 1 de 3 Capresso Infinity Motor Replacement: étape 22, image 2 de 3 Capresso Infinity Motor Replacement: étape 22, image 3 de 3
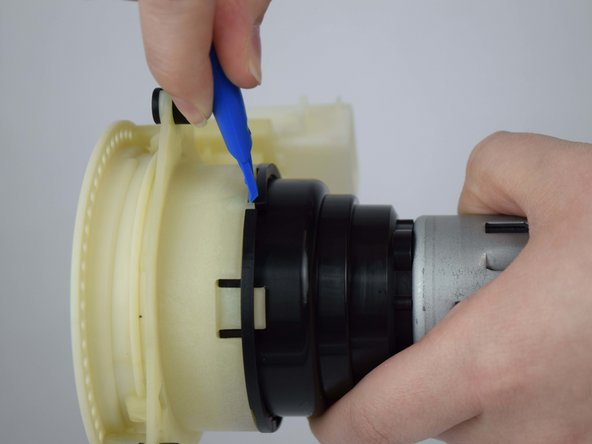
    • Locate the three knobs preventing the white plastic burr housing from being removed from the motor. They are all along the seam.

    • Pry the seam between the two pieces down enough to allow each knob to slide counterclockwise with an opening tool.

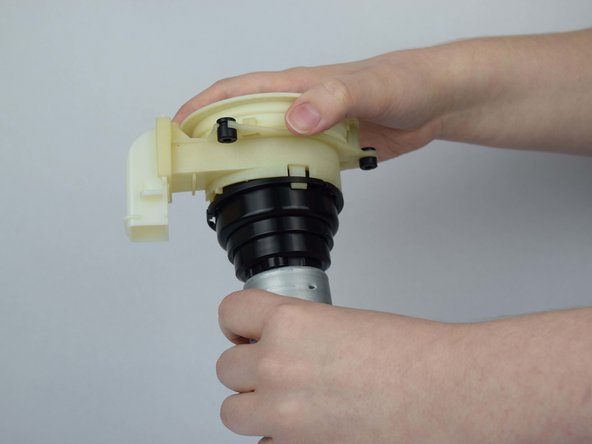
    • Twist the white plastic burr housing as far counterclockwise as you can.

  23. Capresso Infinity Motor Replacement: étape 23, image 1 de 3 Capresso Infinity Motor Replacement: étape 23, image 2 de 3 Capresso Infinity Motor Replacement: étape 23, image 3 de 3
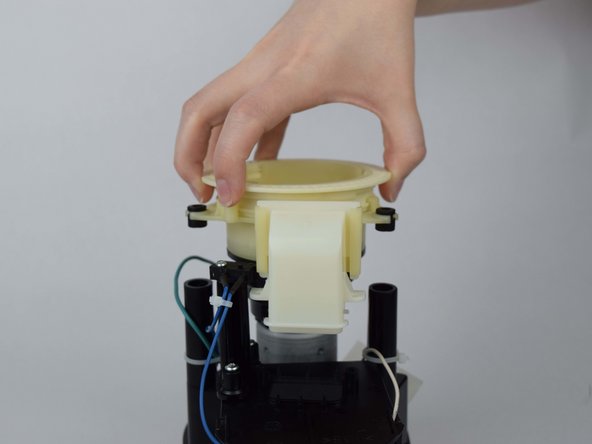
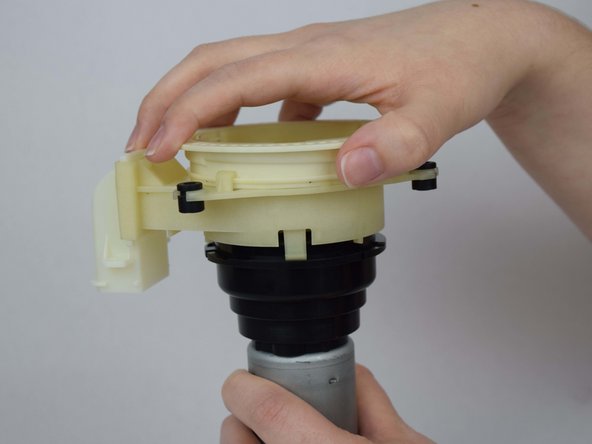
    • Lift up the white plastic burr housing and separate it from the motor.

    • The black plastic piece is attached to the motor. You need to remove the motor with it for replacement.

Conclusion

To reassemble your device, follow these instructions in reverse order.

5 autres ont terminé cette réparation.

Mayson Dunnigan

Membre depuis le 10/09/18

310 Réputation

1 tutoriel rédigé

Équipe

USF Tampa, Team S1-G1, Leahy Fall 2018 Membre de l'équipe USF Tampa, Team S1-G1, Leahy Fall 2018

USFT-LEAHY-F18S1G1

4 membres

5 tutoriels rédigés

11 commentaires

In step 20, I suggest marking which motor terminals the red and black wires connect to so they may be reattached correctly. It is a DC motor so polarity is important. The motor will spin backward if wired incorrectly.

ifabri - Réponse

I have a Capresso 565 with a burnt out motor. If I buy a 560, can I just swap out the stainless steel for the plastic? They look like the same unit with that one exception.

Daniel Hoehnle - Réponse

Where did you find the replacement motor?

Mike - Réponse

I have a Nivona CafeGrano 135, which is technical identical. I was able to remove the entire Motor unit.

In Germany, it can be bought, e.g. here: https://komtra.de/jura-ersatzteile/jura-...

(unfortunately for the same price like a new grinder.)

Is it possible to remove the motor from the black plastic? It should be possible to just replace the motor….

ischorsch - Réponse

I have the plastic-housing version of this unit. I removed the (four) rubber feet, but underneath there was nothing but blank plastic, even though the structure looked exactly like there should be screws there.

The solution: the plastic housing is held in place by four latches around the base, each visible in a slot between the housing and the base. Pry them apart, and you can then pop the plastic housing off. (You may have to work your way around several times before the first latch doesn’t re-latch while you’re working on the other ones.)

griscom - Réponse

Ajouter un commentaire

Nombre de vues :

Dernières 24 heures : 1

7 derniers jours : 19

30 derniers jours : 54

Total : 5,059