Introduction
The Clickn Kids Tablet (Android CK07T-PK-8) is a toy beloved by many children, but when the battery dies it often ends up getting tossed away or forgotten. The battery is a vital part of the tablet and it is not useable without it. A tablet with a broken battery may have a black screen or die quickly when in use. By following these steps, you can extend the life of your Clickn Kid tablet.
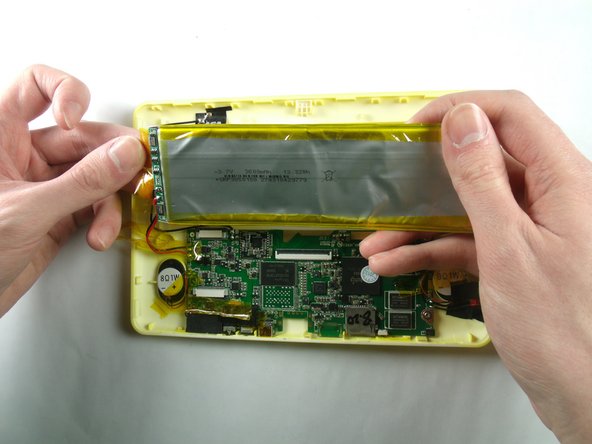
In order to replace the battery, you will need experience in soldering, patience and a careful touch. Removing batteries can carry the risk of battery acid leakage, so please ensure not to bend battery more than necessary. To find out more about soldering, please visit the link below.
Ce dont vous avez besoin


To reassemble your device, follow these instructions in reverse order.
To reassemble your device, follow these instructions in reverse order.
Annulation : je n'ai pas terminé ce tutoriel.
4 autres ont terminé cette réparation.

Équipe

Baylor, Team 4-4, Williams Spring 2015 Membre de l'équipe Baylor, Team 4-4, Williams Spring 2015
BU-WILLIAMS-S15S4G4
3 membres
8 tutoriels rédigés
3 commentaires
A little then moderate skill is necessary if you are somewhat mechanically inclined shouldn't be too problematic. But as far as this gentleman's directions and steps perform the task with no problems and tablet works now. Thank you Kevin Finney and three others my four-year-old daughter Hazel is happy again thanks to you.
Collins Hill
Great Smoky Mountains , TN.
I think these are great instructions for fixing this issue!
If you'd be interested in going a step further…I've been trying to find out how to safely remove the charge port! I know how to solder the replacement onto the board but I can't confirm the best way to detach the old port!?
My god daughter would appreciate another video! :)