Cette version peut contenir des modifications incorrectes. Passez au dernier aperçu vérifié.
Ce dont vous avez besoin
-
Cette étape n’est pas traduite. Aidez à la traduire
-
Unscrew the two 18 mm long Phillips #2 screws on the side of the hair dryer.
-
-
-
Cette étape n’est pas traduite. Aidez à la traduire
-
Once you have taken the screws out, take the top half of the handle off by lifting it off of the dryer.
-
-
Cette étape n’est pas traduite. Aidez à la traduire
-
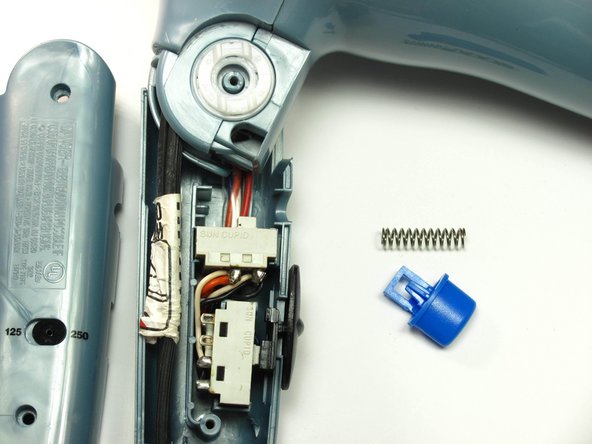
Take out the cool down button and the spring behind it by gently lifting the button up toward you and pushing it to the right out of its groove.
-


Annulation : je n'ai pas terminé ce tutoriel.
Une autre personne a terminé cette réparation.
Équipe

Cal Poly, Team 10-33, Maness Winter 2014 Membre de l'équipe Cal Poly, Team 10-33, Maness Winter 2014
CPSU-MANESS-W14S10G33
3 membres
7 tutoriels rédigés