Aller au contenu principal

Connect Four Electronic Handheld Screen Replacement

Ce dont vous avez besoin

  1. Connect Four Electronic Handheld Screen Replacement, Ensure the device is off.: étape 1, image 1 de 1
    • Make sure the Connect Four Electronic Handheld is off by allowing it to shut off automatically.

  2. Connect Four Electronic Handheld Screen Replacement, Removing the battery casing.: étape 2, image 1 de 2 Connect Four Electronic Handheld Screen Replacement, Removing the battery casing.: étape 2, image 2 de 2
    • Using a Phillips head screwdriver, remove the (9.1mm length) #2 screw in the middle of the battery casing.

    • Slide the cover off and remove the battery.

  3. Connect Four Electronic Handheld Screen Replacement, Removing/Replacing the Back Casing: étape 3, image 1 de 2 Connect Four Electronic Handheld Screen Replacement, Removing/Replacing the Back Casing: étape 3, image 2 de 2
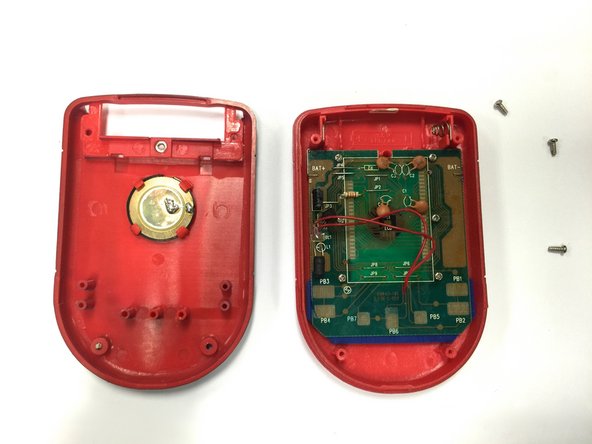
    • Using a Phillips head screwdriver, remove the four (7.1mm- length) #3 screws that hold the back casing in place.

    • Carefully remove the back casing.

    • When removing the back casing, make sure not to rupture the wires that connect the speaker to the circuit board.

  4. Connect Four Electronic Handheld Screen Replacement, Detaching the circuit board.: étape 4, image 1 de 3 Connect Four Electronic Handheld Screen Replacement, Detaching the circuit board.: étape 4, image 2 de 3 Connect Four Electronic Handheld Screen Replacement, Detaching the circuit board.: étape 4, image 3 de 3
    • Using a Phillips head screwdriver, remove the six (0.25"-length) #3 screws that hold down the cpu board.

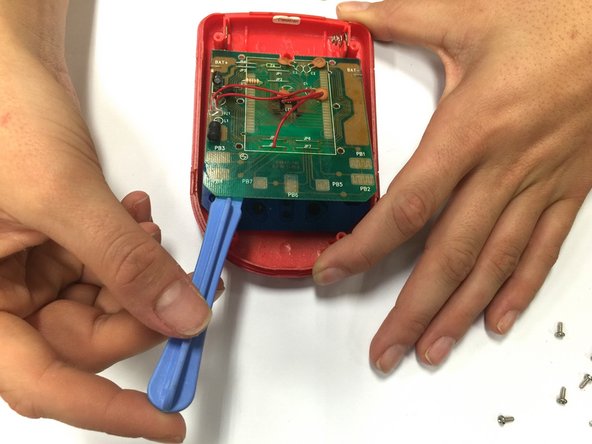
    • Using a plastic opening tool, lever the circuit board just enough to where you can easily access the button sheet.

  5. Connect Four Electronic Handheld Screen Replacement, Removing the Circuit Board: étape 5, image 1 de 2 Connect Four Electronic Handheld Screen Replacement, Removing the Circuit Board: étape 5, image 2 de 2
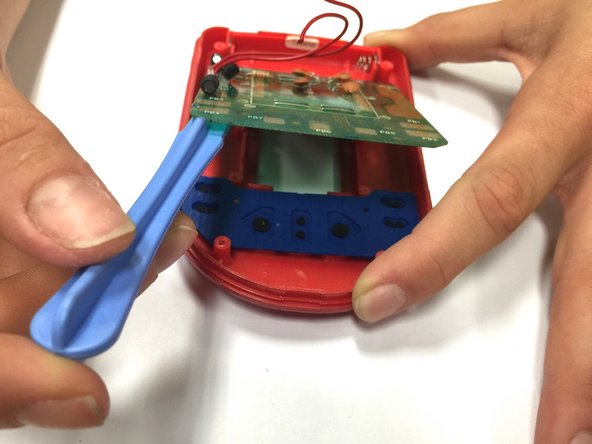
    • Pop out the wires, connected to the battery terminals, out of their place. You can use a plastic opening tool or fine tweezers for this step.

    • The wires in this image have already been detached.

    • Check that there is no power going into the device that could pose any shock hazard.

    • Once the terminals are out of place, remove the circuit board.

  6. Connect Four Electronic Handheld Screen Replacement, Replacing the Screen: étape 6, image 1 de 1
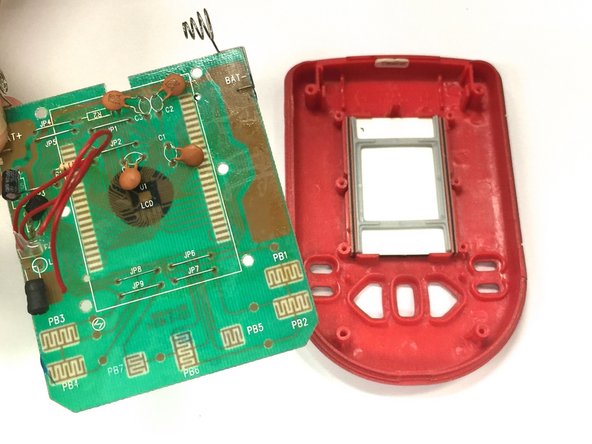
    • Take the old screen out.

    • Replace the old screen with the new screen.

    • Ensure that the screen is facing right side up, where there is more yellow space under the checkered board.

Conclusion

To reassemble your device, follow these instructions in reverse order.

Wil

Membre depuis le 10/22/14

313 Réputation

3 tutoriels rédigés

Équipe

Baylor, Team 8-11, Williams Fall 2014 Membre de l'équipe Baylor, Team 8-11, Williams Fall 2014

BU-WILLIAMS-F14S8G11

3 membres

12 tutoriels rédigés

0 commentaires

Ajouter un commentaire

Nombre de vues :

Dernières 24 heures : 0

7 derniers jours : 0

30 derniers jours : 2

Total : 339