Aller au contenu principal

Cr-48 Chromebook SSD Replacement

Ce dont vous avez besoin

  1. Cr-48 Chromebook SSD Replacement, Battery: étape 1, image 1 de 3 Cr-48 Chromebook SSD Replacement, Battery: étape 1, image 2 de 3 Cr-48 Chromebook SSD Replacement, Battery: étape 1, image 3 de 3
    • Slide the switch on the bottom of the laptop until the battery pops out.

    • Once the battery pops out, you can remove it.

  2. Cr-48 Chromebook SSD Replacement, Remove Rear Rubber Feet: étape 2, image 1 de 2 Cr-48 Chromebook SSD Replacement, Remove Rear Rubber Feet: étape 2, image 2 de 2
    • Using a pair of tweezers, remove the two rear rubber feet to expose two hidden screws.

  3. Cr-48 Chromebook SSD Replacement, Remove Screws: étape 3, image 1 de 3 Cr-48 Chromebook SSD Replacement, Remove Screws: étape 3, image 2 de 3 Cr-48 Chromebook SSD Replacement, Remove Screws: étape 3, image 3 de 3
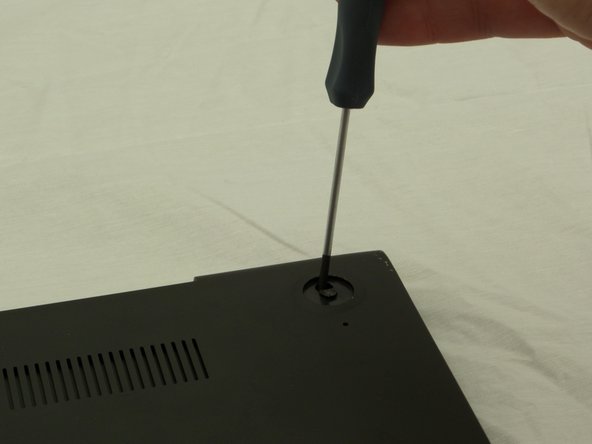
    • Remove ten 3 mm screws in the battery compartment using a Phillips #00 screwdriver.

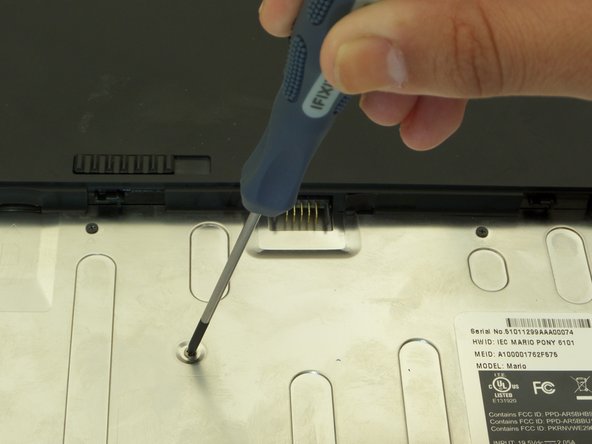
    • Remove two 4.5 mm screws under the rubber feet using a Phillips #00 screwdriver.

  4. Cr-48 Chromebook SSD Replacement: étape 4, image 1 de 3 Cr-48 Chromebook SSD Replacement: étape 4, image 2 de 3 Cr-48 Chromebook SSD Replacement: étape 4, image 3 de 3
    • Starting where the body of the laptop and the laptop screen meet, pry apart the lower case from the rest of the laptop.

    • The case is easier to remove when separating in a clockwise motion, as seen in the pictures.

  5. Cr-48 Chromebook SSD Replacement, Locate SSD and Remove Screw: étape 5, image 1 de 3 Cr-48 Chromebook SSD Replacement, Locate SSD and Remove Screw: étape 5, image 2 de 3 Cr-48 Chromebook SSD Replacement, Locate SSD and Remove Screw: étape 5, image 3 de 3
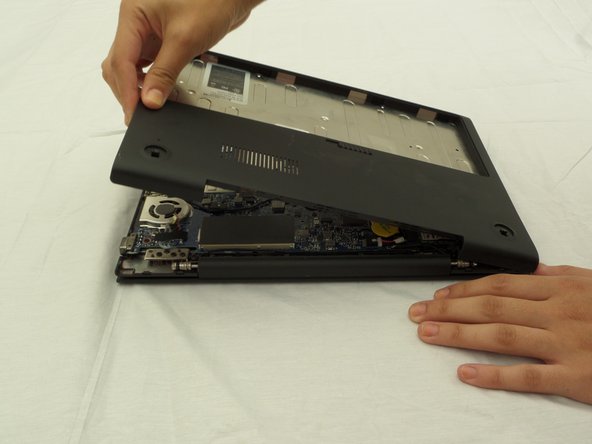
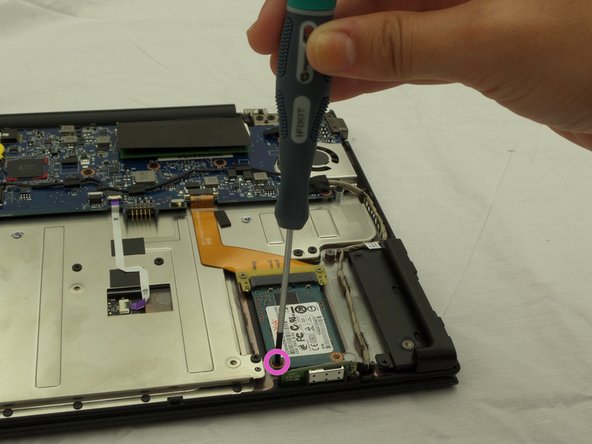
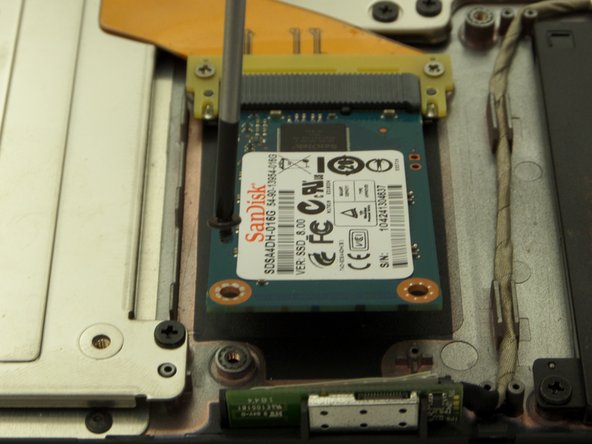
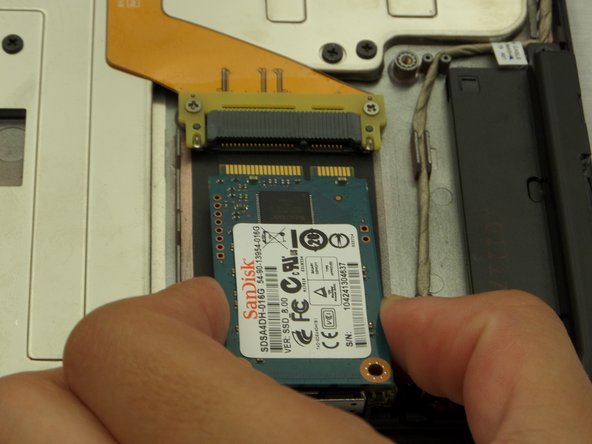
    • Find the SSD located on a corner of the side directly opposite where the laptop screen and device body are connected.

    • Remove one black screw on the SSD using a PH #00 screwdriver.

    • Size ph#00, approximately 3 mm long.

    • Once unscrewed, the SSD will pop up from the device.

  6. Cr-48 Chromebook SSD Replacement, Remove SSD: étape 6, image 1 de 2 Cr-48 Chromebook SSD Replacement, Remove SSD: étape 6, image 2 de 2
    • Firmly grasp the SSD with two fingers slightly upwards and pull.

Conclusion

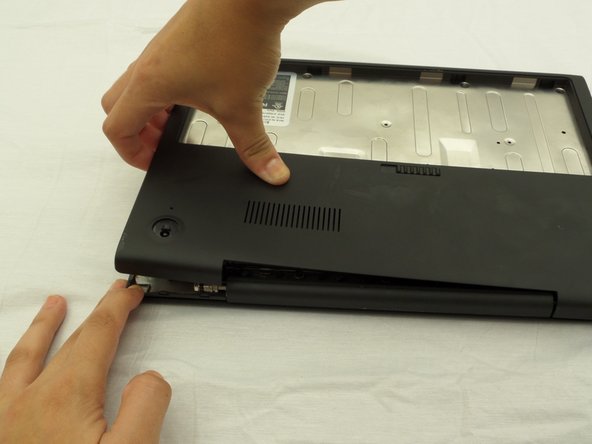
To reassemble your device, follow these instructions in reverse order.

5 autres ont terminé cette réparation.

Athar

Membre depuis le 09/09/14

365 Réputation

2 tutoriels rédigés

Équipe

CSU Fullerton, Team 2-2, Bruce Fall 2014 Membre de l'équipe CSU Fullerton, Team 2-2, Bruce Fall 2014

CSUF-BRUCE-F14S2G2

3 membres

10 tutoriels rédigés

0 commentaires

Ajouter un commentaire

Nombre de vues :

Dernières 24 heures : 4

7 derniers jours : 16

30 derniers jours : 70

Total : 3,072