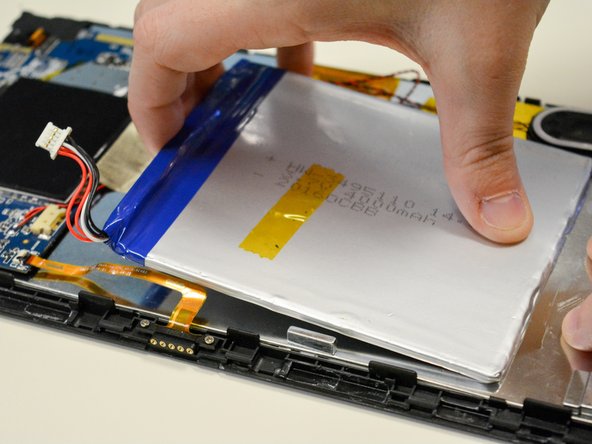
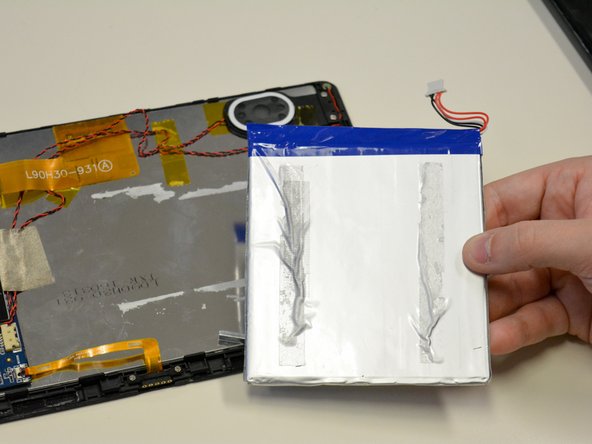
Aller au contenu principal

Craig CMP801 Battery Replacement

Ce dont vous avez besoin

  1. Craig CMP801 Battery Replacement, Back Cover: étape 1, image 1 de 2 Craig CMP801 Battery Replacement, Back Cover: étape 1, image 2 de 2
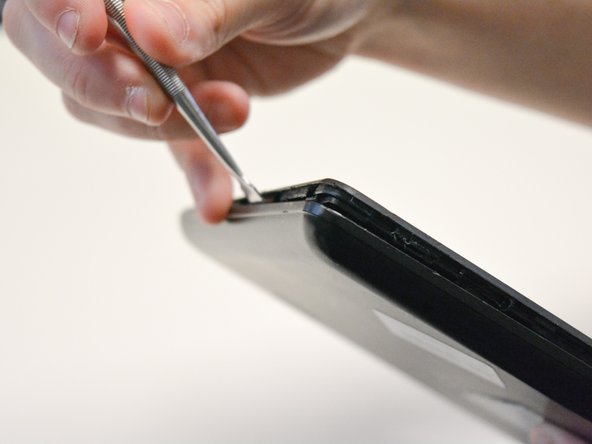
    • Locate the opening line between the cover and the device. Then locate the groove near the charging port.

  2. Craig CMP801 Battery Replacement: étape 2, image 1 de 2 Craig CMP801 Battery Replacement: étape 2, image 2 de 2
    • Use a metal spudger to separate the back cover from the front touch screen.

    • To do this, place the metal spudger in between the groove near the charging port of the device to unlatch the first clip.

  3. Craig CMP801 Battery Replacement: étape 3, image 1 de 2 Craig CMP801 Battery Replacement: étape 3, image 2 de 2
    • Continue to separate all of the clips around the device until the back cover comes off completely.

  4. Craig CMP801 Battery Replacement, Battery: étape 4, image 1 de 3 Craig CMP801 Battery Replacement, Battery: étape 4, image 2 de 3 Craig CMP801 Battery Replacement, Battery: étape 4, image 3 de 3
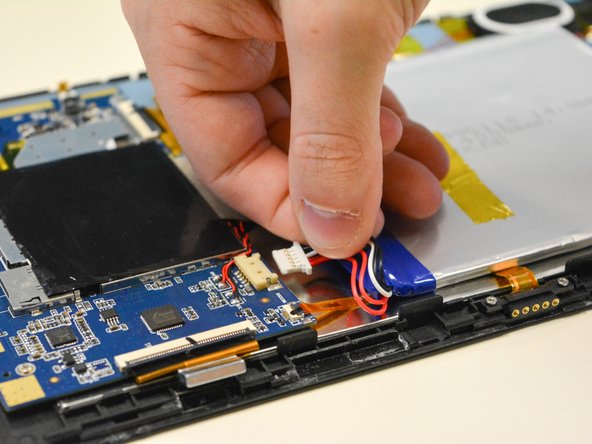
    • Locate the white plug next to the battery.

    • Use your fingers to pull off white plug that connected to the battery.

    • Be careful not to pull or break the wires on the bottom.

  5. Craig CMP801 Battery Replacement: étape 5, image 1 de 3 Craig CMP801 Battery Replacement: étape 5, image 2 de 3 Craig CMP801 Battery Replacement: étape 5, image 3 de 3
    • The battery should only be connected to the LCD by adhesive tape.

    • Using force, carefully remove the battery while holding the LCD in place.

Conclusion

To reassemble your device, follow these instructions in reverse order.

Une autre personne a terminé cette réparation.

Duyen

Membre depuis le 09/25/17

281 Réputation

2 tutoriels rédigés

Équipe

Un commentaire

Where do I find a battery cmp749 ???

kourriclay929 - Réponse

Ajouter un commentaire

Nombre de vues :

Dernières 24 heures : 1

7 derniers jours : 1

30 derniers jours : 10

Total : 986