Aller au contenu principal

Cricut Maker Motherboard Replacement

Ce dont vous avez besoin

  1. Cricut Maker Motherboard Replacement, Cricut Maker Lid Replacement: étape 1, image 1 de 3 Cricut Maker Motherboard Replacement, Cricut Maker Lid Replacement: étape 1, image 2 de 3 Cricut Maker Motherboard Replacement, Cricut Maker Lid Replacement: étape 1, image 3 de 3
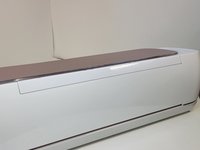
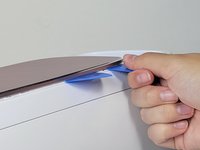
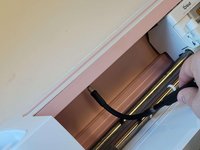
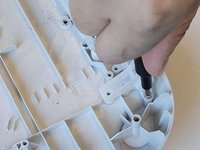
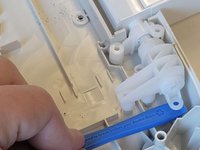
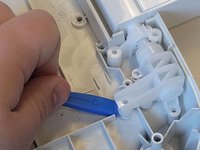
    • To remove the cover from the connecting joint, use an iFixit opening tool, and pry around the perimeter of the cover to release it.

    • Applying too much pressure to this can break it as it is very fragile.

    • There is some adhesive holding the cover, so it may take some patience and finesse to pry the cover off.

    • Remove the cover from the connecting joint and set it aside.

  2. Cricut Maker Motherboard Replacement: étape 2, image 1 de 2 Cricut Maker Motherboard Replacement: étape 2, image 2 de 2
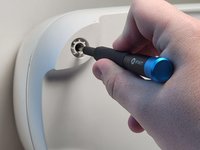
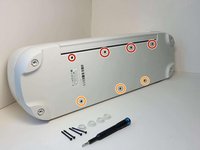
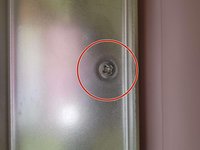
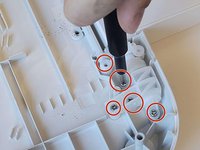
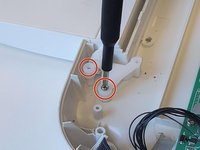
    • Remove the four, 10 mm Torx TR8 security screws holding the lid in place.

  3. Cricut Maker Motherboard Replacement: étape 3, image 1 de 3 Cricut Maker Motherboard Replacement: étape 3, image 2 de 3 Cricut Maker Motherboard Replacement: étape 3, image 3 de 3
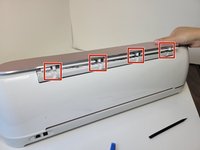
    • Turn the device around, so that the back is facing you.

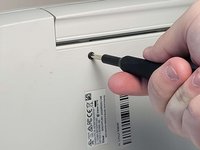
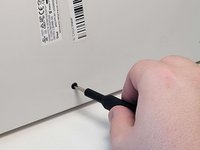
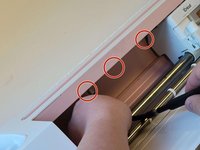
    • Look for the small rectangles along the back of the device. For every two rectangles, there is one cylindrical connector in between the two.

    • Wedge one or two iFixit opening picks in the seam connecting the Top Door to the device, and use the iFixit opening tool to pry upwards along the seam.

    • These actions should reveal the cylindrical connectors.

  4. Cricut Maker Motherboard Replacement: étape 4, image 1 de 1
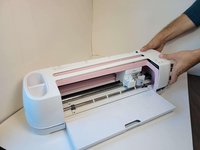
    • Press down on the lid.

    • Push the lid outwards to free it from the jointed clasps.

  5. Cricut Maker Motherboard Replacement, Front Door Replacement: étape 5, image 1 de 2 Cricut Maker Motherboard Replacement, Front Door Replacement: étape 5, image 2 de 2
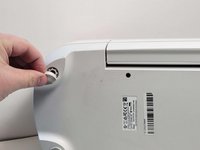
    • Using your hands or an opening tool, remove the four foot pads covering four screws.

    • Use a Phillips #1 screwdriver to remove four 41 mm screws from the feet.

  6. Cricut Maker Motherboard Replacement: étape 6, image 1 de 3 Cricut Maker Motherboard Replacement: étape 6, image 2 de 3 Cricut Maker Motherboard Replacement: étape 6, image 3 de 3
    • Remove the seven screws (Four 8.5 mm screws, and three 12.5 mm screws) on the bottom of the device, this will allow you to remove the cover later on.

    • Use a Phillips #1 screwdriver to remove the four 8.5 mm screws from the bottom of the device.

    • Use a Phillips #0 screwdriver to remove the three 12.5 mm screws.

  7. Cricut Maker Motherboard Replacement: étape 7, image 1 de 3 Cricut Maker Motherboard Replacement: étape 7, image 2 de 3 Cricut Maker Motherboard Replacement: étape 7, image 3 de 3
    • Turn the device on its side.

    • To remove the seven 10 mm screws from the underside of the top of the device, use a Phillips #1 screwdriver with the flex extension.

  8. Cricut Maker Motherboard Replacement: étape 8, image 1 de 3 Cricut Maker Motherboard Replacement: étape 8, image 2 de 3 Cricut Maker Motherboard Replacement: étape 8, image 3 de 3
    • Lift the top case off of the base of the device.

    • After removing this cover, the internals of the device will be exposed.

  9. Cricut Maker Motherboard Replacement: étape 9, image 1 de 2 Cricut Maker Motherboard Replacement: étape 9, image 2 de 2
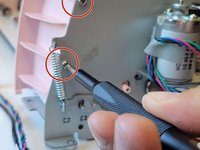
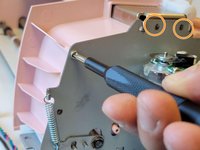
    • Use a Phillips #1 screwdriver to remove four 10 mm screws on the side of the device next to the motors.

    • Use a Phillips #1 screwdriver to remove the two 22 mm screws.

  10. Cricut Maker Motherboard Replacement: étape 10, image 1 de 3 Cricut Maker Motherboard Replacement: étape 10, image 2 de 3 Cricut Maker Motherboard Replacement: étape 10, image 3 de 3
    • Use a Phillips #1 screwdriver to remove two 10 mm screws. These are parallel to one another, one on either side of the machine.

    • Use a Phillips #1 screwdriver to remove two 8mm screws, these are also directly parallel to one another on either side of the machine.

  11. Cricut Maker Motherboard Replacement: étape 11, image 1 de 2 Cricut Maker Motherboard Replacement: étape 11, image 2 de 2
    • Unplug the bundled connector from the motor on both sides of the machine. To to avoid damage, coax the connector out of the socket gently using a spudger.

  12. Cricut Maker Motherboard Replacement: étape 12, image 1 de 2 Cricut Maker Motherboard Replacement: étape 12, image 2 de 2
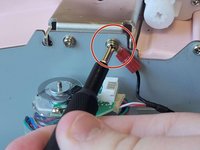
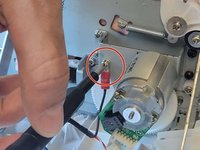
    • Using a Phillips #1 screwdriver, remove one 10 mm screw from both sides of the machine. This will release wires that are screwed into the sides of device.

    • Once the screws are removed and wires detached, the main body can be lifted off the base, and set aside.

  13. Cricut Maker Motherboard Replacement: étape 13, image 1 de 3 Cricut Maker Motherboard Replacement: étape 13, image 2 de 3 Cricut Maker Motherboard Replacement: étape 13, image 3 de 3
    • Remove a total of seven 10 mm screws from the underside of the door.

    • One side of the base has two 10mm screws.

    • The other side of the base has five 10 mm screws.

  14. Cricut Maker Motherboard Replacement: étape 14, image 1 de 3 Cricut Maker Motherboard Replacement: étape 14, image 2 de 3 Cricut Maker Motherboard Replacement: étape 14, image 3 de 3
    • Pry the door from hinges using an iFixit opening tool.

    • Lift upwards and towards you, to remove the door from the hinges.

  15. Cricut Maker Motherboard Replacement, Motor: étape 15, image 1 de 2 Cricut Maker Motherboard Replacement, Motor: étape 15, image 2 de 2
    • Use a Phillips #1 screwdriver to remove the four 5 mm screws that attach the motor on the left side of the machine.

  16. Cricut Maker Motherboard Replacement: étape 16, image 1 de 1
    • Remove the motor by pulling it from the device.

  17. Cricut Maker Motherboard Replacement: étape 17, image 1 de 1
    • Under the motor there is a white plastic gear. To remove it, gently pull it off the axle.

  18. Cricut Maker Motherboard Replacement: étape 18, image 1 de 2 Cricut Maker Motherboard Replacement: étape 18, image 2 de 2
    • Remove the washer from the top screw above the motor.

    • We found it was easier done by hand.

  19. Cricut Maker Motherboard Replacement: étape 19, image 1 de 2 Cricut Maker Motherboard Replacement: étape 19, image 2 de 2
    • Remove the two 5 mm screws from the remaining motor on the opposite side, using a Phillips #2 screwdriver.

  20. Cricut Maker Motherboard Replacement: étape 20, image 1 de 2 Cricut Maker Motherboard Replacement: étape 20, image 2 de 2
    • Twist and remove the motor from the machine.

    • Avoid touching the various tach disks on these motors.

  21. Cricut Maker Motherboard Replacement, Belt: étape 21, image 1 de 3 Cricut Maker Motherboard Replacement, Belt: étape 21, image 2 de 3 Cricut Maker Motherboard Replacement, Belt: étape 21, image 3 de 3
    • Remove the two 10 mm screws using a Phillips #2 screwdriver.

  22. Cricut Maker Motherboard Replacement: étape 22, image 1 de 2 Cricut Maker Motherboard Replacement: étape 22, image 2 de 2
    • Pull the belt holder towards you, and twist it sideways to slide it neatly into the same hole the belt is emerging from.

  23. Cricut Maker Motherboard Replacement: étape 23, image 1 de 2 Cricut Maker Motherboard Replacement: étape 23, image 2 de 2
    • Pull the bar containing the axel and metal attachment out to remove them.

    • This should free the remaining side of the belt.

  24. Cricut Maker Motherboard Replacement: étape 24, image 1 de 2 Cricut Maker Motherboard Replacement: étape 24, image 2 de 2
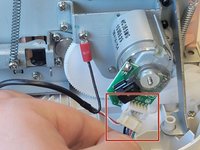
    • Use a Phillips #2 screwdriver to remove the four 10 mm screws from the board on the main motor.

  25. Cricut Maker Motherboard Replacement: étape 25, image 1 de 3 Cricut Maker Motherboard Replacement: étape 25, image 2 de 3 Cricut Maker Motherboard Replacement: étape 25, image 3 de 3
    • Remove the electrical tape from the connecting cable on the backside of the main motor.

    • Use the tip of a spudger or your fingernail to flip up the small locking flap.

    • Pull the cable out.

  26. Cricut Maker Motherboard Replacement: étape 26, image 1 de 3 Cricut Maker Motherboard Replacement: étape 26, image 2 de 3 Cricut Maker Motherboard Replacement: étape 26, image 3 de 3
    • Use a Phillips #1 screwdriver to remove the two 7 mm screws from the belt holder under the main motor.

    • Removing these two screws will cause the belt holder to detach.

    • Slip it through the hole in the main motor frame.

  27. Cricut Maker Motherboard Replacement: étape 27, image 1 de 2 Cricut Maker Motherboard Replacement: étape 27, image 2 de 2
    • Remove the washer (e-clip) securing the bar to the belt holder.

    • We found it is easiest to remove by hand.

    • To remove it, simply twist and pull upwards to free it.

    • Remove the bar from the belt holder and then remove the belt holder.

    • Slip the belt out of the machine.

  28. Cricut Maker Motherboard Replacement, Roller Bar Replacement: étape 28, image 1 de 2 Cricut Maker Motherboard Replacement, Roller Bar Replacement: étape 28, image 2 de 2
    • Pull the bar to the right of the machine, to free it from its placement.

  29. Cricut Maker Motherboard Replacement: étape 29, image 1 de 1
    • Slide the roller bar out to remove it from the machine.

  30. Cricut Maker Motherboard Replacement, Motherboard Replacement: étape 30, image 1 de 3 Cricut Maker Motherboard Replacement, Motherboard Replacement: étape 30, image 2 de 3 Cricut Maker Motherboard Replacement, Motherboard Replacement: étape 30, image 3 de 3
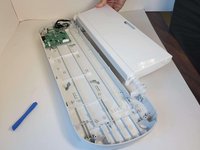
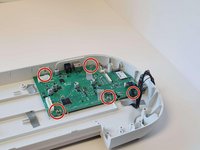
    • Use a Phillips #2 screwdriver to remove the five 7 mm screws from the motherboard.

  31. Cricut Maker Motherboard Replacement: étape 31, image 1 de 1
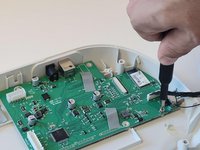
    • Remove the gray electrical tape from the cables.

  32. Cricut Maker Motherboard Replacement: étape 32, image 1 de 2 Cricut Maker Motherboard Replacement: étape 32, image 2 de 2
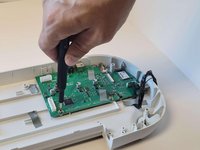
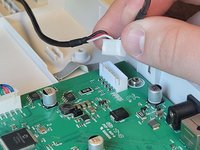
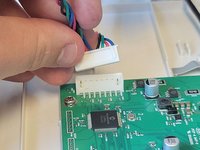
    • Unplug both cables from the corners of the motherboard by pulling them upwards from the base of the connectors.

  33. Cricut Maker Motherboard Replacement: étape 33, image 1 de 2 Cricut Maker Motherboard Replacement: étape 33, image 2 de 2
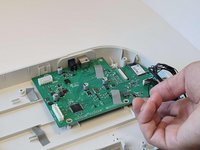
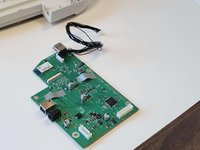
    • Gently slide the motherboard out from USB port slot to remove it from the device.

Conclusion

To reassemble your device, follow these instructions in reverse order.

4 autres ont terminé cette réparation.

Devyn White

Membre depuis le 09/20/22

1 041 Réputation

5 tutoriels rédigés

Équipe

Austin Community College, Team 9-1, Watkins Fall 2022 Membre de l'équipe Austin Community College, Team 9-1, Watkins Fall 2022

AUSTINCC-WATKINS-F22S9G1

3 membres

23 tutoriels rédigés

5 commentaires

So do you sell the motherboard or know where it buy one for cricut cxpl301

David Washington - Réponse

I too am looking for a replacement board. It was suggested to me that I could contact one of the pcb repair companies. For a fee, they will either check and repair your board or they will copy and print a new board and mail it back to you. You have to send in your board for them to check and copy though. So I guess reputation and reviews would be priority. It would suck to send our boards off and never receive a new one or the old one. :-/.

Jennifer Daniels -

Cricut does not sell parts. Cricut does not do repairs.

B·Ware - Réponse

sooooo, theres no place to get parts? thats stupid...might as well just through it away then...

Kirk Serbian - Réponse

Bonjour pourriez vous nous dire où trouver la carte mère svp

Magali Magnier - Réponse

Ajouter un commentaire

Nombre de vues :

Dernières 24 heures : 9

7 derniers jours : 54

30 derniers jours : 279

Total : 5,428