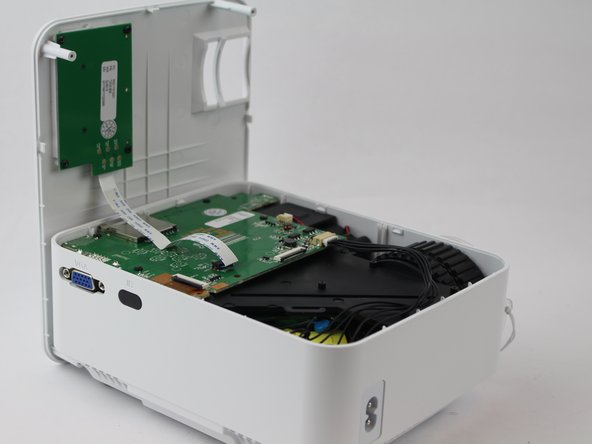
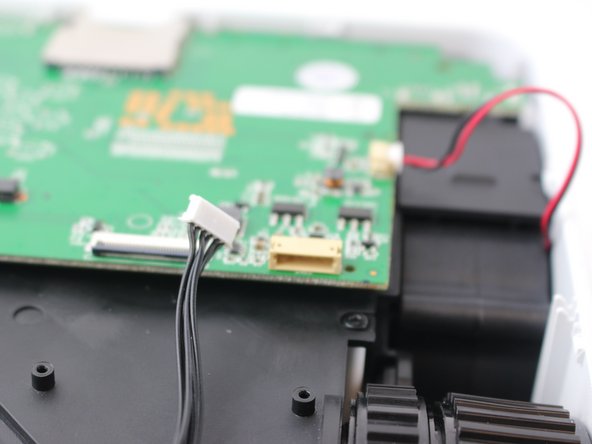
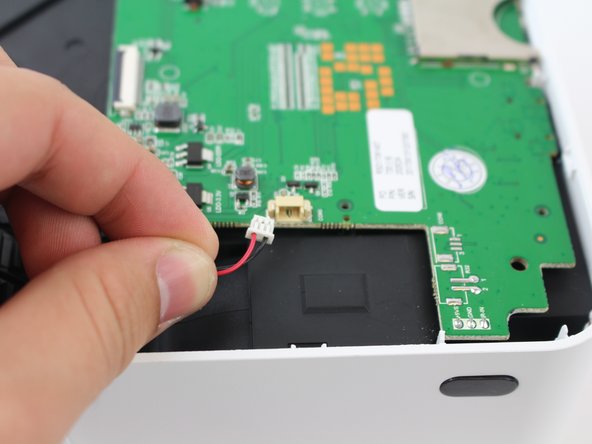
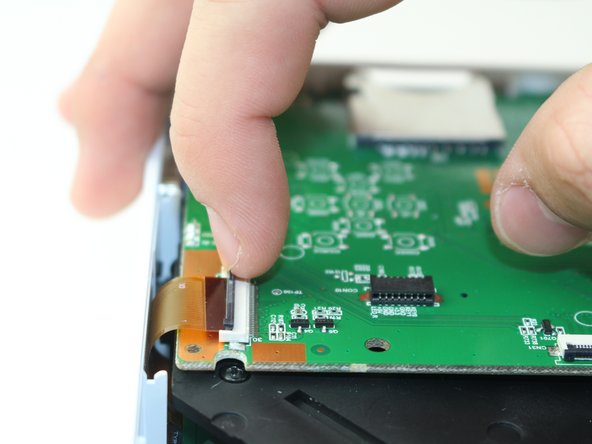
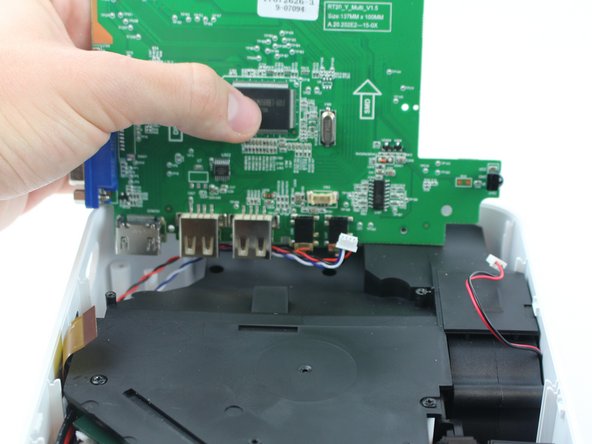
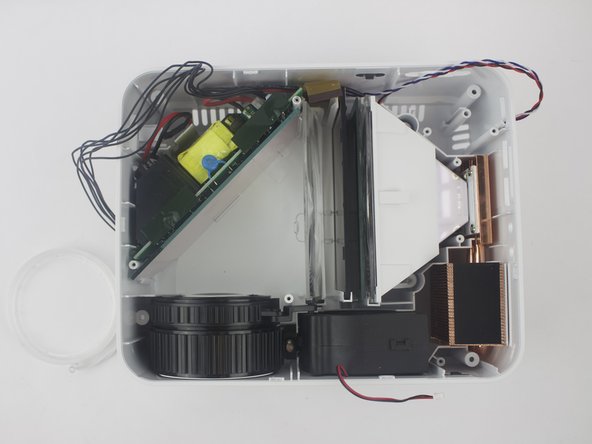
Aller au contenu principal

DBPOWER T20 Disassembly

Ce dont vous avez besoin

  1. DBPOWER T20 Disassembly, DBPOWER T20 Disassembly: étape 1, image 1 de 1
    • Flip the device and lay flat.

  2. DBPOWER T20 Disassembly: étape 2, image 1 de 1
    • Remove the four (9 mm) screws with a PH2 screwdriver.

    • Remove the two (7 mm) located with a PH2 screwdriver.

  3. DBPOWER T20 Disassembly: étape 3, image 1 de 3 DBPOWER T20 Disassembly: étape 3, image 2 de 3 DBPOWER T20 Disassembly: étape 3, image 3 de 3
    • Flip the device over and pry the top off with a plastic opening tool.

  4. DBPOWER T20 Disassembly: étape 4, image 1 de 1
    • Remove the ribbon cable connecting the motherboard to the button control board by gently pulling it from its connector.

  5. DBPOWER T20 Disassembly: étape 5, image 1 de 2 DBPOWER T20 Disassembly: étape 5, image 2 de 2
    • Remove four (6 mm) screws connecting the motherboard using a J0 screwdriver.

  6. DBPOWER T20 Disassembly: étape 6, image 1 de 3 DBPOWER T20 Disassembly: étape 6, image 2 de 3 DBPOWER T20 Disassembly: étape 6, image 3 de 3
    • Remove the two cables connected to the motherboard: black power cable and the red/black fan cable.

    • the black cable requires more force to remove than the other cables.

  7. DBPOWER T20 Disassembly: étape 7, image 1 de 2 DBPOWER T20 Disassembly: étape 7, image 2 de 2
    • Lift the black latch on the ZIF connector and remove the ribbon cable that attaches the digitizer to the motherboard.

  8. DBPOWER T20 Disassembly: étape 8, image 1 de 1
    • Raise motherboard by lifting sideways and then up to avoid the ports.

  9. DBPOWER T20 Disassembly: étape 9, image 1 de 2 DBPOWER T20 Disassembly: étape 9, image 2 de 2
    • Remove wires attaching the piezoelectric speakers to the motherboard.

  10. DBPOWER T20 Disassembly: étape 10, image 1 de 2 DBPOWER T20 Disassembly: étape 10, image 2 de 2
    • Remove the five screws securing the black plastic cover with a J0 screwdriver.

    • Lift up and out to remove.

Conclusion

To reassemble your device, follow these instructions in reverse order.

Une autre personne a terminé cette réparation.

Andrea Espinosa

Membre depuis le 02/15/18

506 Réputation

3 tutoriels rédigés

Équipe

USF Tampa, Team S16-G2, Boczar Spring 2018 Membre de l'équipe USF Tampa, Team S16-G2, Boczar Spring 2018

USFT-BOCZAR-S18S16G2

5 membres

5 tutoriels rédigés

4 commentaires

Anyone find a bulb for this thing? And/or know what else (or a quick fix) would fix a dark or burn mark on the image?

jcr4130 - Réponse

haing the same issue tried to call a electronics repair place to see if the could order a new polarizing lens for me and they said they could not unless they were the ones that did the repair

derek_russell82308 -

Really? Well, crap

KweenBeeTX -

How are the lenses supposed to sit in the hompow t20 mini projector

Joseph Duffey - Réponse

Ajouter un commentaire

Nombre de vues :

Dernières 24 heures : 0

7 derniers jours : 1

30 derniers jours : 14

Total : 2,816