Aller au contenu principal

DKnight MagicBox II Front Panel Assembly Replacement

Ce dont vous avez besoin

  1. DKnight MagicBox II Front Panel Assembly Replacement, Front Panel Assembly: étape 1, image 1 de 2 DKnight MagicBox II Front Panel Assembly Replacement, Front Panel Assembly: étape 1, image 2 de 2
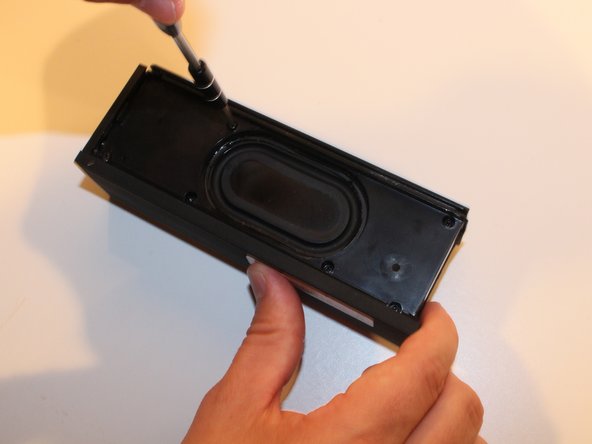
    • Using Blue Plastic opening tool pry the top rubber cover, then using the same tool remove the bottom panel

  2. DKnight MagicBox II Front Panel Assembly Replacement: étape 2, image 1 de 3 DKnight MagicBox II Front Panel Assembly Replacement: étape 2, image 2 de 3 DKnight MagicBox II Front Panel Assembly Replacement: étape 2, image 3 de 3
    • There are four prongs on the grill in the corners, closest to the power button switch. Use the plastic opening tool to release all four prongs from the panel, and then slide the plastic opening tool along the edge of the grill to allow it to easily slide off.

  3. DKnight MagicBox II Front Panel Assembly Replacement: étape 3, image 1 de 2 DKnight MagicBox II Front Panel Assembly Replacement: étape 3, image 2 de 2
    • On the back panel (Opposite to the side containing the two speakers), Use the Philips head PH1 to remove all 7 screws (Screws: Head PH1 , Length 7cm).

  4. DKnight MagicBox II Front Panel Assembly Replacement: étape 4, image 1 de 2 DKnight MagicBox II Front Panel Assembly Replacement: étape 4, image 2 de 2
    • Pull apart the two faces to separate the back panel from the front face plate.

Conclusion

To reassemble your device, follow these instructions in reverse order.

2 autres ont terminé cette réparation.

Anthony

Membre depuis le 02/04/16

695 Réputation

3 tutoriels rédigés

Équipe

USF Tampa, Team 17-1, Blackwell Winter 2016 Membre de l'équipe USF Tampa, Team 17-1, Blackwell Winter 2016

USFT-BLACKWELL-W16S17G1

4 membres

3 tutoriels rédigés

0 commentaires

Ajouter un commentaire

Nombre de vues :

Dernières 24 heures : 0

7 derniers jours : 2

30 derniers jours : 3

Total : 1,497