Aller au contenu principal

DeWalt DCS380 Trigger assembly Replacement

Ce dont vous avez besoin

  1. DeWalt DCS380 Trigger assembly Replacement, DeWalt DCS380 Grip Disassembly: étape 1, image 1 de 2 DeWalt DCS380 Trigger assembly Replacement, DeWalt DCS380 Grip Disassembly: étape 1, image 2 de 2
    • Remove the battery before dissasembly.

    • Remove the M3x16mm T10 screw from the back of the grip. Keep it separate from the rest of the grip screws

    • Remove the six M3.63x19 T15 screws from the grip.

  2. DeWalt DCS380 Trigger assembly Replacement: étape 2, image 1 de 3 DeWalt DCS380 Trigger assembly Replacement: étape 2, image 2 de 3 DeWalt DCS380 Trigger assembly Replacement: étape 2, image 3 de 3
    • Remove the top half of the grip.

    • Turn the saw over and locate the power connectors to the motor.

    • Use needle nose pliers to remove the spade connectors. Take care not to grab the wires on removal, only the end of the spade terminal.

    • Note the polarity for the power connectors and be sure they are not reversed on reassembly.

  3. DeWalt DCS380 Trigger assembly Replacement, Trigger assembly: étape 3, image 1 de 3 DeWalt DCS380 Trigger assembly Replacement, Trigger assembly: étape 3, image 2 de 3 DeWalt DCS380 Trigger assembly Replacement, Trigger assembly: étape 3, image 3 de 3
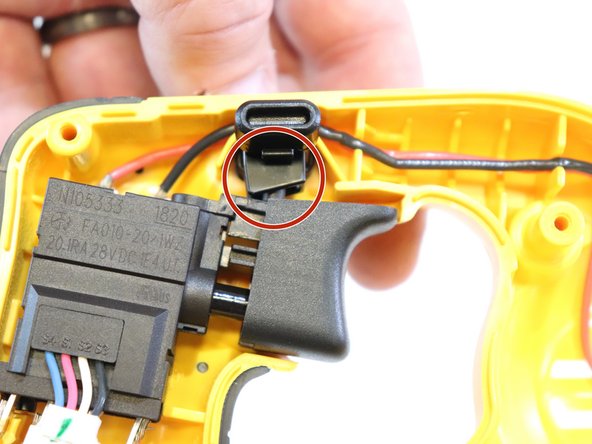
    • Take note of the position of the battery tension spring and safety switch before removal.

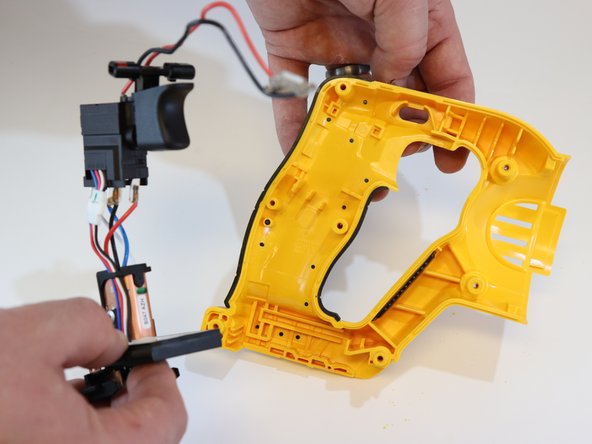
    • Lift the trigger assembly out of the grip.

Conclusion

To reassemble your device, follow these instructions in reverse order.

Jonathan Hicks

Membre depuis le 01/17/19

725 Réputation

7 tutoriels rédigés

0 commentaires

Ajouter un commentaire

Nombre de vues :

Dernières 24 heures : 0

7 derniers jours : 7

30 derniers jours : 33

Total : 1,061