Aller au contenu principal

DeWalt DWD112 Field Replacement

Ce dont vous avez besoin

  1. DeWalt DWD112 Field Replacement, Power Cord: étape 1, image 1 de 1
    • Remove seven TR20 Torx Security screws from the side of the drill.

  2. DeWalt DWD112 Field Replacement: étape 2, image 1 de 1
    • Remove the top cover to reveal the inside of the drill.

    • Set the top cover of the drill aside.

  3. DeWalt DWD112 Field Replacement: étape 3, image 1 de 1
    • The power cord and the trigger act as a single part and must be replaced together.

    • Using one hand grab the trigger box and with the other grab the end of the wire connecting to the trigger box and disconnect the wire.

  4. DeWalt DWD112 Field Replacement: étape 4, image 1 de 1
    • Disconnect the second connected wire from the top of the trigger box.

  5. DeWalt DWD112 Field Replacement: étape 5, image 1 de 1
    • Lift the trigger box up to reveal the bottom side.

    • Disconnect the first connected wire from the bottom of the trigger box.

  6. DeWalt DWD112 Field Replacement: étape 6, image 1 de 1
    • Disconnect the last wire from the trigger box using the same method from the previous step.

  7. DeWalt DWD112 Field Replacement: étape 7, image 1 de 1
    • After all four wires are disconnected, the trigger and power cord are separated from the drill.

    • The power cord and trigger can be set aside if further disassembly is required.

  8. DeWalt DWD112 Field Replacement, Armature: étape 8, image 1 de 1
    • Take note of the keyless chuck and the meshing of the gears.

  9. DeWalt DWD112 Field Replacement: étape 9, image 1 de 2 DeWalt DWD112 Field Replacement: étape 9, image 2 de 2
    • Grab the metal chuck by the rotating spindle as if you are to tighten in a drill bit.

    • Lift the metal chuck out of its resting place and set aside.

  10. DeWalt DWD112 Field Replacement: étape 10, image 1 de 3 DeWalt DWD112 Field Replacement: étape 10, image 2 de 3 DeWalt DWD112 Field Replacement: étape 10, image 3 de 3
    • With your left hand, grab hold of the field, which is the large metal block with coils looped around the inside.

    • Use your other hand to take the bearing out from the end of the gear connected to the armature.

  11. DeWalt DWD112 Field Replacement: étape 11, image 1 de 3 DeWalt DWD112 Field Replacement: étape 11, image 2 de 3 DeWalt DWD112 Field Replacement: étape 11, image 3 de 3
    • Lift the field up once more with one hand and grab the cooling fan with the other hand and gently slide the armature out of the field.

    • The brushes will now be disconnected from the armature, meaning no current can flow from the power cord to the motor.

  12. DeWalt DWD112 Field Replacement, Field: étape 12, image 1 de 3 DeWalt DWD112 Field Replacement, Field: étape 12, image 2 de 3 DeWalt DWD112 Field Replacement, Field: étape 12, image 3 de 3
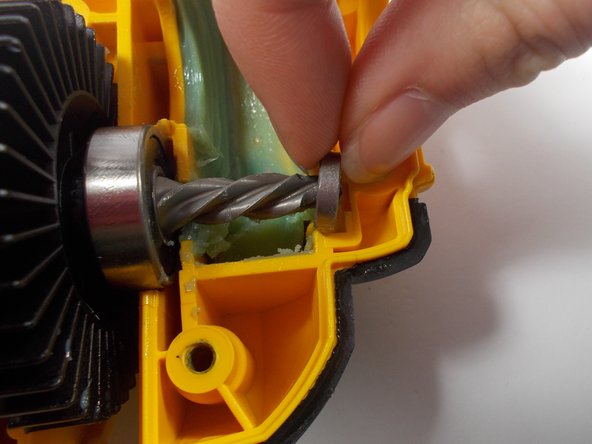
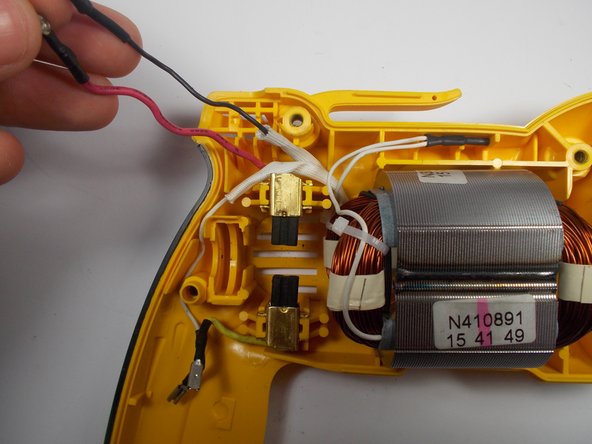
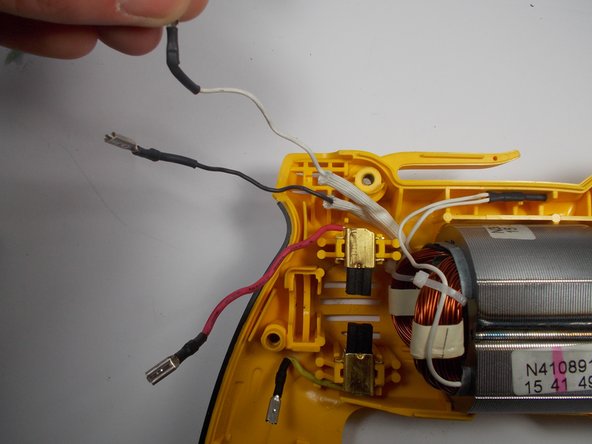
    • Move the black wire clear from any obstruction.

    • Repeat this step for the white wire and the red wire.

  13. DeWalt DWD112 Field Replacement: étape 13, image 1 de 2 DeWalt DWD112 Field Replacement: étape 13, image 2 de 2
    • The field is disconnected from all other parts.

    • Grab the field and gently lift it out of the case.

Conclusion

To reassemble your device, follow these instructions in reverse order.

Une autre personne a terminé cette réparation.

Samantha McSweeney

Membre depuis le 03/07/16

407 Réputation

4 tutoriels rédigés

Équipe

UMass Dartmouth, Team 2-3, Isaacson Spring 2016 Membre de l'équipe UMass Dartmouth, Team 2-3, Isaacson Spring 2016

UMASSD-ISAACSON-S16S2G3

3 membres

6 tutoriels rédigés

Un commentaire

as a recommendation aimed at some or mark with a piece of ribbon cables disconnected the trigger with the contact number that corresponds to the rearm the drill going to not reverse the change control rotation.

Jorge Diaz Viera - Réponse

Ajouter un commentaire

Nombre de vues :

Dernières 24 heures : 2

7 derniers jours : 5

30 derniers jours : 18

Total : 676