Introduction
This guide shows how to replace the actual screen of your Chromebook. If you have an entire new display assembly (plastic case and such that make up the top of the laptop), you can adapt this guide and just remove the old display and replace it with the new one.
Ce dont vous avez besoin
-
Outil utilisé dans cette étape :Tweezers$4.99
-
Using tweezers, remove the circular stickers that are covering the two screws near the middle of the back cover. Stick them to the laptop next to the screws.
-coordinate color of bullet points with markup
-perhaps say "...in the middle of the back cover" instead of "at"
-
-
-
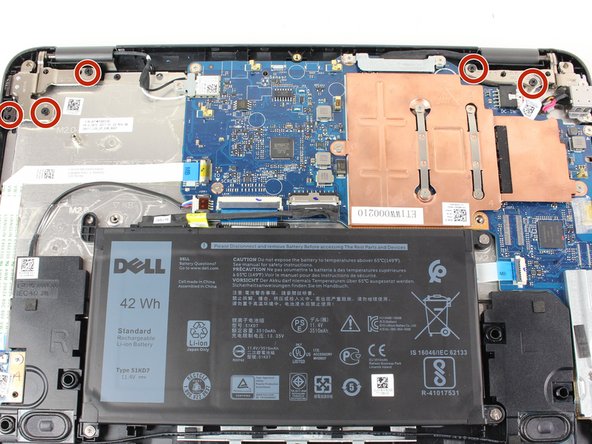
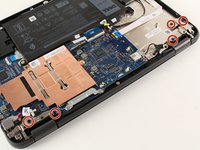
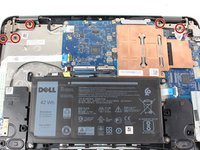
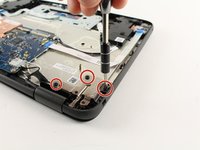
Using a Phillips #0 screwdriver, loosen all seven 2.5mm screws on the back cover of the device.
-
-
-
-
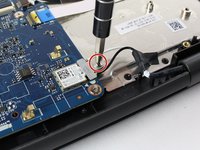
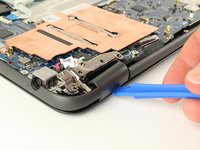
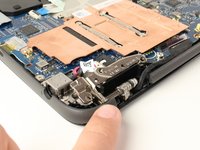
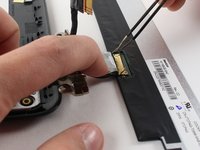
Using a Phillips #0 screwdriver, remove the single 3mm Phillips head screw holding down the small metal bracket that covers where the small black and white wires connect to the motherboard.
-
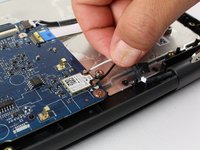
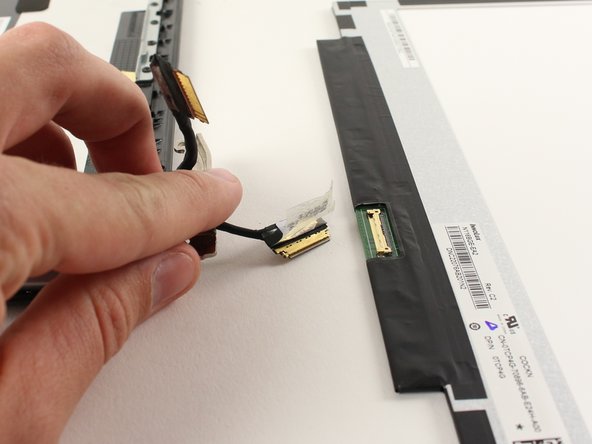
Once this screw has been removed. Unplug these two wires by gently puling them up and away from the motherboard. Hold the wire as close to the end as possible.
-
-
Outil utilisé dans cette étape :Tweezers$4.99
-
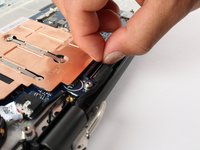
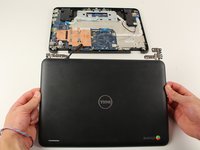
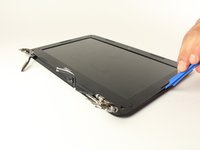
Once it's separated from the rest of the computer, place the screen assembly face up on your work space.
-
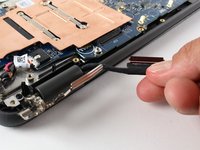
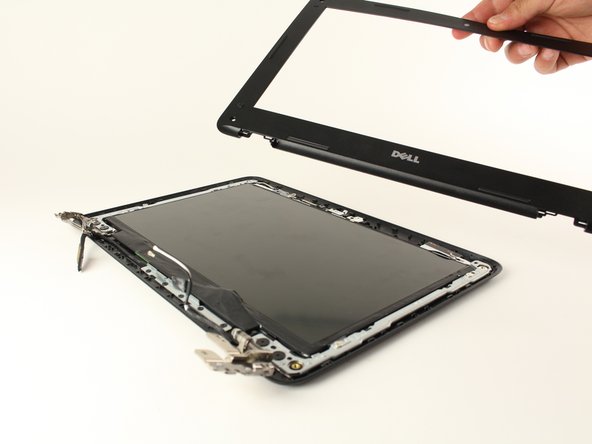
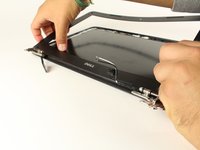
Using tweezers, remove all four stickers covering screws on the front. Stick these to the computer, a few inches from the screw holes.
-
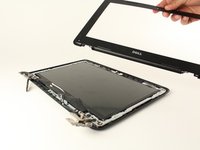
Using a Phillips #0 screwdriver, remove all four 3.5mm Phillips head screws from the front of the display assembly.
-


To reassemble your device, follow these instructions in reverse order.
To reassemble your device, follow these instructions in reverse order.
Annulation : je n'ai pas terminé ce tutoriel.
6 autres ont terminé cette réparation.
Équipe

Cal Poly, Team S22-G1, Livingston Spring 2017 Membre de l'équipe Cal Poly, Team S22-G1, Livingston Spring 2017
CPSU-LIVINGSTON-S17S22G1
4 membres
8 tutoriels rédigés
Un commentaire
You don’t have to disconnect the display from the main body. Just be careful cause the plastic lcd bezel has strong adhesive and it is easy to crack the plastic bezel when separating it from the LCD panel.
I usually skip most all of this and start with the bezel, disconnecting the screen wire AT THE SCREEN, and not at the motherboard. 4 screws around the bezel, and 4 screws in the screen. Leave everything connected and skip to step 12.
Denton Holland - Réponse