Aller au contenu principal

Dell Dimension 4600 Optical Drive Replacement

Ce dont vous avez besoin

  1. Dell Dimension 4600 Optical Drive Replacement, Side Panel: étape 1, image 1 de 1
    • Locate the case cover latch on the back of the computer.

  2. Dell Dimension 4600 Optical Drive Replacement: étape 2, image 1 de 1
    • Using your index finger, slide and hold the cover latch down.

    • While holding the latch down, place your other hand flat on the side of the case and firmly shift the side panel to the left until it disengages.

  3. Dell Dimension 4600 Optical Drive Replacement: étape 3, image 1 de 1
    • Grab the edge of the panel and slide it away from the case until it is removed.

  4. Dell Dimension 4600 Optical Drive Replacement, Optical Drive: étape 4, image 1 de 1
    • Locate the Optical Drive by finding it externally on the case.

  5. Dell Dimension 4600 Optical Drive Replacement: étape 5, image 1 de 2 Dell Dimension 4600 Optical Drive Replacement: étape 5, image 2 de 2
    • Press and hold the three levers located behind the front panel.

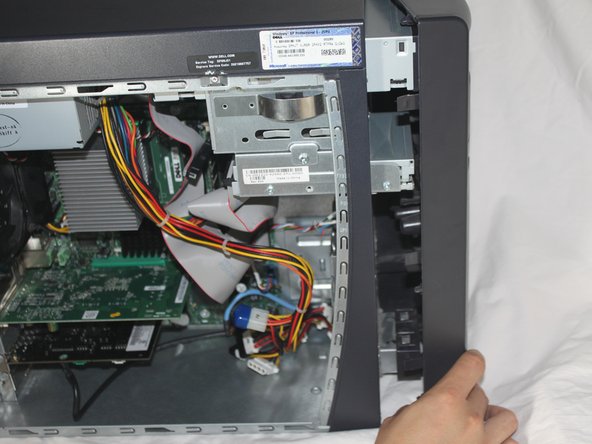
    • While holding the levers down, swing open the front panel.

  6. Dell Dimension 4600 Optical Drive Replacement: étape 6, image 1 de 1
    • Swing the front of the case open until it separates from the main case.

  7. Dell Dimension 4600 Optical Drive Replacement: étape 7, image 1 de 3 Dell Dimension 4600 Optical Drive Replacement: étape 7, image 2 de 3 Dell Dimension 4600 Optical Drive Replacement: étape 7, image 3 de 3
    • Lay the computer flat on it's side so that you are looking down on all of the components.

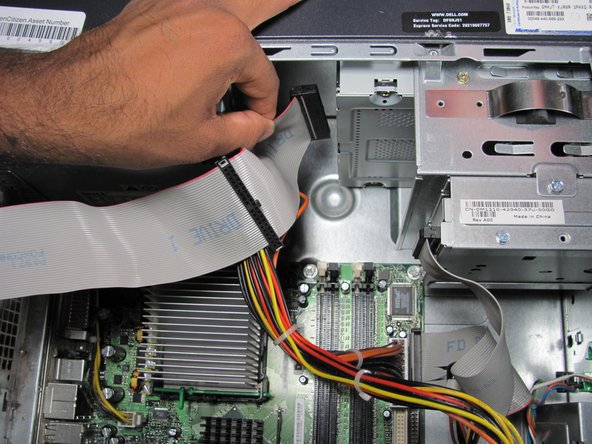
    • Locate the Drive 1 cable and where it is connected to the motherboard.

  8. Dell Dimension 4600 Optical Drive Replacement: étape 8, image 1 de 1
    • Grasp the end of the Drive 1 cable connected to the motherboard and firmly pull upwards until it is removed.

  9. Dell Dimension 4600 Optical Drive Replacement: étape 9, image 1 de 2 Dell Dimension 4600 Optical Drive Replacement: étape 9, image 2 de 2
    • Locate the end of the Drive 1 cable connected to the optical drive.

    • Grasp the cable and pull firmly to disconnect it from the optical drive.

  10. Dell Dimension 4600 Optical Drive Replacement: étape 10, image 1 de 2 Dell Dimension 4600 Optical Drive Replacement: étape 10, image 2 de 2
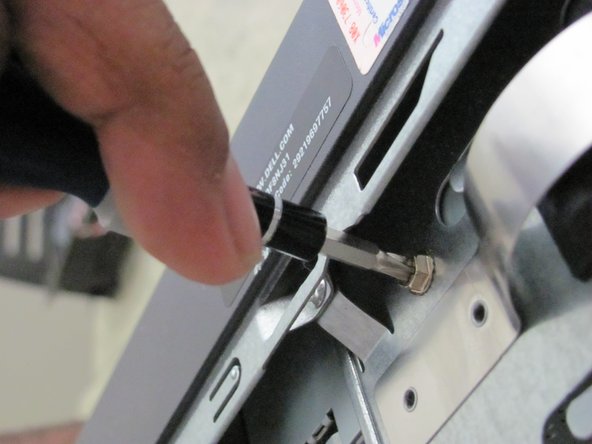
    • Locate the screw on the optical drive.

    • Remove the 7.7 mm screw by using a Phillips #2 screw-driver.

  11. Dell Dimension 4600 Optical Drive Replacement: étape 11, image 1 de 1
    • Remove the optical drive by sliding it out of the front of the case.

Conclusion

To reassemble your device, follow these instructions in reverse order.

13 autres ont terminé cette réparation.

Eugene

Membre depuis le 10/12/11

216 Réputation

1 tutoriel rédigé

Équipe

Cal Poly, Team 6-10, Regan Fall 2011 Membre de l'équipe Cal Poly, Team 6-10, Regan Fall 2011

CPSU-REGAN-F11S6G10

4 membres

11 tutoriels rédigés

0 commentaires

Ajouter un commentaire

Nombre de vues :

Dernières 24 heures : 0

7 derniers jours : 0

30 derniers jours : 11

Total : 6,620