Introduction
Guide to replacing the Hard Disk Drive (HDD) in your Dell Inspiron 15z-5523. A couple of the reasons you would need to replace the HDD is when you run out of storage or when the HDD starts to malfunction. Some of the tools needed to do this repair are precision screwdrivers and a spudger. Some mechanical skills may be needed.
Ce dont vous avez besoin
-
-
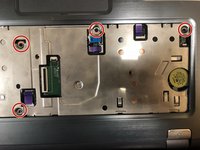
Pop out the rubber pieces and unscrew the 7 screws on the bottom of the computer.
-
Open the RAM door in the center remove the hidden screw labeled "KB" just above the RAM sticks.
-
-
-
-
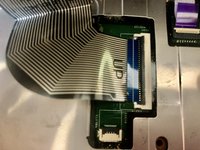
There are two ribbon cables securing the keyboard - data and backlight power. Each ribbon connector must be released by flipping the black retainer up with a fingernail or nylon Uspudger before pulling out the ribbon.
-
First flip up the black retainer on the smaller connector. Slide the cable up and out of the connector.
-
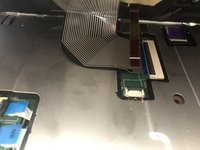
Secondly, flip the black connector up on the larger connector. Slide the cable straight out of the connector, parallel to the case.
-
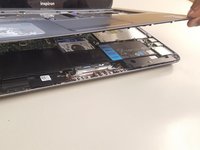
Remove the keyboard from the case.
-


To reassemble your device, follow these instructions in reverse order.
To reassemble your device, follow these instructions in reverse order.
Annulation : je n'ai pas terminé ce tutoriel.
3 autres ont terminé cette réparation.
Équipe

Western Carolina University, Team S1-G5, Virtue Spring 2018 Membre de l'équipe Western Carolina University, Team S1-G5, Virtue Spring 2018
WCU-VIRTUE-S18S1G5
4 membres
5 tutoriels rédigés