Introduction
This guide will take you through the steps to replace the motherboard of your Dell Inspiron 15-3521 with pictures of each step for reference.
A damaged or malfunctioning motherboard can make your laptop unusable, lowering both productivity and performance.
SAFETY FIRST! Before you begin, make sure your device is unplugged and turned off, in addition to any other safety guidance your device's manufacturer provides.
Ce dont vous avez besoin
-
-
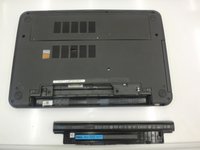
Flip the laptop over.
-
Slide the latches toward the outside of the laptop to unlock the battery.
-
Lift the battery out of the laptop.
-
-
-
Loosen the two screws attaching the access door to the laptop body
-
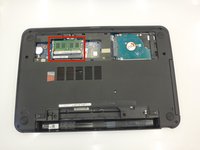
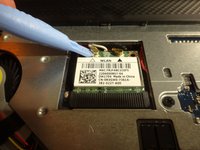
Using a spudger, pry open the access door from the laptop
-
Using your fingers, open and remove the access door from the laptop, exposing the memory cards underneath.
-
-
-
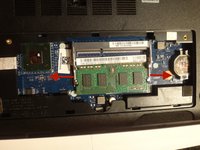
To access the memory cards, push out the latches on the left and right of the memory cards
-
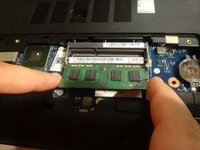
To remove the memory card, pull it out of the tray with the latches still stretched out
-
Insert a new memory card in to the memory card tray, depressing until side latches engage with a click.
-
-
-
Before flipping the laptop right-side up, remove screws holding the back plate to the laptop frame
-
Remove the backplate screws using a phillips head PH0 screwdriver (11).
-
Remove the screws located underneath the battery and access panel using the same phillips head PH0 screwdriver (3).
-
-
-
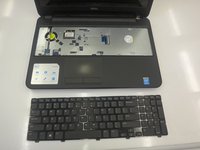
Flip the laptop right-side-up
-
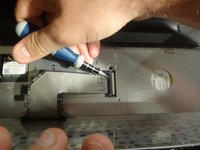
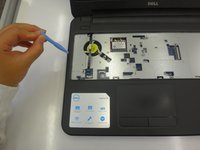
Using a spudger, separate the keyboard from the laptop frame.
-
Using fingers to remove the keyboard from the laptop frame, be careful not to damage the keyboard cable.
-
-
-
-
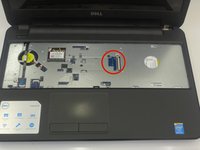
To disconnect the keyboard, locate the keyboard cable locking mechanism.
-
Open the locking mechanism by gently pulling up.
-
Slide out the keyboard cable from the interface to separate the keyboard from the laptop.
-
-
-
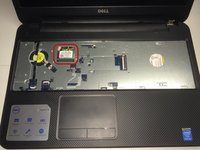
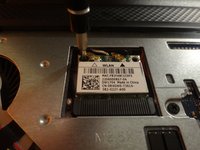
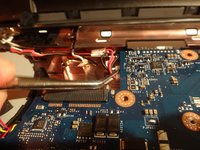
Locate the wireless card location underneath the removed keyboard.
-
Disengage the antenna cables connecting the laptop to the wireless card.
-
Using a phillips head PH0 screwdriver, unscrew the single screw holding the wireless card to the laptop frame.
-
Remove the wireless card.
-
-
-
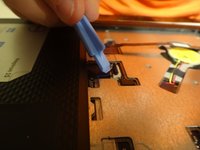
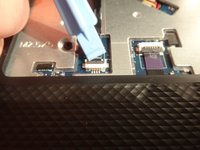
Unplug the palmrest cables, which are denoted by a blue and a purple marking.
-
To remove, lift up the locking tab and pull the cables from their laptop interface.
-
-
-
Remove the four 2.5 mm by 5 mm screws underneath the keyboard plate using a phillips head PH0 screwdriver.
-
Remove the three 2 mm by 3 mm screws underneath the keyboard plate using a phillips head PH0 screwdriver.
-
-
-
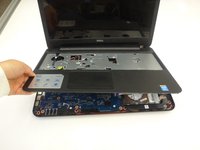
Using a spudger, separate the palmrest from the base of the laptop. This interface is located around the equator of the laptop.
-
Use your fingers to completely remove the palmrest from the laptop base.
-
-
-
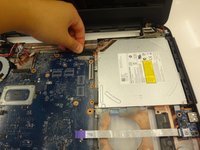
First, remove the power cable, located in the upper left hand side of the laptop. This can be removed using forceps or using your fingers.
-
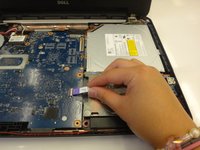
Second, remove the LCD cable located in the upper center of the laptop. This cablemust be removed using the same unlocking procedure as the palmrest cables used in step 6.
-
-
-
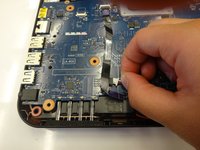
Third, unplug the speaker cables using forceps or by using your fingers.
-
Fourth, unplug the final cable, denoted by a purple plastic flag. This cable uses the same locking mechanism as the palmrest cables seen in step 6.
-
-
-
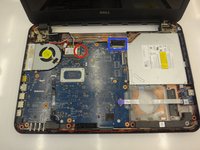
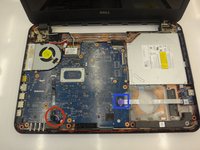
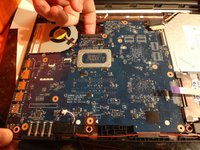
Unscrew the motherboard from the laptop frame using a phillips head PH0 screwdriver.
-
Then, use your fingers to remove the motherboard from the laptop.
-


To reassemble your device, follow these instructions in reverse order.
To reassemble your device, follow these instructions in reverse order.
Annulation : je n'ai pas terminé ce tutoriel.
24 autres ont terminé cette réparation.
Équipe

Clemson, Team 3-1, Benson Fall 2014 Membre de l'équipe Clemson, Team 3-1, Benson Fall 2014
CLEM-BENSON-F14S3G1
4 membres
9 tutoriels rédigés