Aller au contenu principal

Dell Inspiron 15-5548 Hard Drive Replacement

Ce dont vous avez besoin

  1. Dell Inspiron 15-5548 Hard Drive  Replacement, Hard Drive: étape 1, image 1 de 3 Dell Inspiron 15-5548 Hard Drive  Replacement, Hard Drive: étape 1, image 2 de 3 Dell Inspiron 15-5548 Hard Drive  Replacement, Hard Drive: étape 1, image 3 de 3
    • Make sure the computer is unplugged and turned off before you start this procedure.

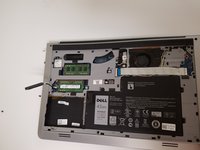
    • Look on the bottom of the computer. Locate the 2 screws. (Picture 1)

    • Using the Phillips 00 Screwdriver, unscrew both screws, and remove the bottom cover. The bottom cover can be hard to pull off, so you may need to pry it off with a pry tool.

  2. Dell Inspiron 15-5548 Hard Drive  Replacement: étape 2, image 1 de 3 Dell Inspiron 15-5548 Hard Drive  Replacement: étape 2, image 2 de 3 Dell Inspiron 15-5548 Hard Drive  Replacement: étape 2, image 3 de 3
    • Remove the 4 - M2.5 x 5mm screws.

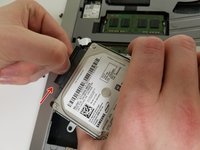
    • Using the tab, lift the Hard Drive out of the laptop. (picture 3)

  3. Dell Inspiron 15-5548 Hard Drive  Replacement: étape 3, image 1 de 2 Dell Inspiron 15-5548 Hard Drive  Replacement: étape 3, image 2 de 2
    • After lifting the Hard Drive, unplug the Hard Drive connector.

    • Now the hard drive is ready to be replaced.

Conclusion

To reassemble your device, follow these instructions in reverse order.

5 autres ont terminé cette réparation.

Waleed ALamri

Membre depuis le 09/20/17

221 Réputation

1 tutoriel rédigé

Équipe

0 commentaires

Ajouter un commentaire

Nombre de vues :

Dernières 24 heures : 0

7 derniers jours : 4

30 derniers jours : 13

Total : 3,493